43
Chapter 5: Outputs
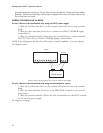
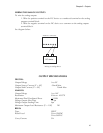
RELAY
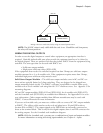
Outside device
External
power source
HOT NEUTRAL
NC COM NO
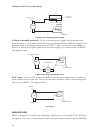
Wiring a device to mechanical relay using an external power source
NOTE: The NO/NC status is only valid while the unit is on. Should the unit lose power,
the relay will invert position.
WIRING THE DIGITAL OUTPUTS
In order to use the digital outputs to control other equipment, an appropriate interface is
required. Optically isolated solid state relays provide the optimum interface to be driven by
the digital outputs. These are preferred because they isolate ISACC from the equipment being
switched. The two types that can be used with ISACC are:
• Solid state output modules
• High power solid state relays (FGD-0020)
If the equipment that needs to be switched requires less than 3 Amps, use solid state output
modules mounted in a 4- or 8-module rack. If the equipment requires more than 3 Amps,
individual high power solid state relays must be used.
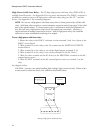
Solid State Output Modules - The solid state output modules come in AC and DC ver-
sions and are typically limited to 3 Amp switching. They are designed to be plugged into
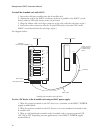
output mounting boards (racks). The ISACC enclosure is predrilled to mount either one 4-
module rack or one 8-module rack using four #6-32 1" machine screws. See Appendix C for
mounting diagrams.
AC and DC output modules (FGD-0015 and FGD-0016), the 4-module rack (FGD-0021),
and the 8-module rack (FGD-0039) are available from Phonetics. See Appendix D for acces-
sory information. Other output modules from different manufactures may be used with
ISACC. Contact Phonetics for more information.
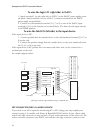
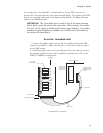
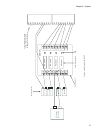
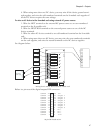
If you use an 8-module rack, you must use a ribbon cable to connect AC/DC output modules
to ISACC. The ribbon cable attaches to the rack and plugs into a 26-pin DIP header at
location P14 on ISACC. The output signals at the DIP header are internally connected to
those at the terminal block. This is only for the digital outputs, there is no DIP connector for
the analog outputs. See the 8-module rack installation diagram.
NOTE: With the 4-module rack, you may use a combination of input and output modules.
For more information on using and wiring input modules, see Chapter 4: Inputs.


