-46-
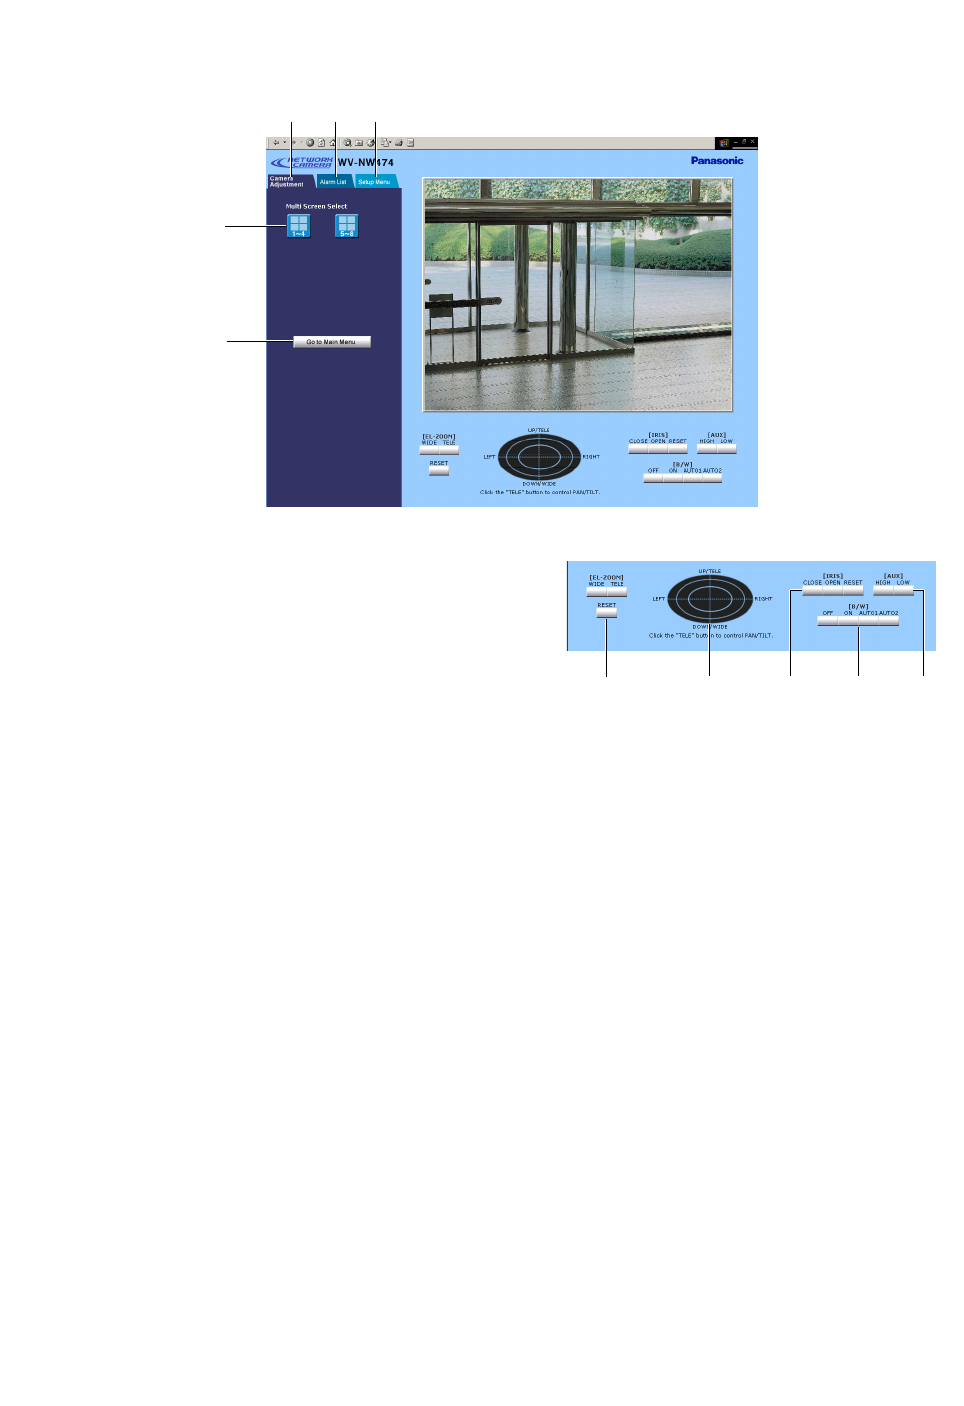
● Camera Adjustment Window
!2 !3 !4 !5 !6
u
Go to Main Menu button
Returns to the main menu.
i Multi Screen Select buttons
[1]:
Displays a single camera image, returning from
a quad split image.
[1-4]: Displays a quad split image comprising cam-
era 1 to camera 4.
[5-8]: Displays a quad split image comprising cam-
era 5 to camera 8.
o Camera Adjustment tab
Returns to the camera adjustment window, but noth-
ing will change in this case.
!0 Alarm List tab
Opens the alarm list (event history) in the left half of
the window.
!1 Setup Menu tab
Opens a line of index buttons in the left half of the
window. Each of the buttons opens respective menu
setup.
!2 EL-ZOOM buttons
[WIDE]:
Electrically zooms out the image.
[TELE]: Electrically zooms in the image.
[RESET]: Cancels electric zoom functions.
!3 Oval pad
[UP/DOWN/LEFT/RIGHT]:
Moves the electrically
zooming portion to a direction in a scene by left-
clicking the mouse. The outer you click, the more
the portion moves.
Note: Click the TELE button first and next click a
position on the oval pad to move the image.
[TELE/WIDE]: Zooms in and out the image by right-
clicking the mouse.
!4 IRIS buttons
[CLOSE]:
Closes the camera iris.
[OPEN]: Opens the camera iris.
[RESET]: Returns to the default setting.
!5 B/W buttons
Notes:
• When EXT is selected in the setup, no buttons
will work and the externally connected sensor will
specify the picture mode.
• Do not switch the picture mode frequently.
Recommendation is one time a day.
i
o !0 !1
u
