-36-
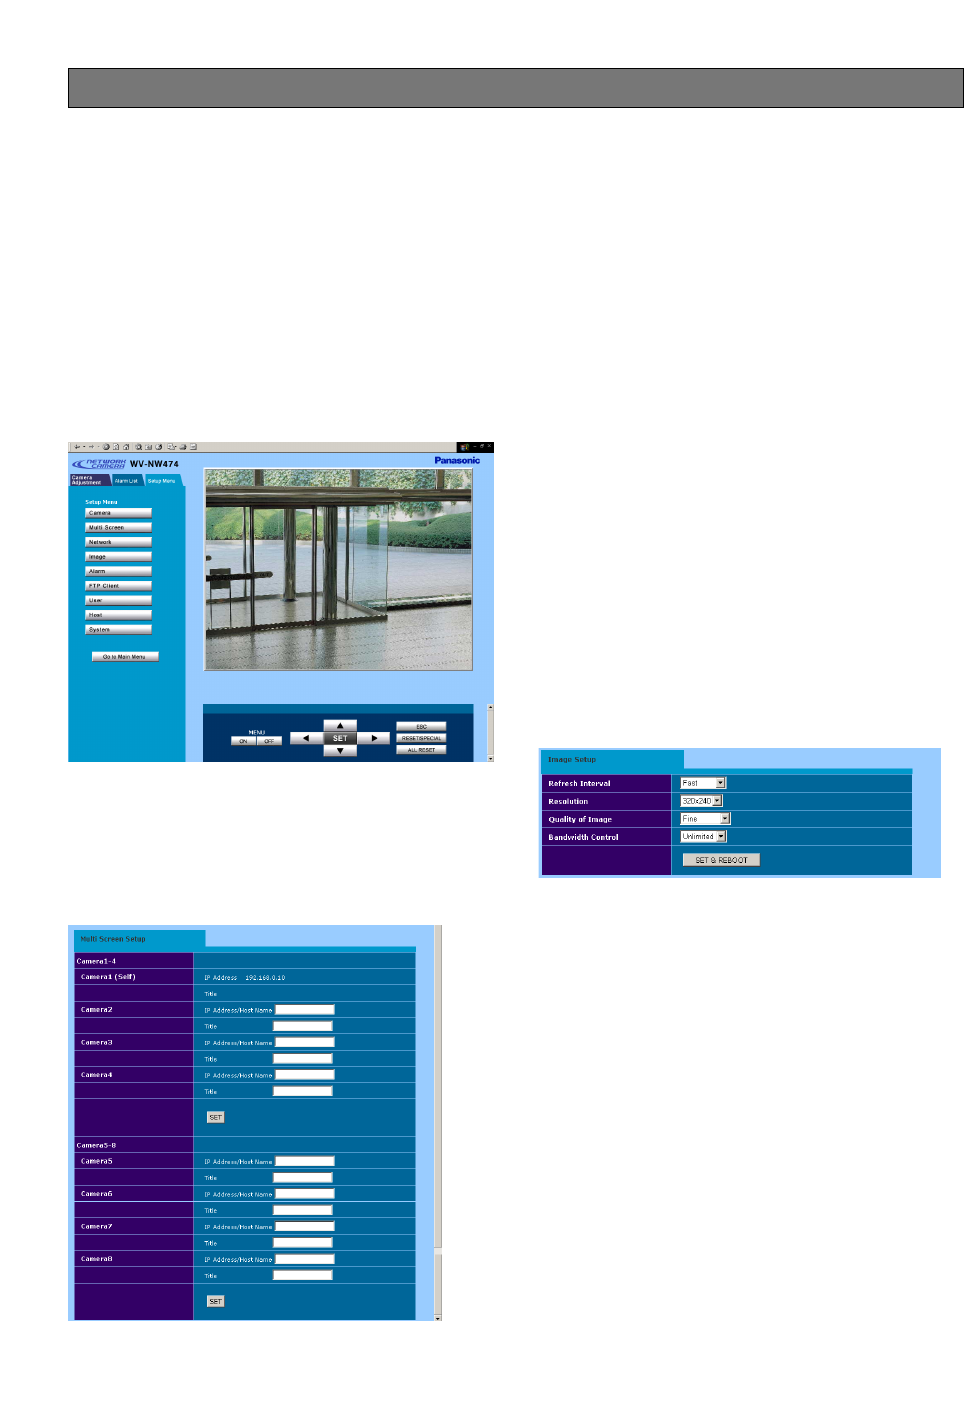
There are nine menu buttons in the Setup Menu tab. As
described earlier the Camera menu is operable from
both the camera and the PC. Contrary to that, the
remaining eight menus are accessible only from the PC.
Multi Screen
Network
Image
Alarm
FTP Client
User
Host
System
■ Multiscreen Setup
Cameras 1-4 and cameras 5-8 are assigned in this
setup and displayed in a quad split screen.
1. Open the Multiscreen Setup window.
2. Enter the IP address of the camera or "host name.
domain name" when the PC uses DNS for browsing.
3. Enter the camera title.
4. Click the [SET] button.
Notes:
• Enter the changed "IP address: port #",
192.168.0.10:8080 for example, to access a
camera whose http port number has been
changed.
• The camera title you enter here will be displayed
in the camera title column of a quad split screen.
Clicking the column will access the top page of
the assigned camera.
■ Network Setup
See page 20.
■ Image Setup
1. Open the Image Setup window.
2. Select the parameter for each item by pressing the
[
o] button.
Refresh Interval: Fast, Middle, Slow, and Very Slow
Resolution: 640x480*, 640x240*, 320x240, and
160x120
Quality of Image: Super Fine, Fine, Normal, and
Low
Bandwidth Control: 32 kbps, 64 kbps, 128 kbps,
256 kbps, 512 kbps, 1024 kbps, and Unlimited
3. Click the [SET & REBOOT] button.
It will take about 10 seconds to complete the reboot.
4. Click the [Go to Main Menu] button to go back to the
main page.
*: The 640 x 240 selection is good to display moving
images without aliasing, while 640 x 480 selection is
good to display motionless images.
PC ORIENTED SETUP PROCEDURES
