


28
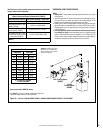
Glass Door
Assembly
Fireplace
Finish Combustible
Or Non-Combustible
Material
Bottom Of
Fireplace
1/8 Inch
Minimum
Door Track
Finish Combustible
Or Non-Combustible
Material
Front Face
Of Fireplace
Floor Panel
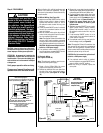
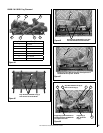
Figure 55
Figure 54
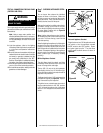
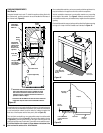
Non-combustible materials, such as surrounds and other appliance trim,
may be installed on the appliance front face with the exceptions.
Vertical installation clearances to combustible mantels vary according
to the depth of the mantel. See
Figure 9. Mantels constructed of non-
combustible materials may be installed at any height above the appliance
opening.
Combustible materials may project beyond the side of the fireplace opening
as long as it is kept within the shaded area illustrated in Figure 10.
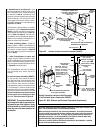
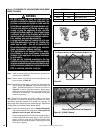
* Insulation is NOT ALLOWED in the clearance zones around vent
components. Keep this area free from combustible materials.
2 Foot Vertical
Vent & 90° Elbow
3" Min.
(76 mm)*
Top of
Appliance
8-3/8" Min.
(213 mm)
Combustible
materials are
allowed above
this point on
the face of the
appliance.
The gray shaded
area must be
non-combustible
or Dura Rock
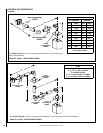
Header
(2x4’s)
Spacers
Top of Door Frame
Fireplace (right side)
Combustible
Finished Wall
Materials
1
*
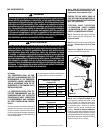
Installations with horizontal terminations which have minimum
vertical vent height only will require 4”(102mm) minimum
side clearance as shown in shaded zone above. All other
installations require 1" (25mm) minimum side clearance as
specified in Table 4 on Page 5.
1
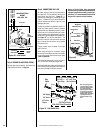
Figure 53
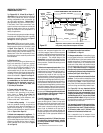
FINISHING REQUIREMENTS
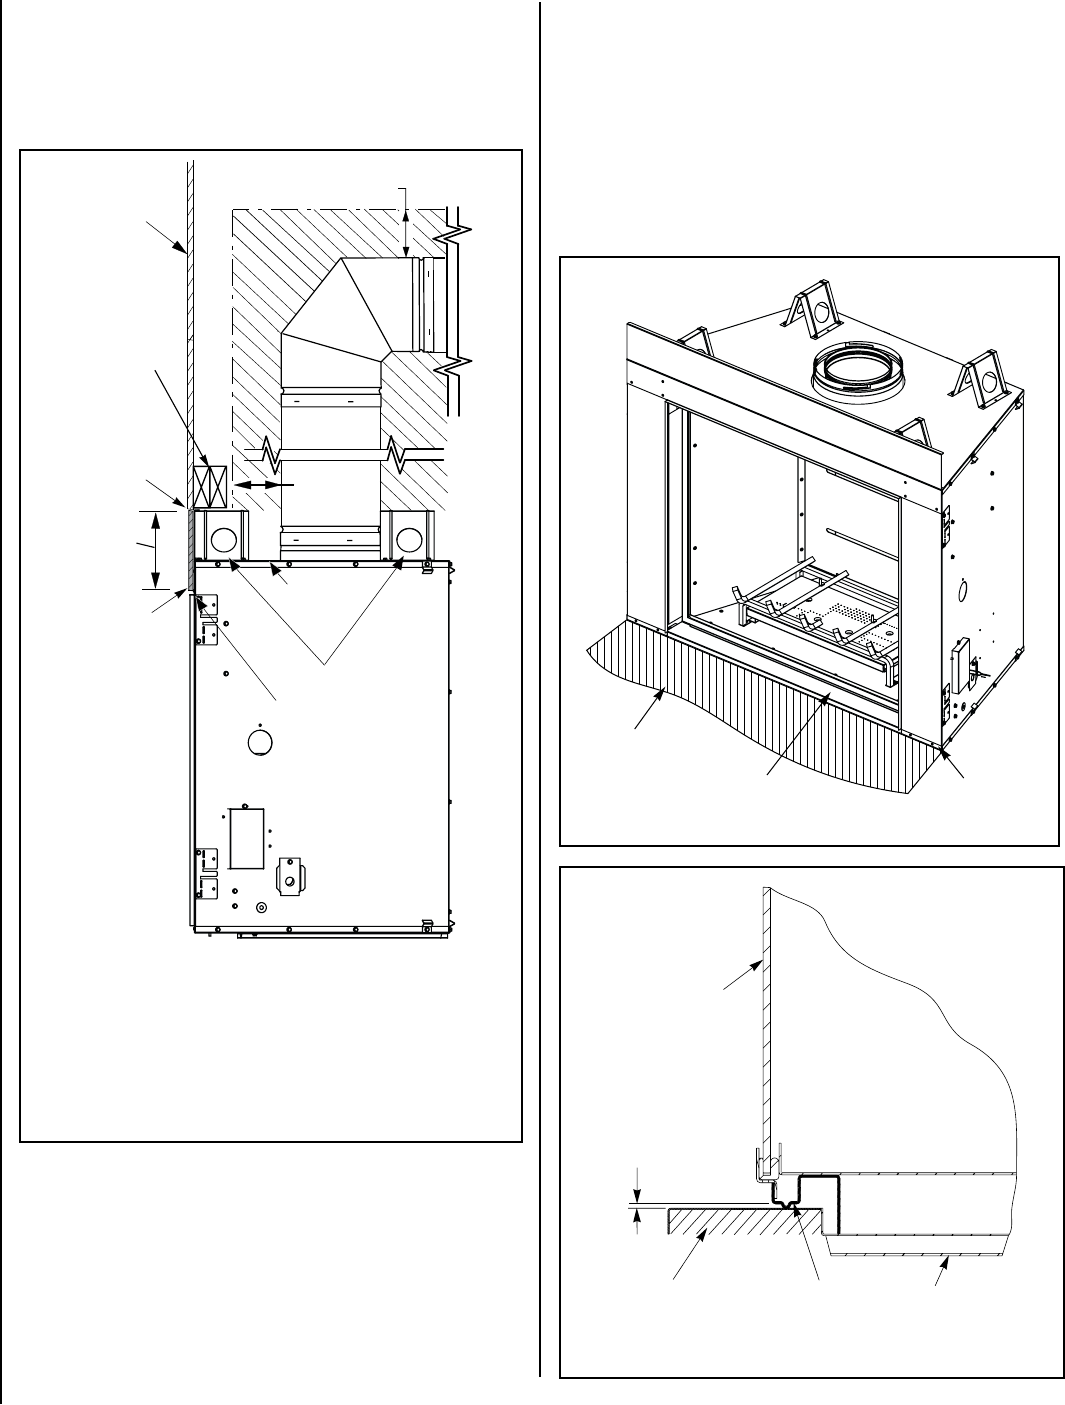
Wall Details
Complete finished interior wall. To install the appliance facing flush with
the finished wall, position framework to accommodate the thickness of
the finished wall
(Figure 53).
A hearth extension is not required with this appliance. If a hearth extension
is used, there are two methods of installation. One, the finish combustible
or non-combustible material could be ended by butting up against the
front face of the fireplace and the floor panel (
refer to Figure 54).
Two, the finish combustible or non-combustible material could be ended
below the fireplace (refer to Figure 55). Remove the floor panel as shown
in Figure 54 by removing the screws on the right side of the panel and
sliding the left side away from the tab. Discard the screws and floor panel.
It is critical that there is at least a 1/8" gap between the bottom of the
door track and the surface of the finish material.