


40 Optional Equipment (for qualified installers only)
Travis Industries 100-01159 4040621
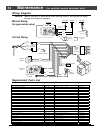
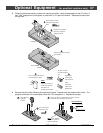
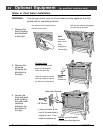
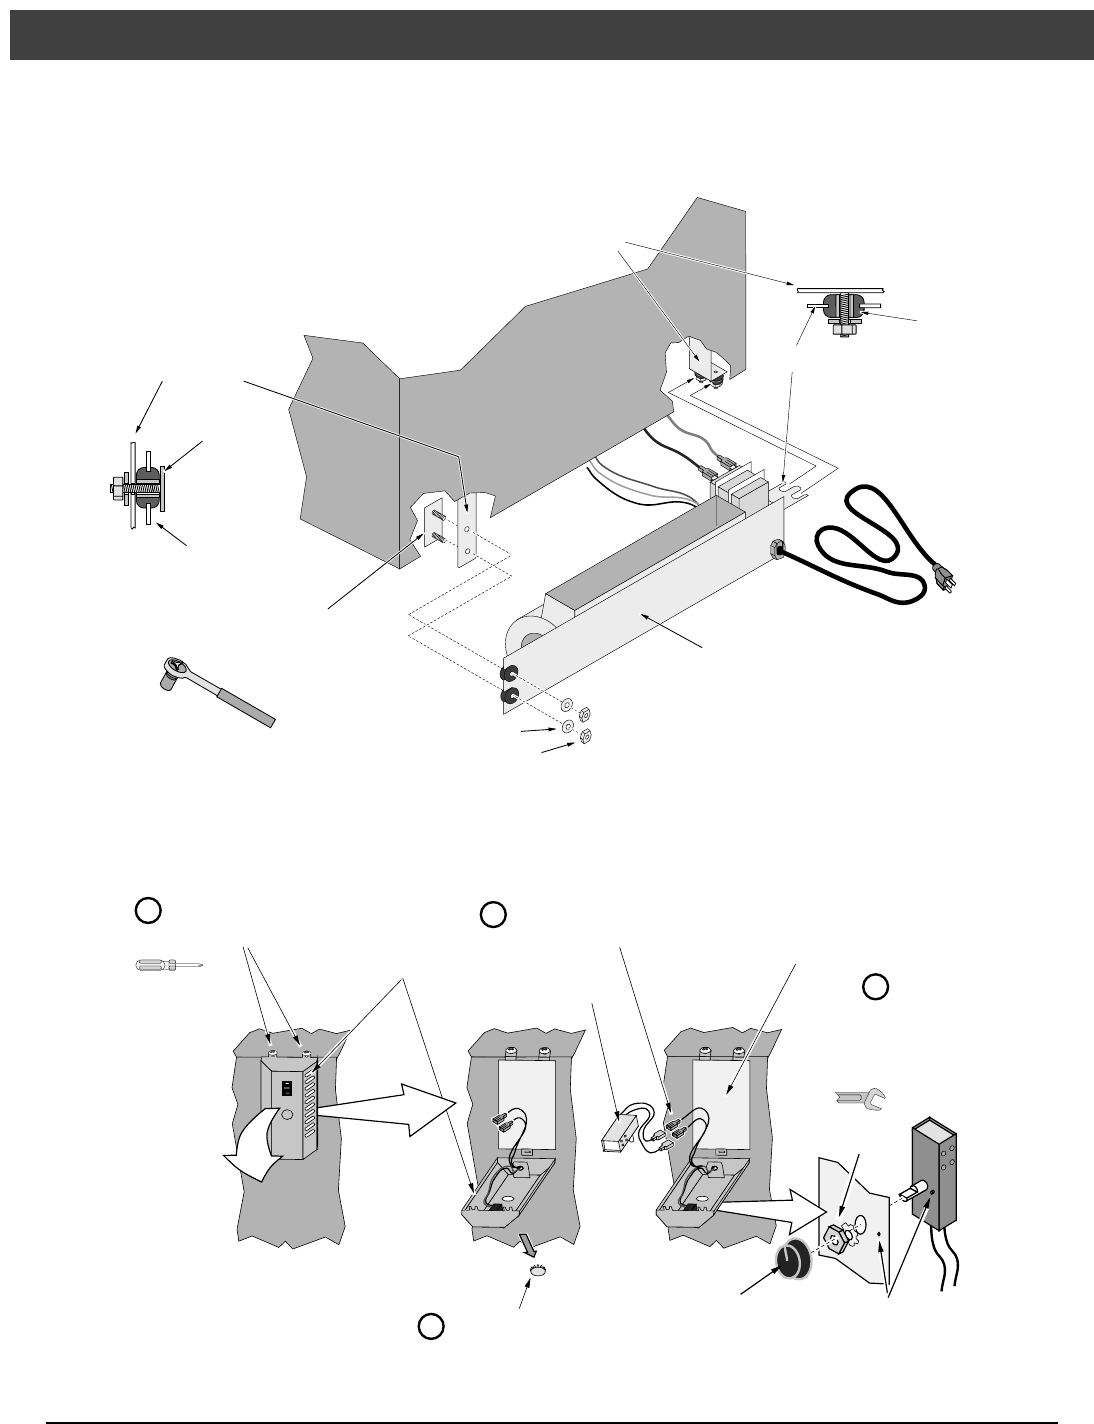
3 Slide the left side of the blower mounting bracket over the grommets on the left mounting bracket
attached to the stove (see the illustration below). Then insert the stud plate through the right side
grommets and through the right mounting bracket on the stove. Secure the stud plate with the
included washers and nuts
Nut
Stud Plate
Washer
11/32”
Socket
Make sure the bracket
slides into the groove on
the rubber grommets.
Left Mounting
Bracket (on stove)
Rubber
Grommet
Blower Mounting
Bracket
Right Mounting
Bracket (on stove)
Back of
Stove
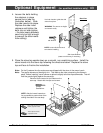
Blower Mounting Bracket
Stud Plate
Blower Mounting Bracket
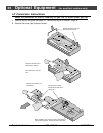
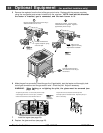
4 Make sure all of the wiring is placed away from the blower impeller and the bottom of the burner. Use
lock ties, if necessary, to ensure no wires are damaged.
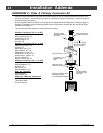
5 Open the control cover following the directions below. Remove the button plug and install the
rheostat.
Back of
Stove
Loosen the two screws holding the control
box in place. This allows access to the
back of the control box.
a
b
c
Remove the button plug
from the control box.
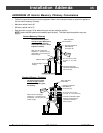
Attach the rheostat wires to the two
quick connects inside the control
box (orientation does not matter).
Control Box
e
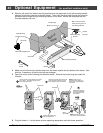
Rheostat
1/2"
Wrench
NOTE: this tab fits into the
hole on the mounting bracket.
Attach the rheostat to
the control panel with
the included nut and
star washer.
Attach
the knob.
NOTE: make sure the
fiberglass heat shield is in
place when re-attaching the
control box.
Phillips
Screwdriver
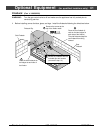
6 Plug the blower in. Let the heater achieve operating temperature and test blower operation.