


Optional Equipment (for qualified installers only) 37
Travis Industries 100-01159 4040621
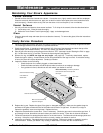
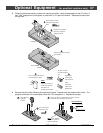
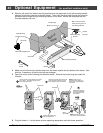
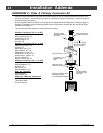
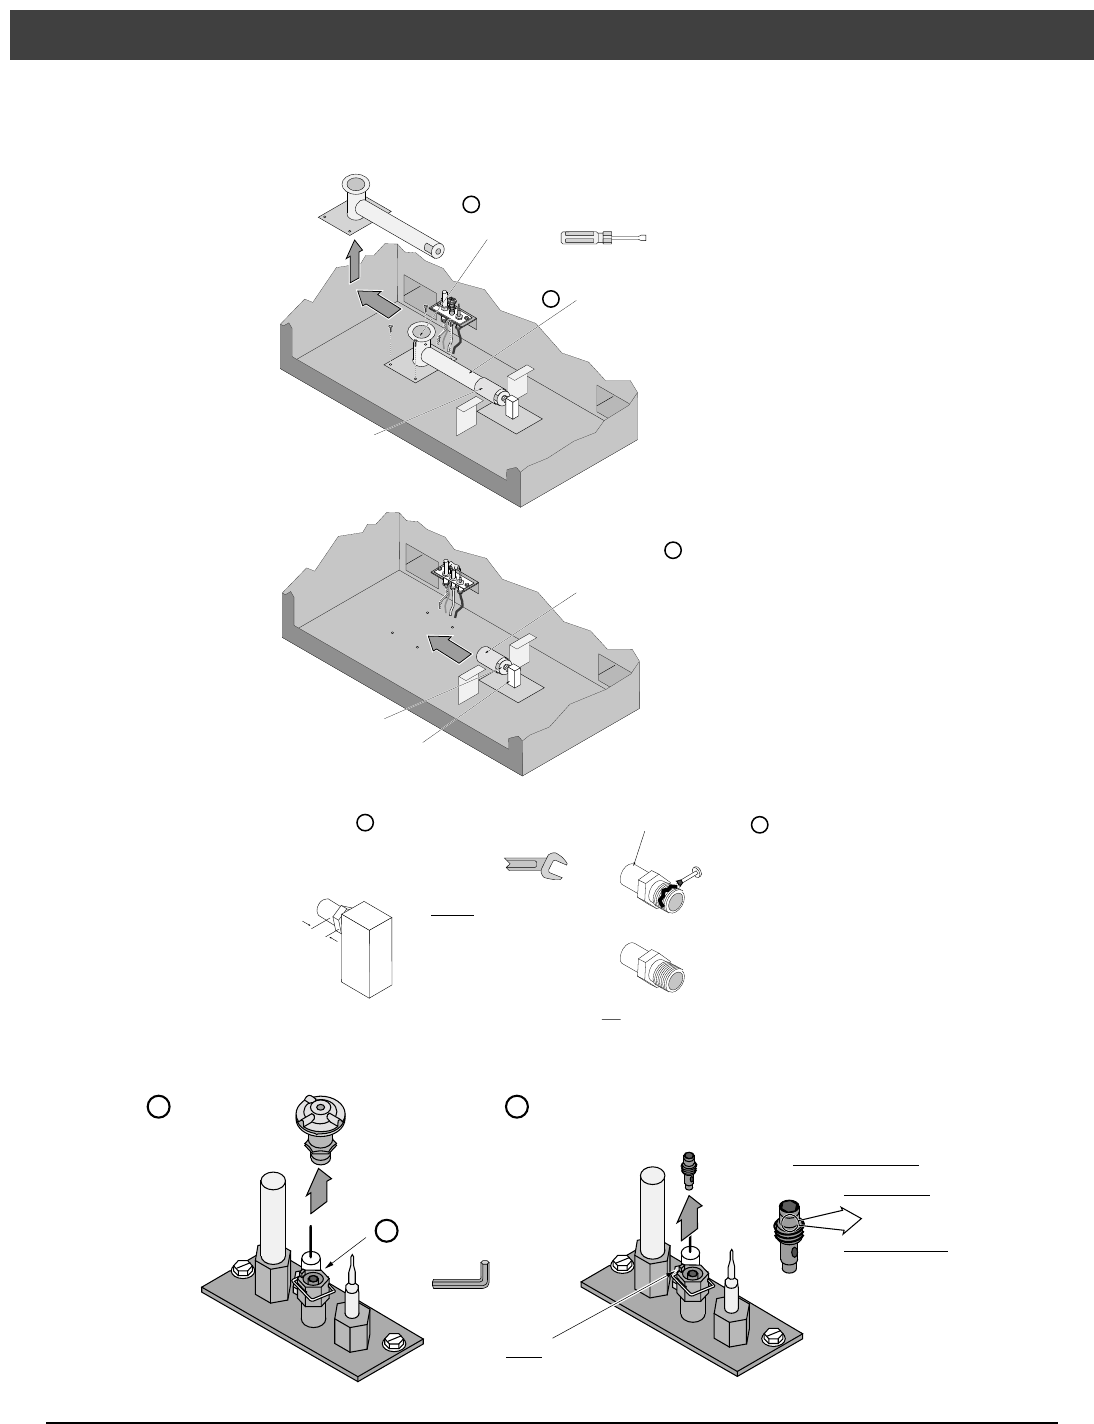
3 Follow the directions below to remove the natural gas orifice. Apply thread sealant to the LP orifice ( it
has ".062" stamped on it) and tighten in place with a 1/2" open end wrench. Replace and secure the
mixing tube.
1/2" Wrench
Use a 1/2” open end wrench to
unscrew the burner orifice.
NOTE:
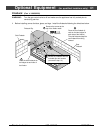
Screw the LP orifice in
so the orifice shoulder
protrudes 5/16”
(indicating full insertion).
37
.062
The new LP orifice
has “.062” stamped
on it.
The old NG
orifice has “37”
stamped on it.
Apply thread
sealant to the
new orifice and
install.
5/16”
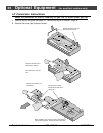
Remove the four screws
holding the mixing tube in
place.
Remove the mixing tube
from the air shutter by
sliding it to the left.
1/4" Nutdriver
Air Shutter
a
b
Slide the air shutter to the fully
open position.
Manifold
Burner Orifice
c
d
e
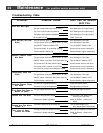
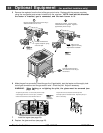
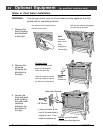
4 Remove the pilot orifice following the instructions below. Replace with the propane pilot orifice. The
propane conversion kit includes pilot orifice with "35" stamped on it. Replace burner pan.
Lift the pilot hood
off the pilot
assembly.
5/32" Hex
Use a hex wrench to
unscrew the orifice.
Remove the orifice and replace with the LP orifice. Screw the
orifice all the way in and replace the pilot hood.
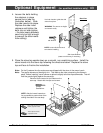
LP (Propane) Orifice
Orifice Identification:
NG (Natural Gas) Orifice
35
62
35
a
b
c
NOTE: when re-attaching,
this pin lines up with the
notch in the pilot hood.