System and Control Options
30
7.3.4 Set Up Alarmable Inputs in Latched or Unlatched Mode
Alarmable input points may be set up in Latched mode (Y), which
requires the user to clear the AC4 alarms after an alarm has occurred,
or Unlatched mode (N), in which alarms will automatically clear after
a return-to-normal state. The default setting for alarmable inputs is
Y (Latched). Any input defined as an event is automatically
Unlatched.
An input defined as Latched does not reset automatically after an
alarm. It will remain in the triggered position even after the moni-
tored device returns to normal. After an alarm, the user must manu-
ally reset Latched inputs, as described in 7.10.1 - Clear Active
Alarms. This also means that any outputs linked to a Latched digital
input will remain triggered until the input is manually reset.
An input defined as Unlatched will automatically track the status of
the monitored device. No action by the user is required.
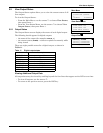
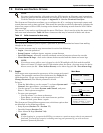
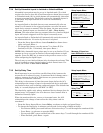
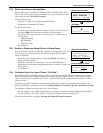
• From the Setup Inputs Menu, choose Latched, as shown above
right, and press Enter ↵.
• To change this feature, use the arrows
↑↓ to choose Y (Yes -
Latched) or N (No - Unlatched), then press Enter ↵.
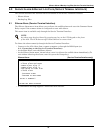
NOTE: Only alarmable input points may be set up as Latched. If you
attempt to set up an event as Latched, the message shown at right
appears. Press the ESC key to return to the previous screen to con-
tinue configuring the digital input.
The only way to reset latched alarms is by clearing active alarms. This
step is required to return latched points to their normal state. For
details, see 7.10.1 - Clear Active Alarms.
7.3.5 Set Up Delay Time
Each input may be set up with a specified time delay between the
occurrence of an alarm or event—a monitored device changes state—
and any response by the AC4. This feature can prevent needless
responses to transient conditions.
This delay is the amount of time that must elapse before the AC4
acknowledges the change of state in the monitored device and takes
any further action, such as dialing configured pagers. The default time
delay is 1 second (displayed as 00 MIN : 01 SEC).
The time delay applies only when a monitored device changes from its
normal state—for example, the AC4 detects a closed contact that is
defined as Normally Open.
When the monitored device returns to its normal state, the AC4
acknowledges the change of state after the delay timer ends its
countdown.
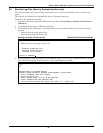
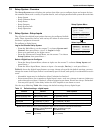
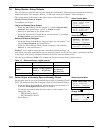
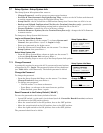
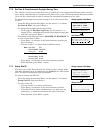
• From the Setup Inputs Menu, choose Delay, as shown at right, and press Enter ↵.
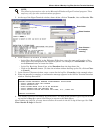
• To change the time delay in minutes and seconds (in the range of 00:00 to 99:59):
• For minutes (MIN), press and hold one of the arrow keys
↑↓ scroll through the numbers 00-99.
• Press Enter ↵ to advance to seconds (SEC).
• For seconds (SEC), press and hold one of the arrow keys
↑↓ scroll through the numbers 00-59.
• When finished, press Enter ↵ again.
Setup Inputs Menu
SETUP DEVICE_1
LABEL: DEVICE_1
NORM OPEN/CLOSE: NO
ALARM/EVENT: AL
↑↓=NEXT ↵=SELECT
> LATCHED: N
DELAY: 00:01
Latched / Unlatched
IS ALARM
LATCHED? N
↑↓=Y/N ↵=END
Message (if input has
been defined as an event)
LATCH NOT ALLOWED
WHEN IN EVENT MODE
ESC=BACK
Setup Inputs Menu
SETUP DEVICE_1
LABEL: DEVICE_1
NORM OPEN/CLOSE: NO
ALARM/EVENT: AL
↑↓=NEXT ↵=SELECT
LATCHED: N
DELAY: 00:01
Delay Time
DELAY TIME BEFORE
TRIGGER?
00
MIN : 01 SEC
↑↓=SELECT
↵=NEXT/END


