


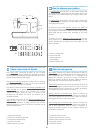

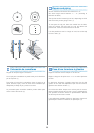

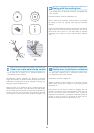
Remove the zigzag foot and attach the buttonhole foot. Adjust
the stitch length dial between "0.5" - "1". The density of the stitch
depends on thickness of the fabric.
Always test sew a buttonhole.
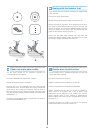
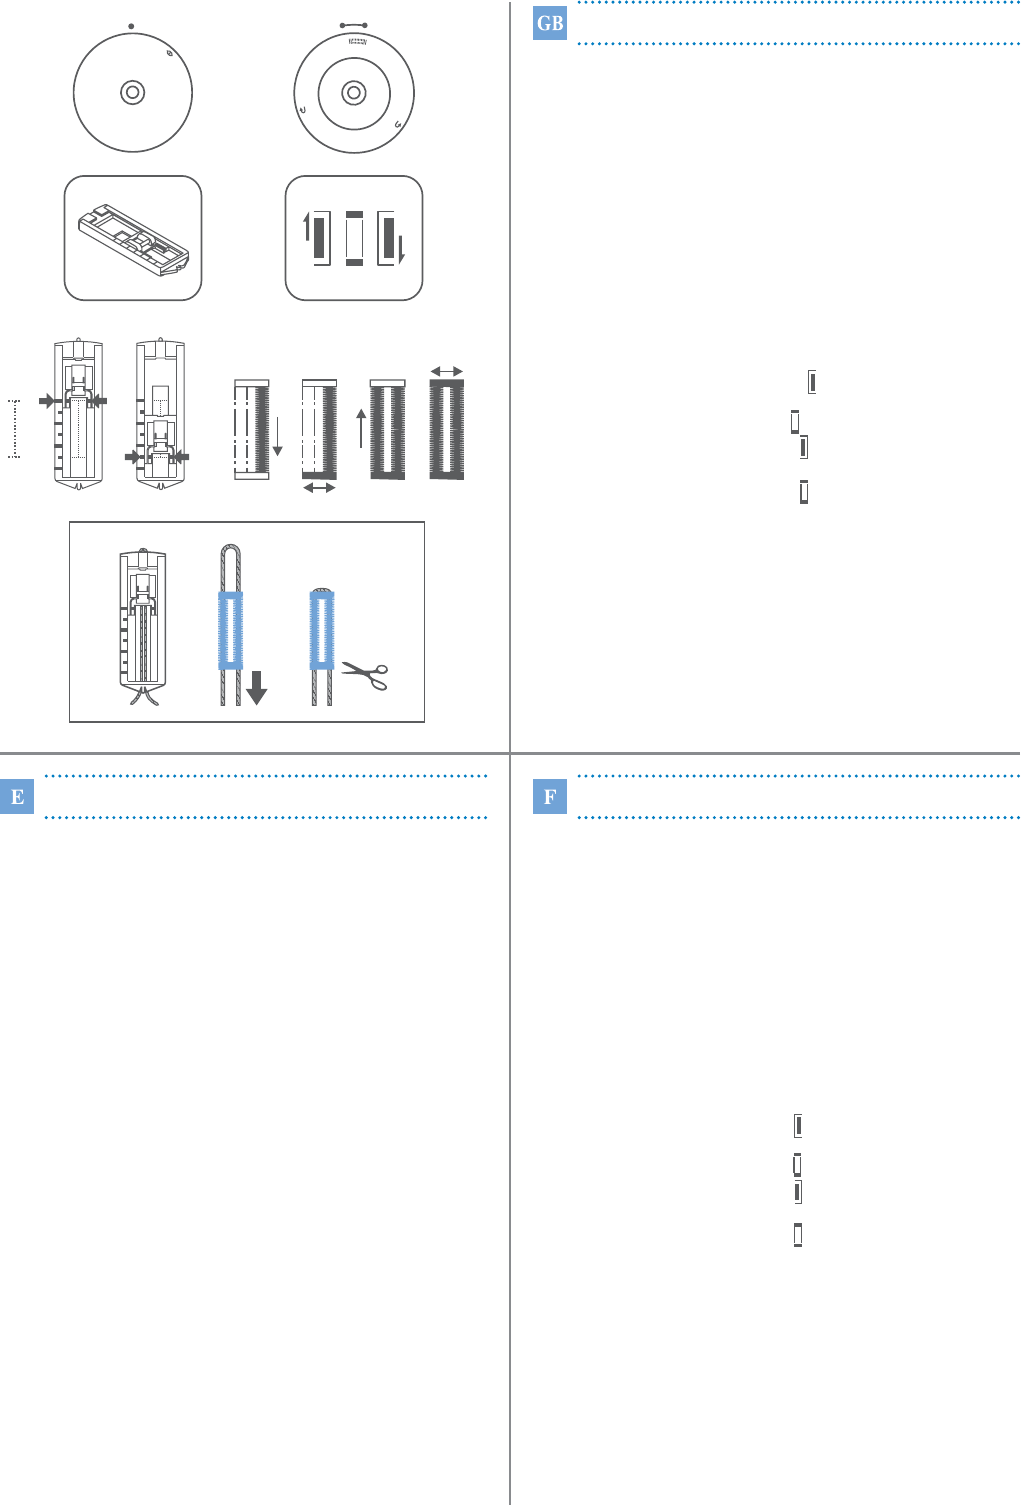
Measure the diameter of the button and add 0.3 cm (1/8") for the
bartacks. If you have a very thick button, add more to the
diameter measurement. Mark the position and length of the
buttonhole on the fabric.
Position the fabric so that the needle is on the mark that is
furthest from you.
Pull the buttonhole foot towards you as far as it will go.
Lower the foot.
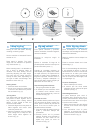
a. Turn the pattern selector dial to . Sew at moderate speed
until you reach the end mark.
b. Turn the pattern selector dial to and sew 5-6 bartack stitches.
c. Turn the pattern selector dial to and sew the left side of the
buttonhole to the mark at the end which is further from you.
d. Turn the pattern selector dial to and sew bar tack stitches.
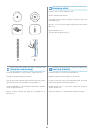
Remove the fabric from under the foot. Draw the upper thread
through the backside of the fabric and knot upper and lower
threads. Cut the center of the buttonhole with the seam ripper,
being careful not to cut the stitches on either side.
- Slightly reduce upper thread tension to produce better results.
- Use backing material for fine and stretchy fabrics.
- It is advisable to use a gimp cord for stretch or knit fabrics. The
zigzag should sew over the gimp. (e)
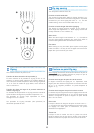
Preparation:
Note:
To prepare the fabric:
Tips:
Faire les boutonnières
Poser le pied pour boutonnières.
Régler la longueur du point entre "0.5" - "1". La densité du point
dépend de l'épaisseur du tissu.
Toujours faire une boutonnière d'essai.
Mesurer le diamètre du bouton et ajouter 0.3cm pour la bride.
Si vous avez un bouton épais, il faut ajouter à la longueur.
Marquer la position et la longueur de la boutonnière sur le tisu.
Placer le tissu afin que l'aiguille soit au bout de la marque le plus
éloigné de vous.
Tirer le pied à boutonnière vers vous jusqu'au bout et abaisser le
pied.
a. Tourner le sélecteur de point à . Coudre à vitesse modérée
jusqu'au bout de la marque.
b. Tourner le sélecteur de point à et coudre 5-6 points d'arrêt.
c. Tourner le sélecteur de point à et coudre le côté gauche de
la boutonnière jusqu'au point de départ.
d. Tourner le sélecteur de point à et coudre les points d'arrêt.
Pour nouer les fils, mettre le sélecteur de point à "B" (largeur de
point à "0") et coudre quelques points.
- Pour de meilleurs résultats, réduire légèrement la tension du fil
supérieur.
- Utiliser une feuille de papier pour éviter les distorsions sur les
tissus très fins ou synthétiques.
- Pour les tissus extensibles ou les tricots, il est préférable
d'utiliser un cordonnet. Le point doit couvrir complètement le
cordonnet. (e)
Préparation:
Note:
Suggestions:
Coser ojales
1. Sacar el pie: zig-zag y colocar el pié ojalador.
2. Medir el diámetro y el espesor del botán y agregar 3 mm para
marcar los remates del ojal en la tela.
3. Colocar la tela bajo el pié de modo que la marca en el pié
hojalador coincida con la marca en la tela. Bajar el pié, de
modo que la linea central de la marca del ojal en la tela
quede en el centro del pié.
Ajustar la longitud de la costura colocando el dial en el area
"0.5" - "1" para tener una correcta densidad de costura de
acuerdo al tipo de tela. Siempre pruebe antes de hacer un ojal.
Seguir la secuencia. Tener cuidado de no coser demasiadas
puntadas en posiciones2y4.Usar el abridor y cortar el ojal
desde ambos extremos hacia el centro.
- Reducir un poco la tensión superior produce buenos
resultados.
- Usar un fondo para telas finas o elásticas.
- Es aconsejable usar cordón para telas elásticas o tejidos de
punto. El zig-zag debe coser sobre el cordón. (e)
Preparar
Consejos útiles:
How to sew buttonholes
5
0
1
2
3
4
1
4
2
3
0
1
2
3
4
S
1
da b c
27
e