


19
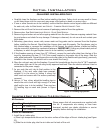
7. As you push the unit into its nal position in the
replace, if the vent collar plate was removed,
reinstall it to the stove by sliding it along the
draft hood and secure with the screws previously
removed.
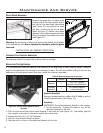
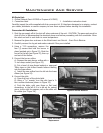
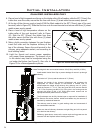
8. Using a ” hex driver, adjust the levelling legs to
ensure the unit is level and high enough if a base
shelf and/or riser is to be installed. There are two
(2) levelling legs on each side (shown in Figure
31).
Figure 31: Levelling legs position.
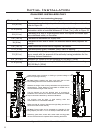
CONVERTING A DIRECT VENT FIREPLACE TO A B-VENT FIREPLACE:
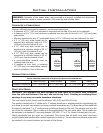
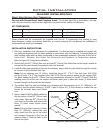
Kit Contents:
Quantity Description
1 Air Intake Plug
1 Spill Switch with Wires & Bracket
B-Vent Kit Installation:
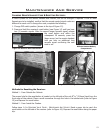
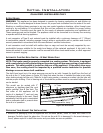
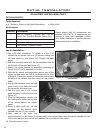
1. Install the air intake plug.
a) Place high temperature silicone on the outer surface of the ridges of the air intake plug (see Figure
32).
b) Slide the air intake plug into the air intake on the back of the unit.
Please ensure that all components are supplied with
this kit. If components are missing or have been
damaged, contact your dealer, distributor or courier
company before starting this installation.
Initial Installation
QUALIFIED INSTALLERS ONLY
• Carefully clean the replace and ue before installing the stove. Failure to do so may result in fumes
or dirt being blown into the room and may cause a re leading to death or serious injury.
• If one or more Sonnets are to be installed, conrm that the remote control signal codes are different
for each unit, refer to M
AINTENANCE AND SERVICE - CHANGING REMOTE HANDSET CODE.
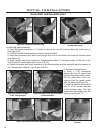
1. Remove the unit from the box and remove all packaging material from the appliance.
2. Remove door. See M
AINTENANCE AND SERVICE - GLASS DOOR REMOVAL.
3. Remove log and ember set and all wrapping material from the stove. Remove wrapping material from
log and embers and check for any damage. If damage is observed, do not use unit and contact your
local dealer.
4. Refractory, glass doors, screen rails, screen mesh and log grates can be removed from the replace
before installing the Sonnet. Check that the chimney clean outs t properly. The ue damper can be
fully blocked open or removed for installation of the Sonnet; the smoke shelves, shields and bafes
may be removed if attached by mechanical fasteners. IMPORTANT: Cutting any sheet-metal parts of
a replace, in which the gas replace insert is to be installed, is prohibited.
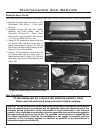
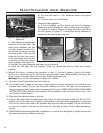
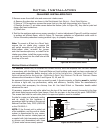
5. If the replace opening is lower than 19” (483mm), remove the vent collar plate from the top of the
insert by unscrewing the two (2) T-20 Torx screws located on the center top of the stove. Slide the
collar plate backwards. Properly secure the vent collar plate to the exible vent pipe liner(s) previously
installed in the chimney. Be careful not to over-stretch the liner(s).
6. Place the unit part way into the replace. Connect the household gas line into the ” NPT receptacle
at the lower right rear of the unit using locally approved methods. Place the electric cable so it can be
connected to the power supply.