27
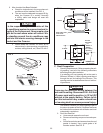
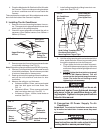
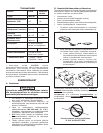
FIG. 11
Step a
Remove At
Perforation
Step b
Remove At
Perforation
Step c
Use As
Packaged
Upper Discharge
Air Duct
Lower Discharge
Air Duct
Rear Of Air
Conditioner
Upper Discharge
Air Duct
Edge Without
Flange To
Rear Of Unit
FIG. 10
If bolts are left loose there may not be an ad-
equate roof seal or if over tightened, damage
may occur to the air conditioner base or ceil-
ing template. Tighten to torque specifications
listed in this manual.
CAUTION
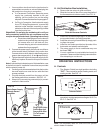
FIG. 12
Slide Lower Air
Discharge Duct
Over Upper Duct
Roof
Gasket
Hold Ceiling Template With
One Hand And Install 3
Mounting Bolts Finger Tight
Air Conditioner
Return Air
Opening
Disconnect 220 - 240 Volt AC. Failure to follow
these instructions could create a shock hazard
causing death or severe personal injury.
WARNING
!
4. Place the Mechanical Air Distribution Box Kit inside
the Caravan. This box contains mounting hardware
for the air conditioner and will be used inside the
Caravan.
This completes the outside work. Minor adjustments can be
done from the inside of the Caravan if required.
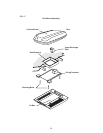
F. Installing The Air Conditioner
1. Remove air box and mounting hardware from car-
ton. The upper duct is shipped inside the lower duct
which is part of the ceiling template.
2. Check for correct alignment and adjust the unit as
necessary (Roof Gasket centers over 362mm x
362mm (± 3.2mm).
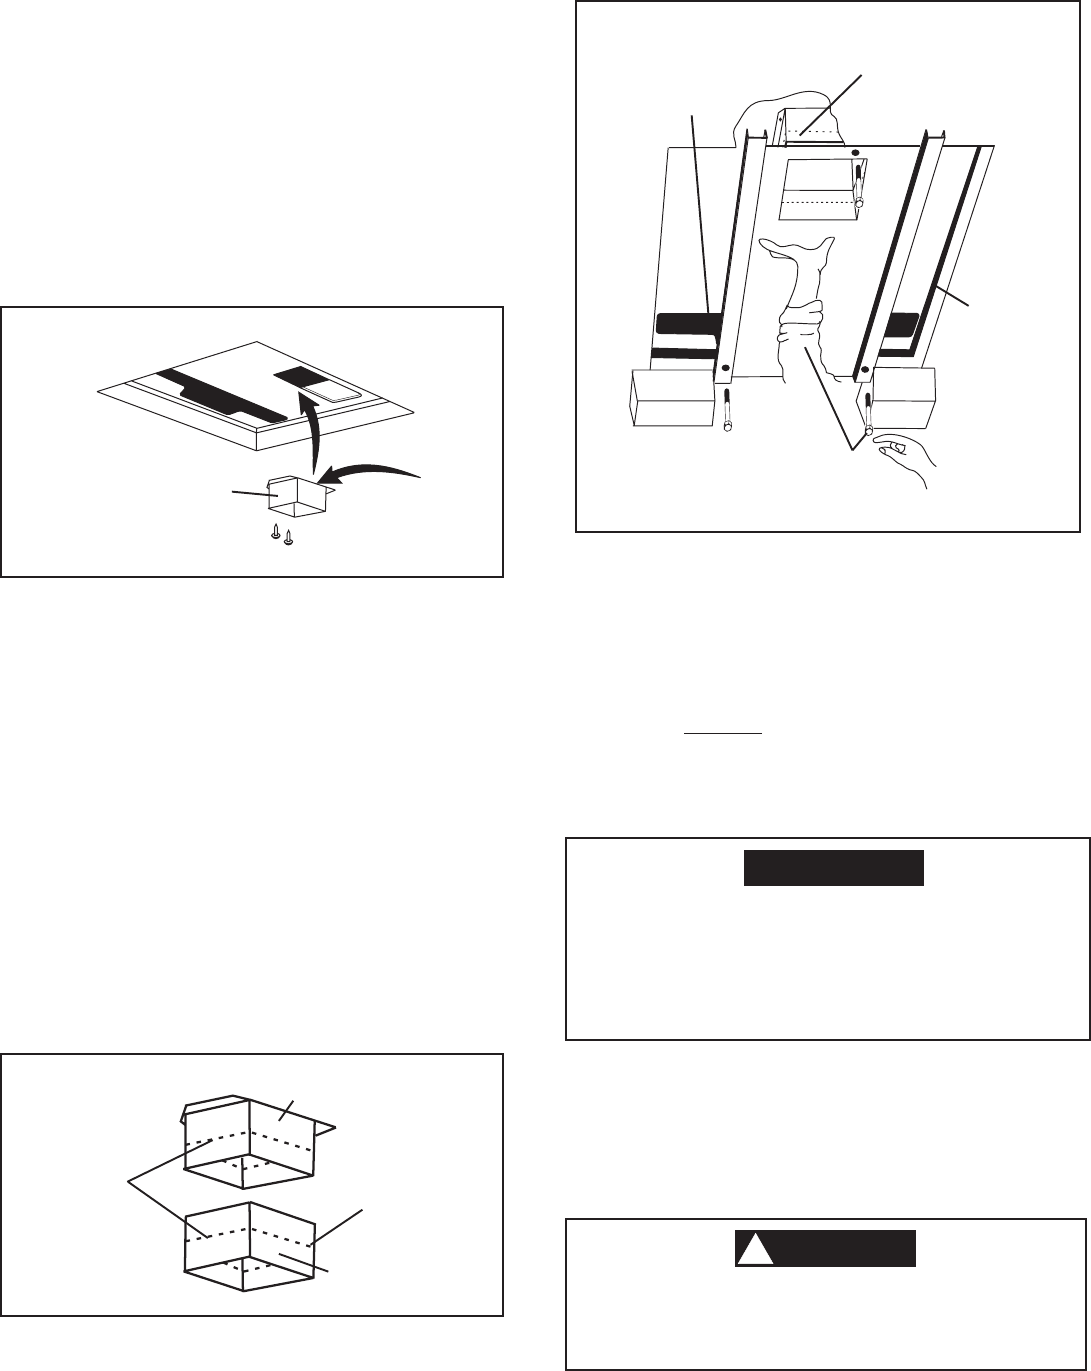
3. Remove upper duct from ceiling template and locate
it over blower discharge. See FIG. 10.
Note: Edge without flange installs toward REAR of opening.
4. Use two (2) sharp pointed #10 sheet metal screws
to hold duct to base pan. Screw holes are provided
in bottom of base pan for these screws.
5. Reach up into return air opening of the air conditioner
and pull the unit's electrical cord down for later
connection.
6. Measure the ceiling to roof thickness:
a. If distance is 25mm - 50mm, remove perforated
tabs from both upper and lower ducts. See
FIG. 11.
b. If distance is 50mm - 75mm, remove perforated
tabs from bottom duct only. See FIG. 11.
c. If distance is 75mm - 100mm, install ducts as
received. See FIG. 11.
7. Install ceiling template by sliding lower duct over
upper duct. See FIG. 12.
8. Hold the ceiling template with one hand and with the
other, install the three 150mm long mounting bolts
through the template and into the base pan.
a. Finger-tighten the bolts and check alignment.
There should be an equal opening on each side
and the rear flange must be tight against the roof
opening.
b.
EVENLY tighten the three bolts to a torque of
4.5 to 5.5 NM (Newton Meters). This will
compress the roof gasket to approximately
13mm. The bolts are self locking so over
tightening is not necessary.
G. Connection Of Power Supply To Air
Conditioner
Important: The electrical installation must be done
by an authorized electrician. In some areas they must
be licensed.


