


15
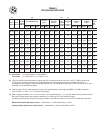
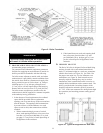
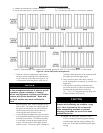
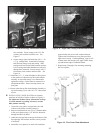
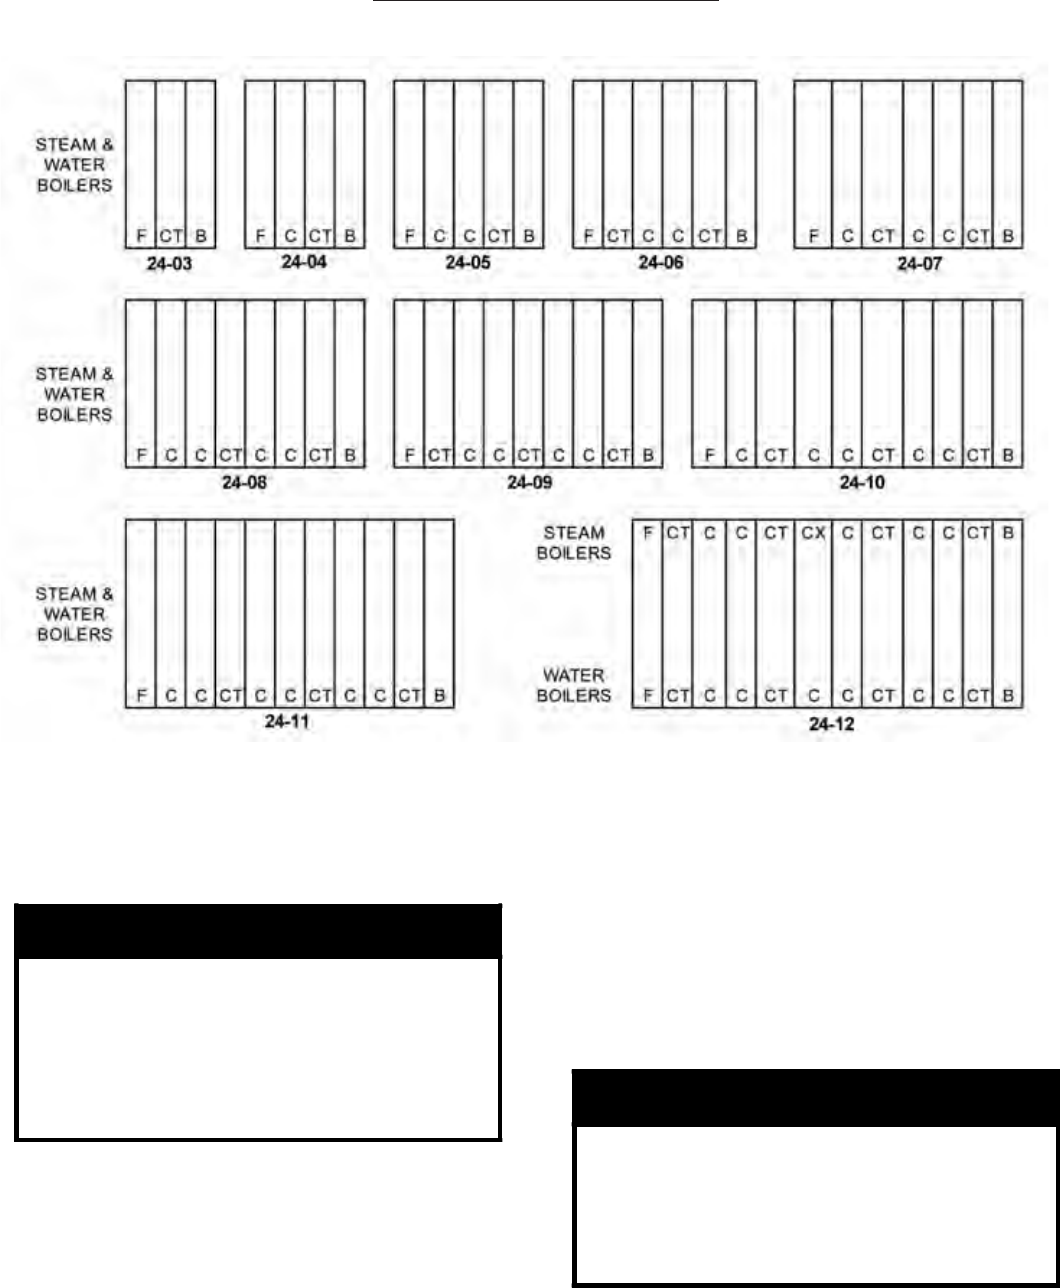
i. From the “Section Arrangement” chart, select
the next section according to the “Identification
Code” at the top of the chart. See Figure 8. Use
a wire brush to clean the groove in the face of
the next section. Then, using a cartridge of RTV
6500 or RTV 736 sealant in a caulking gun, fill
the groove in this section with silastic sealant.
Touch-up any missed spots before draw-up.
T
ouch-up after draw-up has no value.
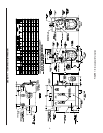
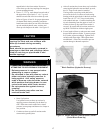
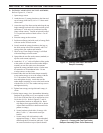
j. Clean and lubricate nipple ports on next section
to be assembled and place on nipples previously
installed in rear section. To facilitate assembly,
it is advisable to enter the upper nipple first in
its port. Then enter the lower nipples in their
respective ports. If necessary, place a lifting bar
(crowbar) under the center of the section and lift
the nipple port onto the upper nipple.
k. Drive section in place with a heavy block of
wood, striking blows as squarely as possible over
nipple port.
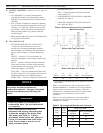
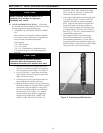
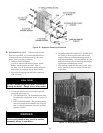
l. The lar
ge draw-up rod lugs with dual holes
are cast in the four (4) corners of each casting.
Starting with the upper holes, install four
(4) 5/8” x 9¾” long draw-up rods along with
washers and nuts (see Figure 9).
NOTICE
The sections must be assembled according
to the arrangement shown to ensure proper
operation, proper assembly of canopy,
jacket and alignment of piping and tankless
heaters with jacket knockouts. Start with
the back section and work towards the
front.
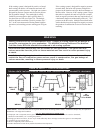
CAUTION
To avoid damage to the draw-up rod
threads while drawing up sections, apply
oil or other lubricant to tie rod threads
while assembling sections to prevent
stripping of threads on rod and to make
assembling easier.
BOILER SECTION IDENTIFICATION CODE
F = FRONT SECTION WITH 4” SUPPLY TAPPING C = CENTER SECTION
B = BACK SECTION WITH 4” SUPPLY TAPPING CX = CENTER SECTION WITH 4” TOP SUPPLY TAPPING
NOTES: FOR BOILERS LESS TANKLESS HEATER, REPLACE THE “CT” SECTIONS WITH “C” SECTIONS.
Figure 8: Series 24 Section Arrangement
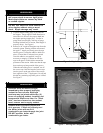
m. DRAW UP SECTION SLOWLY AND
EVENLY using an alternating pattern starting
with the upper right lug and proceeding to the
lower left , lower right and finishing with upper
left lug.