


14
WARNING
Nipples must be driven in evenly and to
the proper depth to assure tight joints.
Most nipple leaks are caused by tilted
or cocked nipples.
DO NOT use steel/iron head hammer to
drive nipples without using a wood
block. Nipple damage may result.
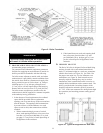
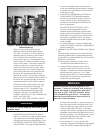
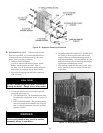
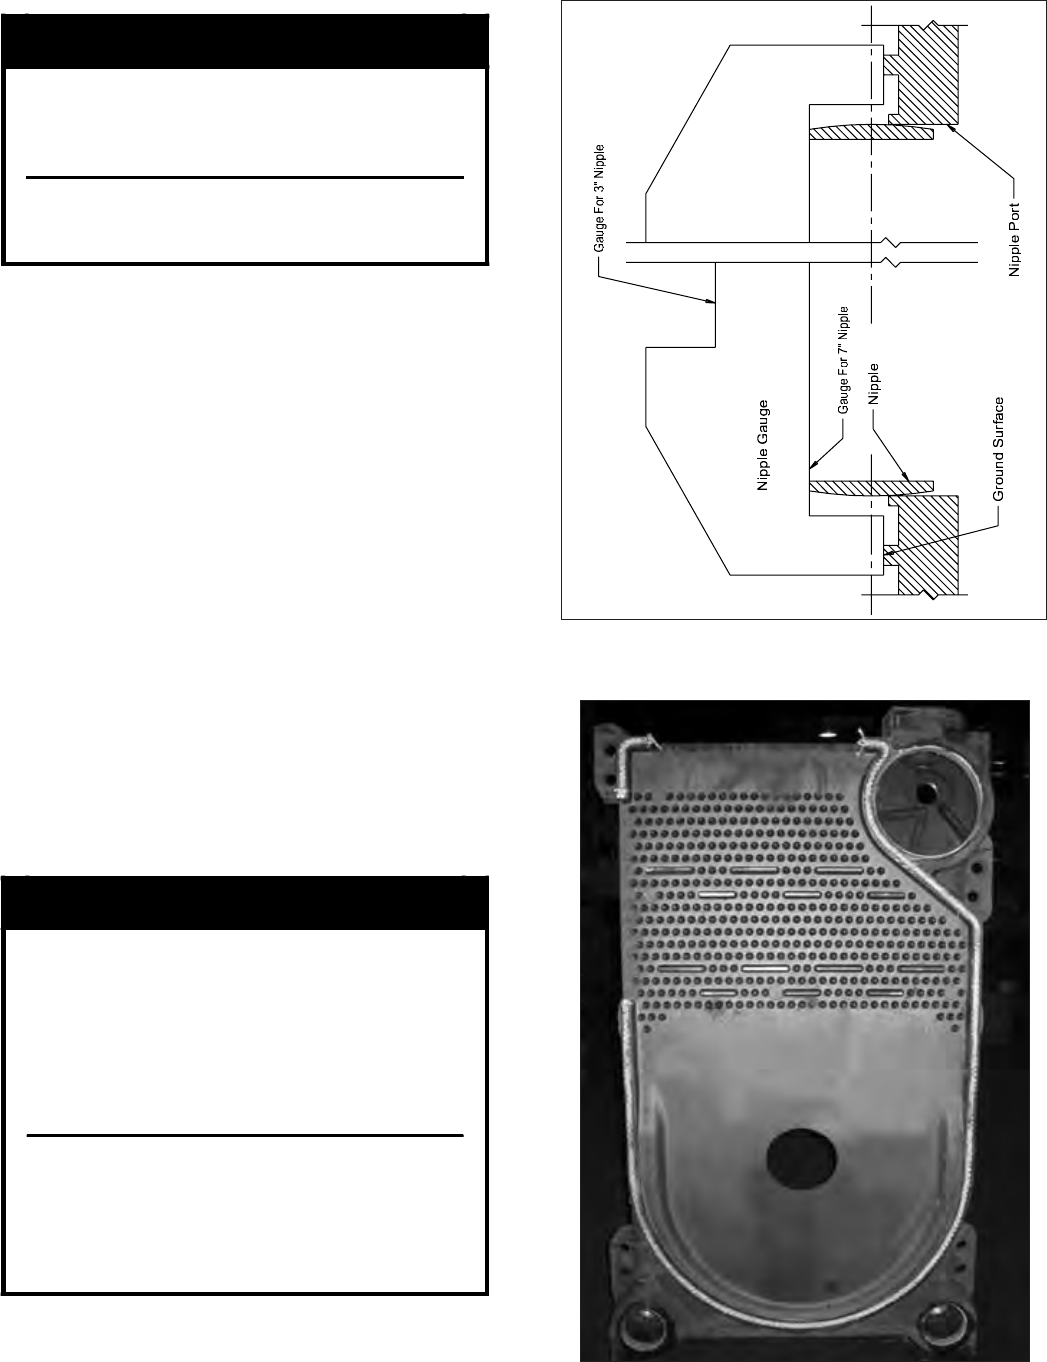
g. A special nipple setting gauge is provided for
the nipples. Gauge nipple in both directions to
insure that it is driven to the proper depth into
the nipple opening (nipple port). Cut-out in
gauge must rest on nipple, with legs of gauge
touching finished face of section, when nipple is
properly driven. See Figure 6.
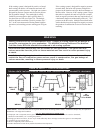
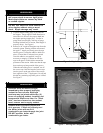
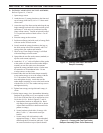
h. Remove a 96” length of fiberglass rope from the
assembly carton. Starting with the area around
the upper 7” nipple port, firmly press the rope
into the groove, so that the adhesive holds it in
place. (If more than 25 minutes have passed
since the adhesive was applied, it may be
necessary to reapply.) Continue to affix the
rope to the groove in this fashion around the
perimeter of the section. Make sure that the rope
does not droop or hang outside of the groove.
When the end of the groove is reached, cut off
the excess rope. Push the length of excess rope
into the groove at the top corner of the section
face (opposite of the 7” nipple port.) Cut off and
discard any remaining rope after groove is filled.
See Figure 7.
Figure 7: Affixing the Fiberglass Rope
Figure 6: Nipple Gauge
WARNING
Sections must be drawn-up tight
immediately after properly applying
sealant for best results. Although
sections may be joined within two (2)
hours of applying sealant, humidity and
temperature affect cure time. If a "thick
skin" has been formed on the sealant
bead, remove and re-apply sealant.
Sealant must be properly applied to
ALL grooves. Failure to properly seal
the boiler joints will result in
combustion gas leaks through the joint.
DO NOT operate boiler with
combustion gas leaks.