


7. SEWING
RH-9800
31
7-2. Sewing
CAUTION
Turn off the power switch at the following times, otherwise the machine may operate if the start switch is pressed
by mistake, which could result in injury.
When threading the needle
When replacing the needle
When not using the machine and when leaving the machine unattended
Do not touch any of the moving parts or press any objects against the machine while sewing, as this may result
in personal injury or damage to the machine.
When carrying out automatic sewing for the first time, be sure to carry out a test sewing first.
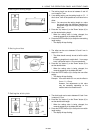
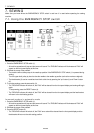
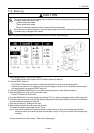
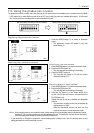
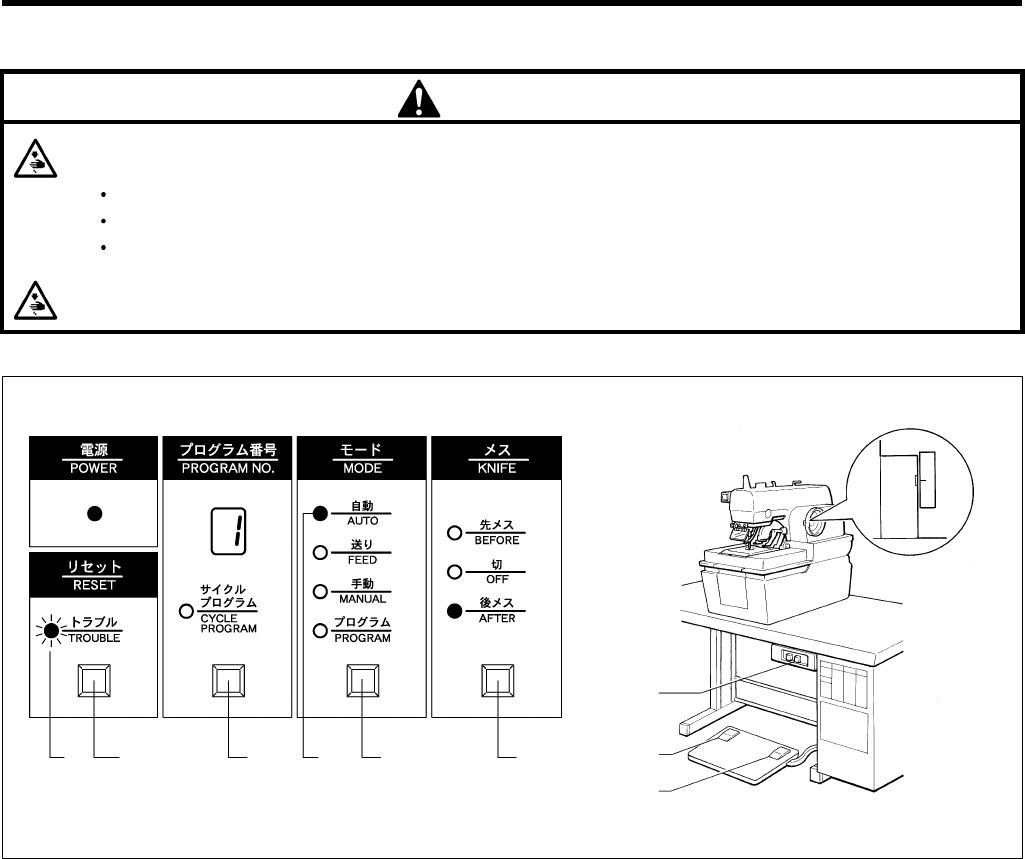
1. Press the power switch (1) to turn on the power.
* The POWER indicator will illuminate and the TROUBLE indicator (2) will flash.
2. Press the RESET button (3).
* The TROUBLE indicator (2) will switch off and the feed bracket will move to the cloth setting position.
* If the buzzer sounds and "E-10" appears on the front panel display (J) at this time, turn the pulley to set the needle
to its upper position, and press the RESET button (3).
3. Press the PROGRAM NUMBER button (4) to select the desired program number. (Refer to page 20.)
4. Press the MODE button (5) to switch to automatic mode.
* The AUTO indicator (6) will illuminate.
5. Press the KNIFE button (7) to select cutting before sewing, OFF (no cutting) or cutting after sewing. (Refer to page 20.)
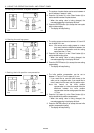
6. Place the material to be sewn under the cloth presser and press the cloth presser switch (8) to lower the cloth presser,
and then release the cloth presser switch (8).
7. Press the start switch (9). Sewing will then start.
8. When sewing is finished, the cloth presser will be raised.
To repeat this operation, repeat steps 6. and 7. above.
Note: After you have finished the machine and have turned the power off, the previous sewing data will still be
retained in memory even when the power is turned back on again. Thus you can continue with the same type
of sewing.
Check the thread tension after sewing. Refer to the following page.
1164Q
1165Q
(1)
(8)
(2) (3) (4) (6) (5) (7)
(9)