


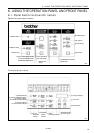
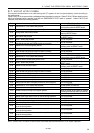
6. USING THE OPERATION PANEL AND FRONT PANEL
RH-9800
25
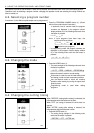
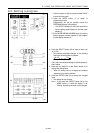
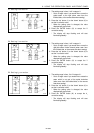
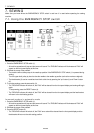
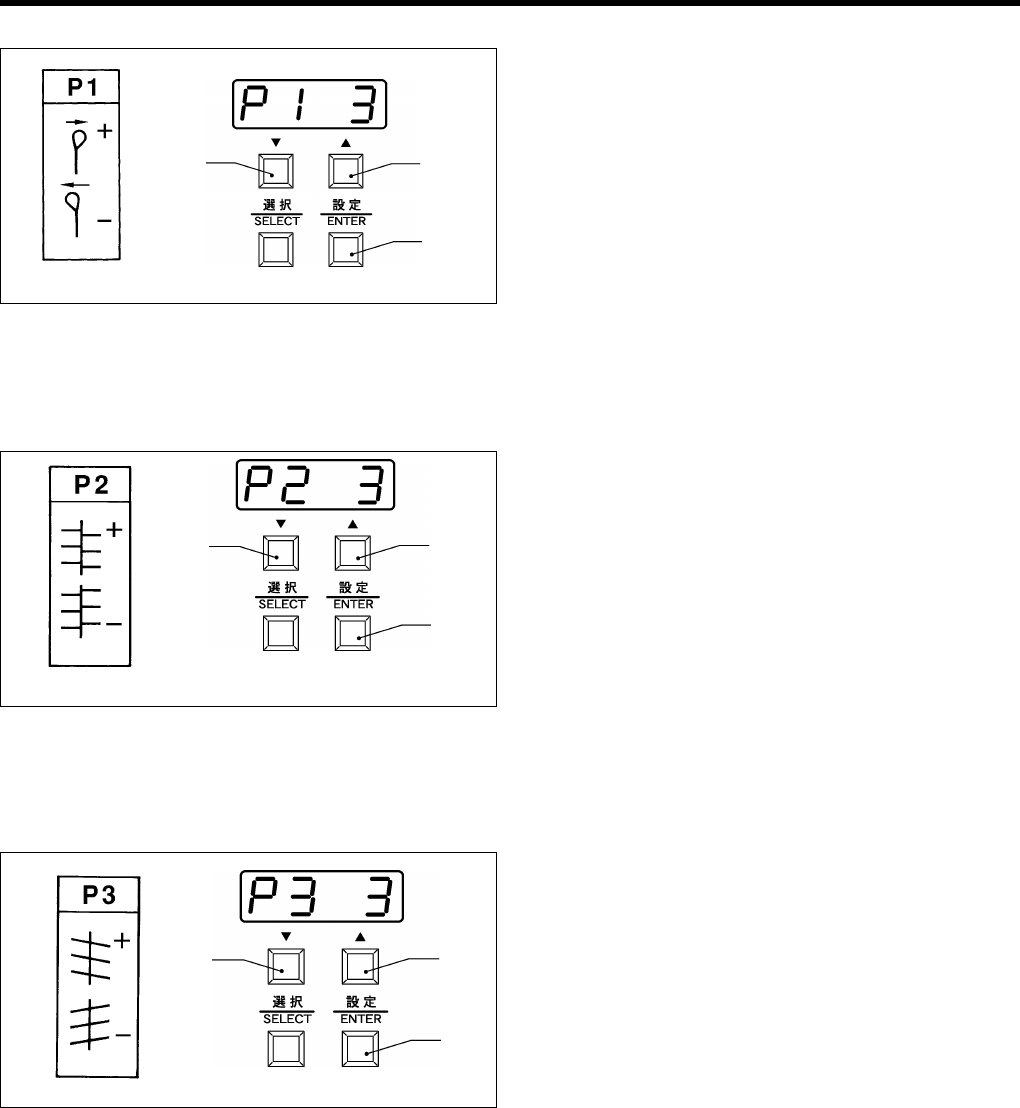
P1. Setting X correction
1. The setting range is from 1 to 6 in steps of 1.
* Set to a larger value if you would like to move the
eyelet seam to the right (when seen from the
finished side, or the reverse side when sewing).
2. Press the “up” button (L) or the “down” button (K) to
set the X correction value.
* When the setting value is changed, the value
displayed will start to flash.
3. Press the ENTER button (N) to accept the X
correction setting.
* The display will stop flashing and will start
illuminating steadily.
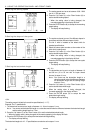
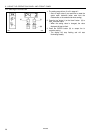
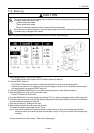
P2. Setting Y correction
1. The setting range is from 1 to 6 in steps of 1.
* Set to a larger value if you would like to move the
right-side seam further forward (when seen from
the finished side, or the reverse side when sewing).
2. Press the “up” button (L) or the “down” button (K) to
set the Y correction value.
* When the setting value is changed, the value
displayed will start to flash.
3. Press the ENTER button (N) to accept the Y
correction setting.
* The display will stop flashing and will start
illuminating steadily.
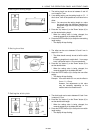
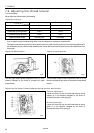
P3. Setting θ
1
correction
1. The setting range is from -3 to 3 in steps of 1.
* Set to a larger value if you would like to rotate the
seam which is not part of the eyelet clockwise
(when seen from the finished side, or the reverse
side when sewing).
2. Press the “up” button (L) or the “down” button (K) to
set the θ
1
correction value.
* When the setting value is changed, the value
displayed will start to flash.
3. Press the ENTER button (N) to accept the θ
1
correction setting.
* The display will stop flashing and will start
illuminating steadily.
1152Q
1153Q
(L)
(N)
(K)
1154Q 1155Q
(L)
(N)
(K)
1156Q
1157Q
(L)
(N)
(K)