


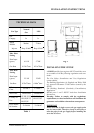
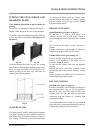
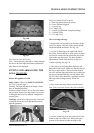

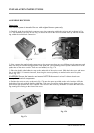
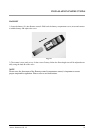
Plan View Of Coal Set Layout.
Note - Ensure that the pilot light is visible through
the slot in the front right base matrix and that the
pilot flame is not impinged.
FITTING AND ARRANGING THE
LOGS (NG ONLY)
Ensure the appliance is cold
Safety Notice - Please see SAFETY NOTICES
ref. Coal / Log set, page 3.
Warning: The logs and matrix are fragile, ensure
they are handled carefully.
Ensure location is correct. Do not force the matrix
into position. If any of the logs and/or rear matrix
is damaged, they must be replaced with genuine
Aarrow parts.
Warning: An incorrect log layout may cause soot
to build up inside the stove and therefore invali-
date the guarantee.
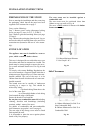
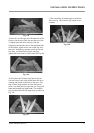
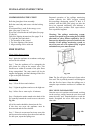
Key For Contents To NG Log Set -
A = Rear log matrix (black in colour)
B = Loose Embers (bagged)
C = Curved Log
D = Y Shape Log
E = Central Log (Knotted Lump Protruding)
F = 3x Small Twigs
G = 1x Large Twig
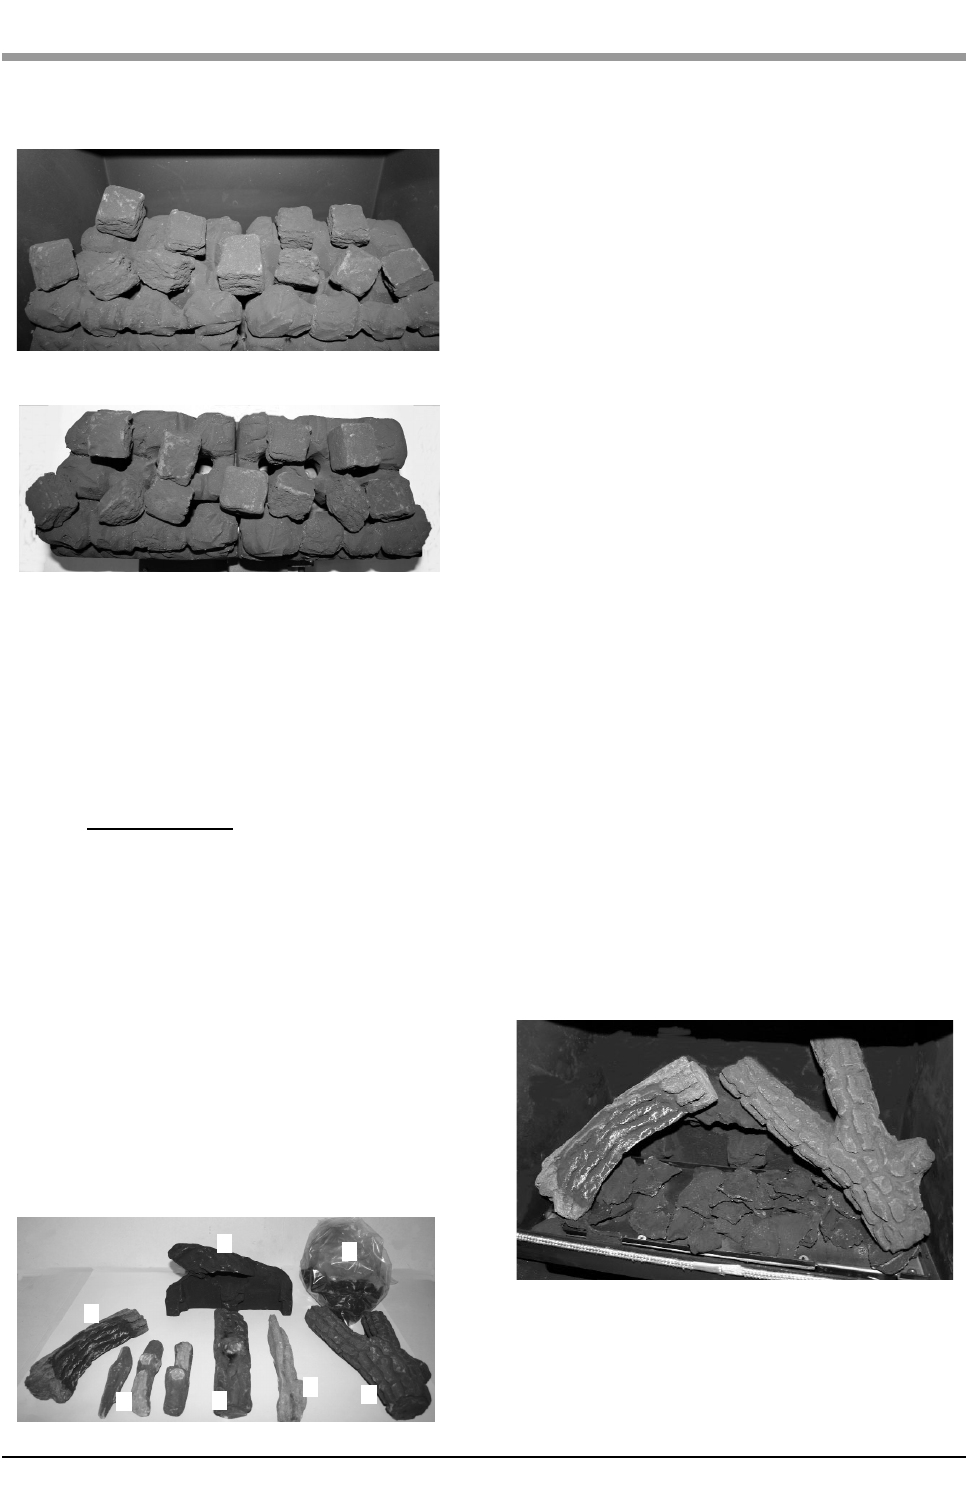
How to arrange the logs
1) Position the rear log matrix in the centre at the
rear of the burner. The base of the matrix should
slot down behind the burner. See Fig. 12a.
2) Lay the Y shape log to the right hand side of
the burner. Ensure that the Y open section is upper
most and is resting onto the cutout flat area to the
right of the rear log matrix. The base should be
approimately 30mm from the front of the stove
window opening. See Fig 12a.
3) Take the curved log and place this to the left
hand side of the burner. Make sure that the base of
this log is again approx. 30mm from the front of
the stove and the upper end of the log is resting on
the grooved notch within the rear log matrix. See
Fig 12a. Note, there should be a gap between both
side logs when resting correctly on the rear
matrix.
4) Next scatter the loose embers onto the burner
area. Take care not to obstruct the pilot assembly.
5) Lay the central log, from the centre front of the
burner to the rear of the stove. Sitting the upper
portion of the central log onto the edge of the
Aarrow Sherborne GSL CF 15
INSTALLATION INSTRUCTIONS
Fig. 10d
Fig. 10e
Fig. 11
A
B
D
G
E
C
F
Fig. 12a