


21
Please Do Not Return This Product To The Store. Contact your local Wayne-Dalton dealer. To find your local Wayne-Dalton dealer, refer to your
local yellow pages/business listings or go to the Find a Dealer section online at www.wayne-dalton.com
Tools Needed:
Tools Needed:
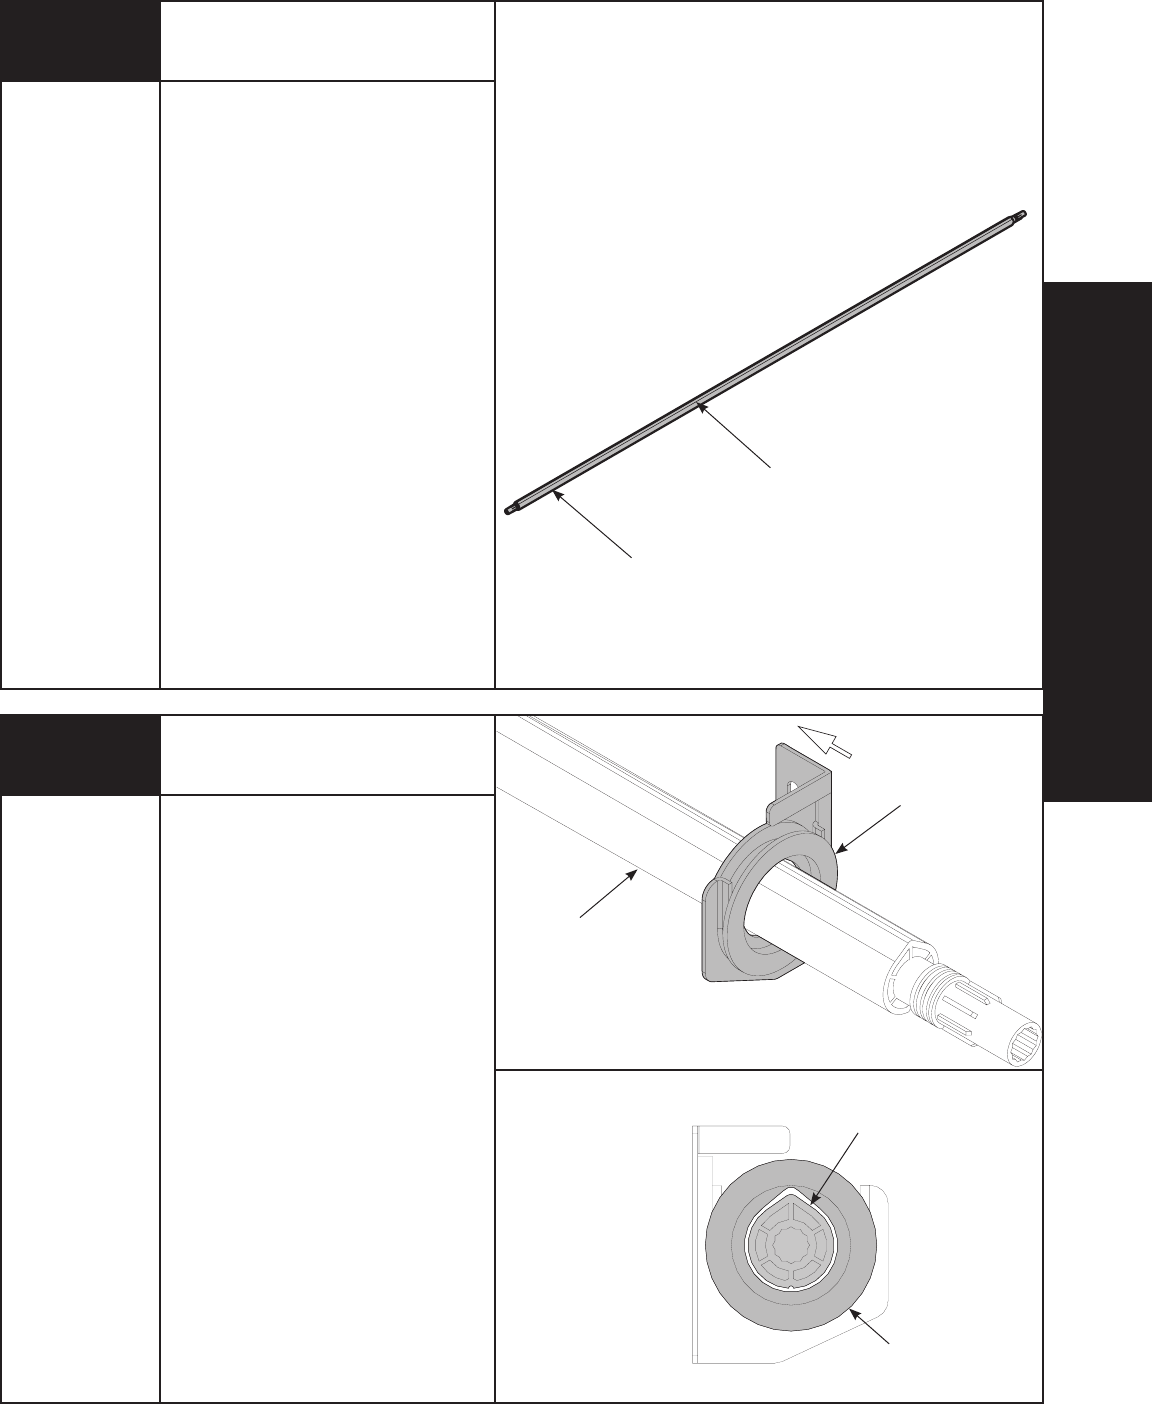
INSTALLATION
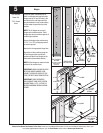
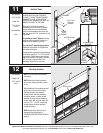
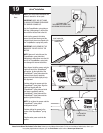
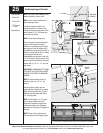
Center Bracket Bushing
NOTE: If you are installing an idrive
®
opener on your garage door, skip this
step and continue with Step 19.
NOTE: If you are not installing an idrive
®
opener on your garage door, you must
install the center bracket bushing
assembly. Follow these instructions for
non-idrive
®
operated garage doors.
NOTE: If you are installing a
DoorMaster™ opener, see optional
DoorMaster™ Bracket installations on
page 33, figure A.
Being cam shaped the center bracket
bushing only fits one way.
Slide the center bracket assembly
towards the center of the torque tube,
from the right side as shown.
NOTE: Upon completion of this step,
continue with Step 20.
CENTER
BRACKET
ASSEMBLY
TORQUEMASTER
®
SPRING TUBE
TORQUEMASTER
®
SPRING TUBE
CENTER
BRACKET
BUSHING
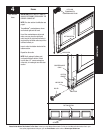
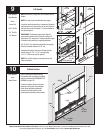
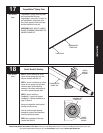
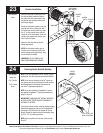
TorqueMaster
®
Spring Tube
TorqueMaster
®
springs come lubricated
and pre-assembled inside the
TorqueMaster
®
spring tube. To install, lay
the TorqueMaster
®
spring tube on the
floor (inside garage) in front of the door
with the labeled end to the left.
IMPORTANT: RIGHT AND LEFT HAND IS
ALWAYS DETERMINED FROM INSIDE THE
GARAGE LOOKING OUT.
LABELED END
TORQUEMASTER
®
SPRING TUBE
17
18
None
None