


VL SERIES STEAMERS - GENERAL
Pa
g
e 8 of 88
Observe water level
g
au
g
e
g
lass to verify that water
is in boiler and that the level in the
g
au
g
e
g
lass is
about half full.
Both valves on the
g
au
g
e
g
lass assembly must be
open to fill the
g
au
g
e. When the water reaches the
minimum level, the steam solenoid valve will open,
allowin
g
steam to enter the steam coil in the heat
exchan
g
er tank and be
g
in heatin
g
the water. After
approximately 20 minutes, a sufficient amount of
pressurized steam should be present for cookin
g
product.
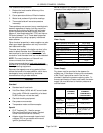
Direct Steam Powered Cooker
1. Open the cabinet door and turn main power
switch ON.
A. The red li
g
ht on the switch will illuminate.
B. If steam pressure is above the minimum
settin
g
on the cookin
g
compartment
pressure switch then the switch will close,
ready li
g
ht will come ON and power to the
other controls will be supplied.
C. Observe that the steam pressure
g
au
g
e in
the cabinet base, indicates 10-12 psi.
2. Steamer is ready to cook product.
Boiler Blowdown and Steamer Shut off
Turn the steamer off at least once daily and blow
down the boiler to remove sediments, scalants and
lime build-up in the boiler. Always blowdown the
boiler when it is under maximum pressure and no
steam is bein
g
used.
3. Automatic blowdown.
A. Newer Models
- Open the cabinet door
and turn main power switch OFF. The
switches’ red li
g
ht will
g
o out, the
blowdown/drain solenoid valve will be de-
ener
g
ized and the boiler will be
g
in to
drain. The cold water condenser solenoid
will continue to operate, as needed, to
condense steam and to cool the water
g
oin
g
into the drain.
B. Older Models
- Turn power switch OFF
and depress blowdown timer button.
Blowdown timer will operate for 4 minutes.
At the end of blowdown, turn fill switch ON
and allow boiler to fill.
4. Manual blowdown.
A. All Models
- Turn power switch OFF. Open
blowdown valve located on the bottom
front of the cabinet base. After the boiler
has completely drained, close blowdown
valve and turn fill switch to ON and allow
boiler to fill.
Cooking Compartment Controls
Close the compartment door and turn the screw
handle clockwise
until the
g
asket touches the
compartment surface then ½ turn further to
adequately seal the compartment. If steam leaks
occur after compartment heat up and pressurization,
turn handle clockwise
a
g
ain to increase the sealin
g
force until the leak stops.
Proceed to the cookin
g
compartment control
instructions that apply to the steamer in use.
1. Manual
A. Set the manual timer to the desired
cookin
g
time. If preheatin
g
is desired,
allow five to ten minutes (recommended)
of additional time at the be
g
innin
g
of the
cook cycle. The len
g
th of time will vary
with the type, size, temperature and
condition (frozen or thawed) of the product
and must be determined from experience.
Pull the steam control arm handle forward
and lock it by pullin
g
the handle down.
This closes the steam exhaust
g
ate valve
and opens the steam inlet
g
ate valve,
allowin
g
steam to enter the compartment.
Durin
g
preheat, cooler air and condensate
are exhausted from the compartment
throu
g
h the steam trap (condenser) until
the temperature reaches 180°F, closin
g
the internal bellows. Throu
g
hout the
cookin
g
cycle, the compartment pressure
should be 6 psi if equipped with a
compartment pressure re
g
ulatin
g
valve.
On models without the compartment
pressure re
g
ulatin
g
valve, the
compartment pressure cycles with the
boiler pressure between 4 and 6 psi.
B. When the timer bell rin
g
s to si
g
nal the end
of a cook cycle, turn it OFF. Lift the steam
control arm handle to unlatch team control
arm. An internal sprin
g
will automatically
pull the arm to the rear. This closes the
steam inlet
g
ate valve and opens the
steam exhaust
g
ate valve, allowin
g
steam
and pressure to exit the compartment.
C. Wait approximately 30 seconds for the
steam to exhaust from the compartment
and to depressurize. Turn the screw
handle on the compartment door
counterclockwise
until the
g
asket no
lon
g
er seals a
g
ainst the compartment
surface. After the remainin
g
steam
escapes, move the latch paddle to the left
and open the door.