SMC sierra monitor corporation Sentry Instruction Manual - Version 6
SERVICE
Page: 58
7.2 CONTROLLER
7.2.1 MECHANICAL/FUNCTIONAL DESCRIPTION
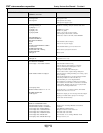
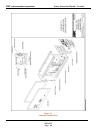
The controller consists of four sub assemblies. Figure 7-1.
7.2.1.1 CONNECTOR PANEL
The Back Panel contains all the connectors for providing
system power, powering and communicating with the
modules, operating alarm devices and communicating
with a printer. The panel also contains the AC fuse.
The connector panel contains, internally, an edge card
connector which connects the main control card.
To remove the panel from the controller unscrew the four
corner screws and gently slide the edge connector apart.
This procedure allows the controller to be removed for
repair without disconnecting all the wiring from the
connector panel.
Except for the AC fuse there are no field repairable
components on the connector panel.
7.2.1.2 POWER SUPPLY ASSEMBLY:
The power supply assembly includes the transformer
which is installed on the bottom plate of the controller and
the power supply board which is "piggy backed" to the
main control board. To gain access to the power supply
board remove the six screws which hold the perforated
side panel on the left side of the controller and slide the
panel off toward the connector panel.
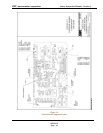
The power supply board provides various DC voltages for
system operation and is described in Section 7.2.2
To remove the power supply board unplug the large in-
line harness connector, remove the four nuts from the
corners of the board, and lift the board off the multi-pin
connectors which interface the power supply to the main
control board.
7.2.1.3 MAIN CONTROL BOARD
The main control board assembly is a printed circuit board
which connects to the connector panel and the power
supply as described above and to the front panel via a
ribbon cable. To access the component side of the board
remove the perforated side panel on the right side of the
controller.
Field repairs to the main control board involve socketed
component replacement only. Board removal is not
required for these repairs.
7.2.1.4 FRONT PANEL
he front panel assembly contains the membrane panel, the
two displays and the indicator lights (LED's). A ribbon
cable connection to the main control card is the only
electrical connection to the panel.
Access to the lower display angle adjustment is by
removal of the left side panel.
7.2.2 ELECTRICAL DESCRIPTION
7.2.2.1 POWER SUPPLY DESCRIPTION
The controller power supply is configured to accept 120
VAC and/or 12 VDC. See specifications Section 8.1 for
specific requirements.
The controller can also accept +10 to +29 VDC. If both
AC and DC supplies are connected and the AC drops
below 90 VAC the system will operate on DC until that
supply drops below 10.5 VDC. At that time the controller
will reset.
The power supply provides a regulated +24 to +26 volts
for the channel regulators, +5 volts for the main control
card and front panel board, and +15 & -12 volts for the
main control card. A 1 Amp (120 VAC) or .5 Amp (220
VAC) slo-blow fuse protects the AC input power. Check
the fuse on the connector panel if the power light is off. -
Figure 3-9
The power supply is protected by an over-voltage
transient protector (MOV), an EMI/RFI line filter and
Zener transient protectors.
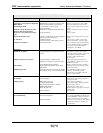
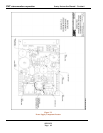
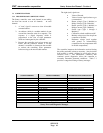
The following are symptoms of power supply failure.
Figure 7-3.
1. No +24 volts: no modules recognized by the system.
Action: check the fuse on the connector panel, check that
the 9 pin in-line connector is fully seated. If the +24
volts is still absent, replace the power supply board.
(The failed board can be factory repaired.)
2. No +5 volts: no lights or displays on the front panel.
Action: check fuse F1 on power supply board.
3. No +15 volts: no modules recognized by the system
& no bottom display.
Action: replace power supply board.
4. No -12 volts: no lower display and/or no modules
recognized, no printing and no alarm functions.
Action: replace power supply board.
5. No +12 volts with battery back-up: no lights on front
panel.


