


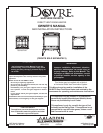
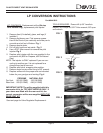

DV425TR DIRECT VENT ROOM HEATER
02/01 Page 6 250-5533
OVERVIEW OF INSTALLATION TO OPERATION
• Familiarize yourself with this Owner's Manual and the Safety Notices located in this manual, and posted on
the heater.
• Remove and unpack the following components:
Beneath the stove: 5 Logs, grill, grill cover*, and 4 cap speed nuts.
Shrink-wrapped to front of unit: Owner's Manual, mineral wool, lava rock, and flex line.
• Unbolt heater from pallet.
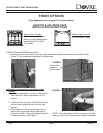
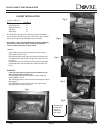
• Remove glass door by inserting fingers into the spring latches located on both the left and right sides at
top of glass. Pull towards you and separate latch from notch. Lift the glass out of the three notches at
its base and carefully set aside.
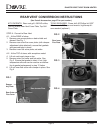
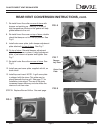
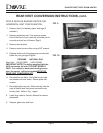
• Convert to horizontal venting if necessary for your installation plans. (Kit #844-8920)
• Convert to LP if necessary. (Kit #844-9010)
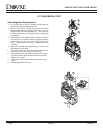
• Install Blower if purchased. (Kit #844-9030) NOTE: Blower will not fit on a stove fitted with the Hearth Leg Kit.
• Install Hearth Legs if necessary. See Parts and Accessories, page 57 for part numbers.
• Finalize your installation decisions and requirements:
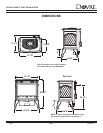
• Refer to Dimensions on page 7
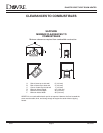
• Refer to Clearances to Combustibles on page 8
• Refer to Horizontal termination requirements on page 26
• Refer to Vertical termination requirements on page 35
• Refer to Vent Kits pertinent to your installation on page 20
• Contact your local building inspector for code requirements in your area.
• Run thermostat lines to TH & TPTH connectors on valve, if applicable, see page 17.
• Set unit in place and install venting per your installation requirements.
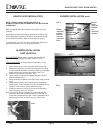
• Install logset, embers, mineral wool and lava rock. See instructions on page 14 of this manual.
• Connect the gas line. See page 44
• Plug in blower, if purchased.
• Leak test gas line to manual shut-off valve. See page 46
• NOTE: If you are using any accessories with gold it is IMPORTANT TO CLEAN THE GOLD FINISH, using
a glass cleaner and non-abrasive towel, prior
to the initial burn of the unit. This prevents fingerprint oils
from staining the gold. After heater has been burned, the gold finish will cure and fingerprint oils will no
longer cause staining.
• Follow Lighting Instructions, page 47, a copy of which is also attached to rear of heater, to light the heater.
• Re-attach door.
• Attach face (Quartet or Solitaire), see page 9
• Adjust gas control knob to "ON" (Following Lighting Instructions)
• Check flames. See diagram on page 46
• Adjust shutter position, if necessary. See page 48
• Set Thermostat or turn control panel switch to the "ON" position. See page 47 & 50.
• Familiarize yourself with the maintenance requirements of the stove. See pages 51-52.
• Familiarize yourself with the Troubleshooting section of this manual, pages 54.
*The use of the grill cover is optional. It can be placed beneath the top grill. See page 17 for installation instructions.
The use of the plate increases blower efciency and also hides the interior of unit from view.