FPI FP90 Wood Fireplace 31
OPERATION
OPERATING
INSTRUCTIONS
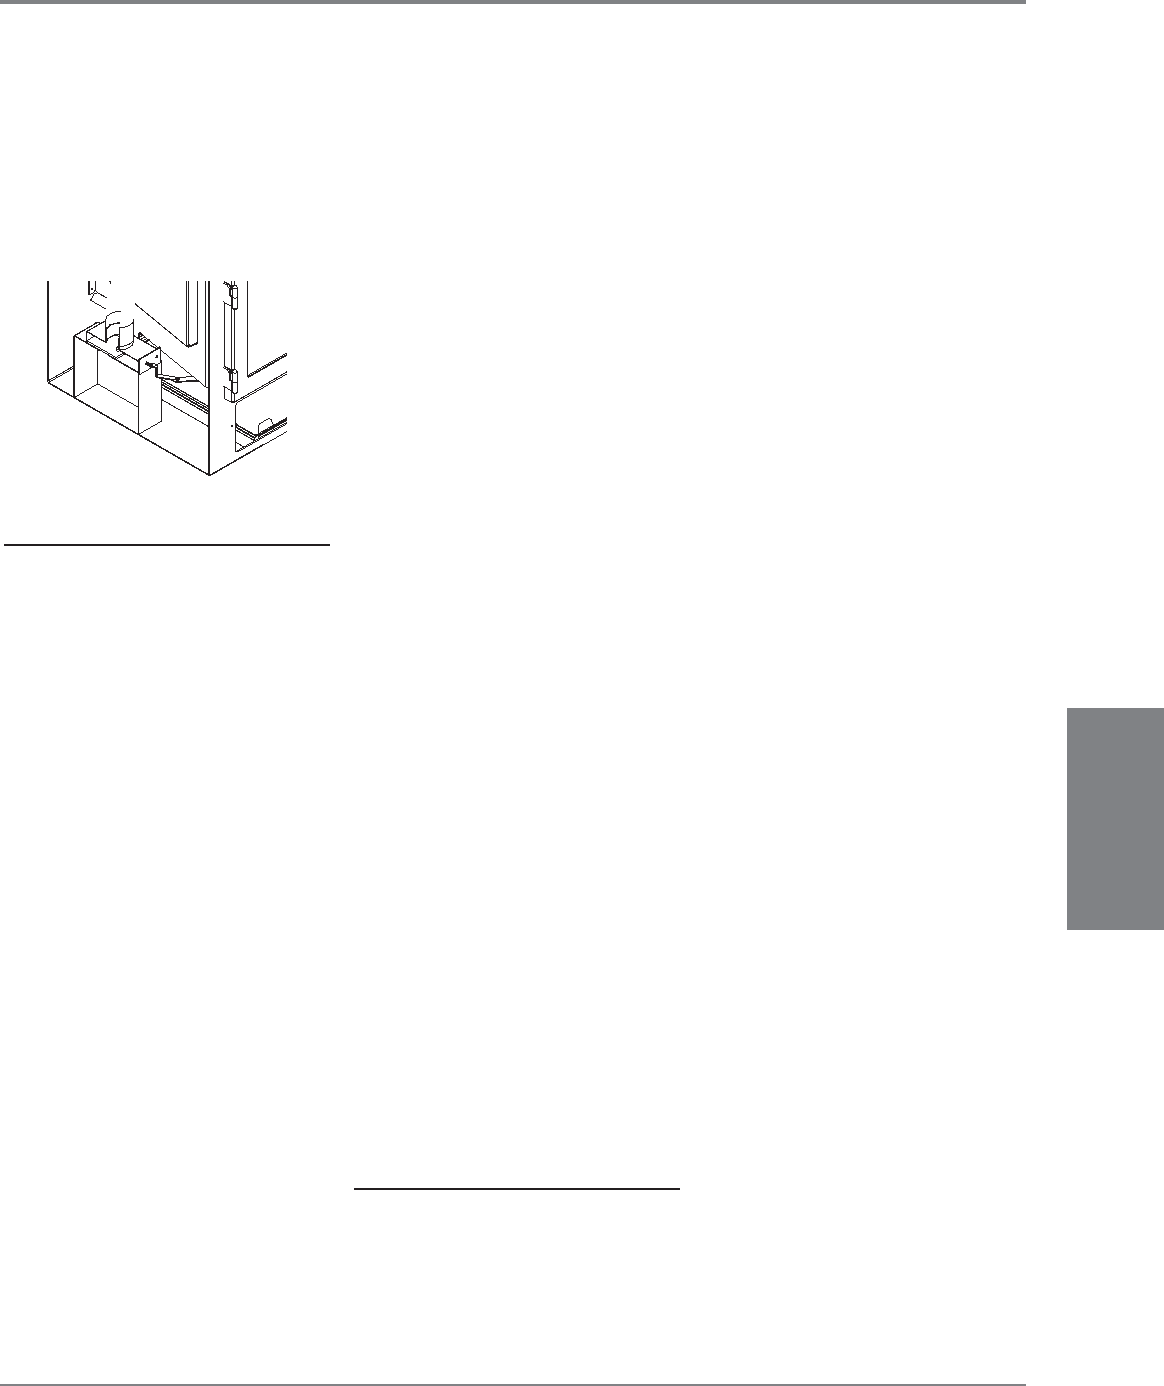
Draft Control
Both the primary and air wash drafts are
controlled by the control rod located behind
the bottom louver. To increase your draft, pull
to the right for open, to decrease push to the
left for closed.
WARNING: Do not build the fi re too close
to the glass.
FIRST FIRE
When your installation is completed and
inspected you are ready for your fi rst fi re.
1) Open draft control fully to the right to open.
2) Open fi rebox doors and build a small fi re
using paper and dry kindling. Secure doors
on the fi rebox and wait a few minutes for
a good updraft in the fl ue to establish the
fi re. Leaving the doors slightly open will help
your fi re start more rapidly and keep glass
clean. Add more kindling to establish a hot
coal bed before adding larger cordwood.
CAUTION: Fireplace equipped with
doors should be operated only with
doors fully open or doors fully closed.
If doors are left partly open, gas and
fl ame may be drawn out of the fi replace
opening, creating risks of both fi re and
smoke.
3) With the draft still in the fully open position
add two or three seasoned logs to your fi re.
Form a trench in the ash bed to allow air to
reach the rear of the fi rebox prior to closing
the doors.
4) During the fi rst few days it may be more
diffi cult to start the fi re. As you dry out
your fi rebrick, your draft will increase.
Due to the large quantity of fi rebrick, which
has a high water content, it may take many
fi res (20 or more) to thoroughly cure the
fi rebrick. The fi rebrick will become lighter
in colour as it dries out.
5) After about 15 to 20 minutes, when your
wood has begun to burn strongly, adjust
your draft control down to keep the fi re at a
moderate level.
OPERATING INSTRUCTIONS
WARNING: Never build a roaring fi re in
a cold stove. Always warm your stove
up slowly!
6) Once a bed of coals has been established, you
may adjust the draft control to a low setting to
operate the unit at its most effi cient mode.
7) For the fi rst few days, the stove will give
off an odour from the paint and oil burn off.
This is to be expected as the high tempera-
ture paint becomes seasoned. Windows
and/or doors should be left open to provide
adequate ventilation while this temporary
condition exists. Burning the stove at a very
high temperature the fi rst few times may
damage the paint. Burn fi res at a moderate
level the fi rst few days.
8) For those units installed at higher elevations
drafting problems may occur. Consult an
experienced dealer on methods of increasing
your draft. Follow the Flue Height Chart
(Table 2, page 15).
9) Some cracking and popping noises may be
experienced during the heating up process.
These noises will be minimal when your unit
reaches temperature.
10) Before opening your door to reload, open
draft fully for approximately 10 to 15 seconds
until fi re has been re-established. This will
minimize any smoking.
11) All fuel burning appliances consume oxygen
during operation. It is important that you
supply a source of fresh air to your unit
while burning. Air drawn from the interior of
the building will affect the performance of
gas or oil furnaces, and exhaust fans and
fan driven appliances. This may cause a
negative pressure in the house allowing
smoke to back into the home. The preferred
source of combustion air is from outside the
building. If possible, install the kit on the wind
loading side of the building not the leeward
or (negative pressure) side.
12) Green or wet wood is not recommended
for your unit since most of the energy will
be used to drive off the moisture instead of
heating your home. As well, green or wet
wood can result in dirty glass.
13) Always maintain clean glass. Clean glass
means a clean fl ue; if you are experiencing
dirty glass you may be operating a fi re that
is set too low. Ask your dealer for details.
14) Keep your spark arrester on the fl ue clean. It
should be checked and maintained regularly,
at least monthly.
SAFETY GUIDELINES
1) Never use gasoline, gasoline type lantern
fuels, kerosene, charcoal lighter fuel or
similar liquids to start or ‘freshen up’ a fi re
in your fi replace. Keep all such liquids well
away from the unit while in use.
2) Keep the doors closed during operation.
Doors can be fully open during operation
when optional fi re screen door is used.
Maintain all seals in good condition.
3) Do not burn large quantities of paper in your
fi replace.
4) If you have smoke detectors, prevent smoke
spillage as this may set off a false alarm.
5) Do not overfi re fi replace. If overfi ring takes
place, stop adding fuel and close the draft
control. Overfi ring can cause extensive
damage to your unit including warpage and
premature steel corrosion. Overfi ring will
void your warranty.
6) Do not permit creosote or soot build-up in the
chimney system. Check and clean chimney
at regular intervals.
7) The fi replace face can be very hot. You
may be seriously burned if you touch the
unit while in operation. Warn children of
the burn hazard.
8) Do not connect this unit to a chimney fl ue
serving another appliance.
9) Do not use grates or andirons or other
methods for supporting fuel. Burn directly
on the bricks.
10) When re-fuelling the fi re turn off blowers, open
draft prior to slowly opening the door. Failure
to do so could result in smoke spillage.
11) Your unit should burn dry, standard fi rewood
only. The use of “mill ends” is discouraged as
this fuel can easily overheat your fi replace.
Evidence of excessive overheating will void
your warranty. As well, a large portion of
sawmill waste is chemically treated lumber,
which is illegal to burn in many areas. Salt
drift wood, chemically treated fi re logs and
pressure treated woods, green or wet wood,
must not be burned in your woodstoves.
12) Do not store any fuel closer than 3 feet from
your unit.
13) Clearances from front of the fi replace to
combustible materials is 36" (i.e. from a
sofa, table, etc.).
14) IMPORTANT: Do not obstruct the convection
louvers at any time. Blocking air into this area will
cause excessively high fi rebox temperatures
and a potentially dangerous situation.
15) Creosote: Formation and need for removal.
When wood is burned slowly, it produces tar
and other organic vapors, which combine
with expelled moisture to form creosote. The
creosote vapors condense in the relatively
cool chimney fl ue of a slow-burning fi re. As
a result, creosote residue accumulates on
the fl ue lining. When ignited, this creosote
makes an extremely hot fi re. The chimney
shall be inspected at least twice a year during
the heating season to determine when a
creosote buildup has occurred. If creosote
has accumulated it shall be removed to
reduce the risk of a chimney fi re.


