


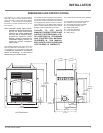


FPI FP90 Wood Fireplace14
INSTALLATION
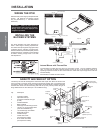
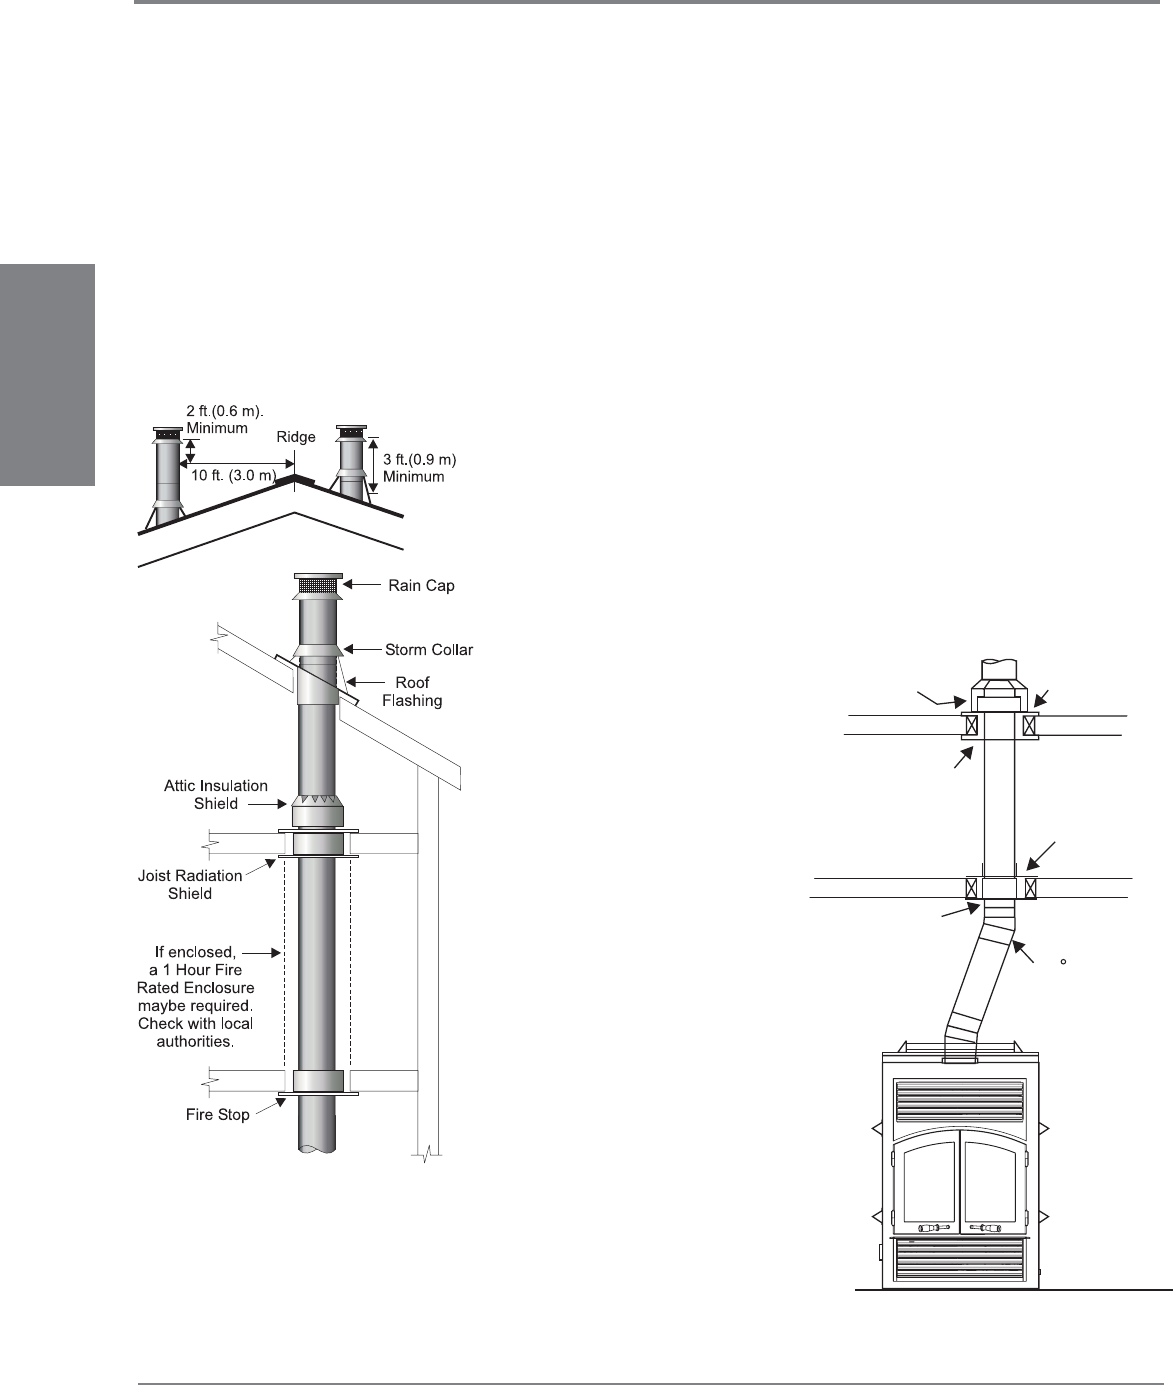
The performance of your unit is governed to a
very large extent by the chimney system. Too
short a chimney can produce poor drafting
which in turn can cause diffi cult start-up, dirty
glass, smoking out door and even reduced
heat output. Too tall a chimney may prompt
excessive draft which can result in very short
burn times and excessive heat output. The
chimney must extend at least 3ft. (0.9m)
above its point of penetration of the roof. It
must also be at least 2ft. (0.6m) higher than
any point of a roof, wall, or building within
10ft. (3m) of it.
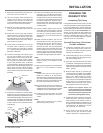
6) The raincap and storm collar should now
be fastened to the top of the chimney.
Install additional support(s) as indicated by
chimney manufacturer's instructions.
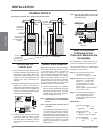
INSTALLATION
This may be the case if your unit smokes
on start-up with the door open, until the
unit heats up. To overcome this problem,
try closing an upstairs window and open a
nearby window to pressurize the house.
Note: the door can be open briefl y to start
your fi re but must be closed during regular
operation because the unit uses outside air
for combustion, not room air.
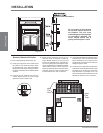
2) Multiple Terminations. When you install
more than one chimney in the same chase
or within the same general area, we suggest
that their terminations be separated by at
least 16" (410mm) horizontally and 18"
(460mm) vertically. This separation is to
prevent smoke migrating from one chimney
to another.
3) Chimney Maintenance. It is important that
you inspect your chimney regularly and keep
it clean. If you note more than 1/8" (3mm)
creosote build up in your chimney have it
cleaned as per instructions of the chimney
manufacturer.
4) Chimney Fires. If you do have a chimney
fi re, refer to the following:
a. Close the fireplace doors and air
damper.
b. Clear family members out of the area.
c. Call the fi re department.
d. Use a dry chemical fi re extinguisher,
baking soda or sand to control the fi re.
Do not use water, it will create a steam
explosion.
e. Check for hot embers around the unit
and outside your home; extinguish.
f. Do not use your fi replace again until it has
been inspected by a qualifi ed person.
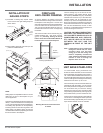
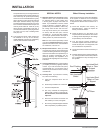
Offset Chimney Installation
Chimney elbows may be used in the installation
of the system. A maximum of four 30 degree
elbows are allowed. Offset angles of 30 and
15 degrees are allowed with a maximum of 2
offsets.
1) Install the fireplace and chimney as
described above. When you require an
elbow, proceed as follows:
2) Install the elbow. Turn the elbow to the
required direction and fasten it with screws
or locking bands depending on fl ue design
as specifi ed by the manufacturer.
3) Turn the chimney lengths clockwise to
lock them together, then secure them with
screws at each joint or locking bands; see
the manufacturers requirements.
4) Use another elbow to return the chimney to
vertical.
5) Install an offset support in the joist at the ceil-
ing. Re-support above each offset; elbows
are not designed to carry the weight of the
fl ue system.
SPECIAL NOTES:
1) Negative Pressure In The House. When
there is no fi re in your unit there still should
be suffi cient draft to draw smoke from
a burning piece of paper held under the
baffl e. If your installation is correct, smoke
will go up the fl ue. If however, there is a
problem with your installation, cold air may
be coming down the fl ue into the room.
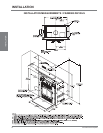
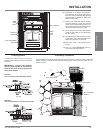
30 Elbow
Joist Radiation
Shield
Attic Insulation
Shield
Use Listed Roof,
Offset, or Floor
Support
Roof Flashing
Use Listed Roof,
Offset, or Floor
Support