


FPI FP90 Wood Fireplace26
INSTALLATION
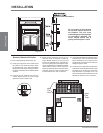
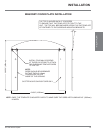
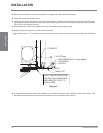
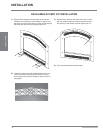
2) Make sure the insulation under the top stand-off is up against the back of the top nailing strip.
3) Fasten the nailing strips to the framing.
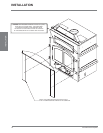
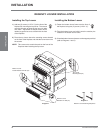
4) Install both the left and right side trim (see labels for orientation). The side trims have slotted holes to allow the sides to be
adjusted once installed to ensure the top corners will fi t tight. Fasten the trim to the nailing strips with the screws provided,
(#8 x 9/16”) in the center of each slot.
5) Attach the top trim. Center it and attach it to the top nailing strip with self drilling screws.
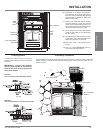
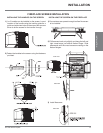
8) It is recommended that the joints of the sheathing run horizontal from the top corners of the unit rather than vertical. This
will reduce the heat exposure to the joints and reduce the chance of the fi nish from cracking.
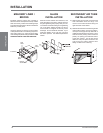
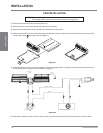
INSTALL TRIM ON NAILING STRIP
THEN TUCK NON-COMBUSTIBLE
SHEATHING INTO POCKET TO
CONCEAL EDGE.
FINISH COAT
NON-COMBUSTIBLE (i.e. Cement Board)
2x4 FRAMING
DRYWALL
STANDOFF
11.000" (279mm)
Diagram 2
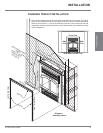
6) Adjust the sides to minimize the overlap at the top corners.
7) The sheathing (up to ½” [13 mm] thick) can then be tucked into the channel of the trim to hide the cut edge (refer to Diagram
2).
INSTALLATION