


14.0 Changing Components
37
© Baxi Heating UK Ltd 2007
IMPORTANT: When changing components ensure
that both the gas and electrical supplies to the
boiler are isolated before any work is started.
When the new component has been fitted turn the
selector switch fully anticlockwise against the spring
pressure to the ‘Reset’ position and hold for 2
seconds to reset the boiler before recommissioning.
See Section 13.1 “Annual Servicing” for removal of case
panel, door etc.
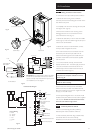
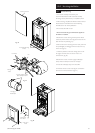
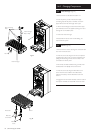
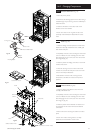
14.1 Fan (Figs. 62 & 63)
1. Note the positions of the two sensing tubes on the
outlet elbow and three wires on the fan motor and
remove them.
2. Slacken the screws on the fan spigot outlet pipe
clamps. Ease the clamps inwards over the pipe.
3. Draw the outlet pipe away from the boiler.
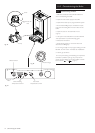
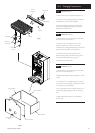
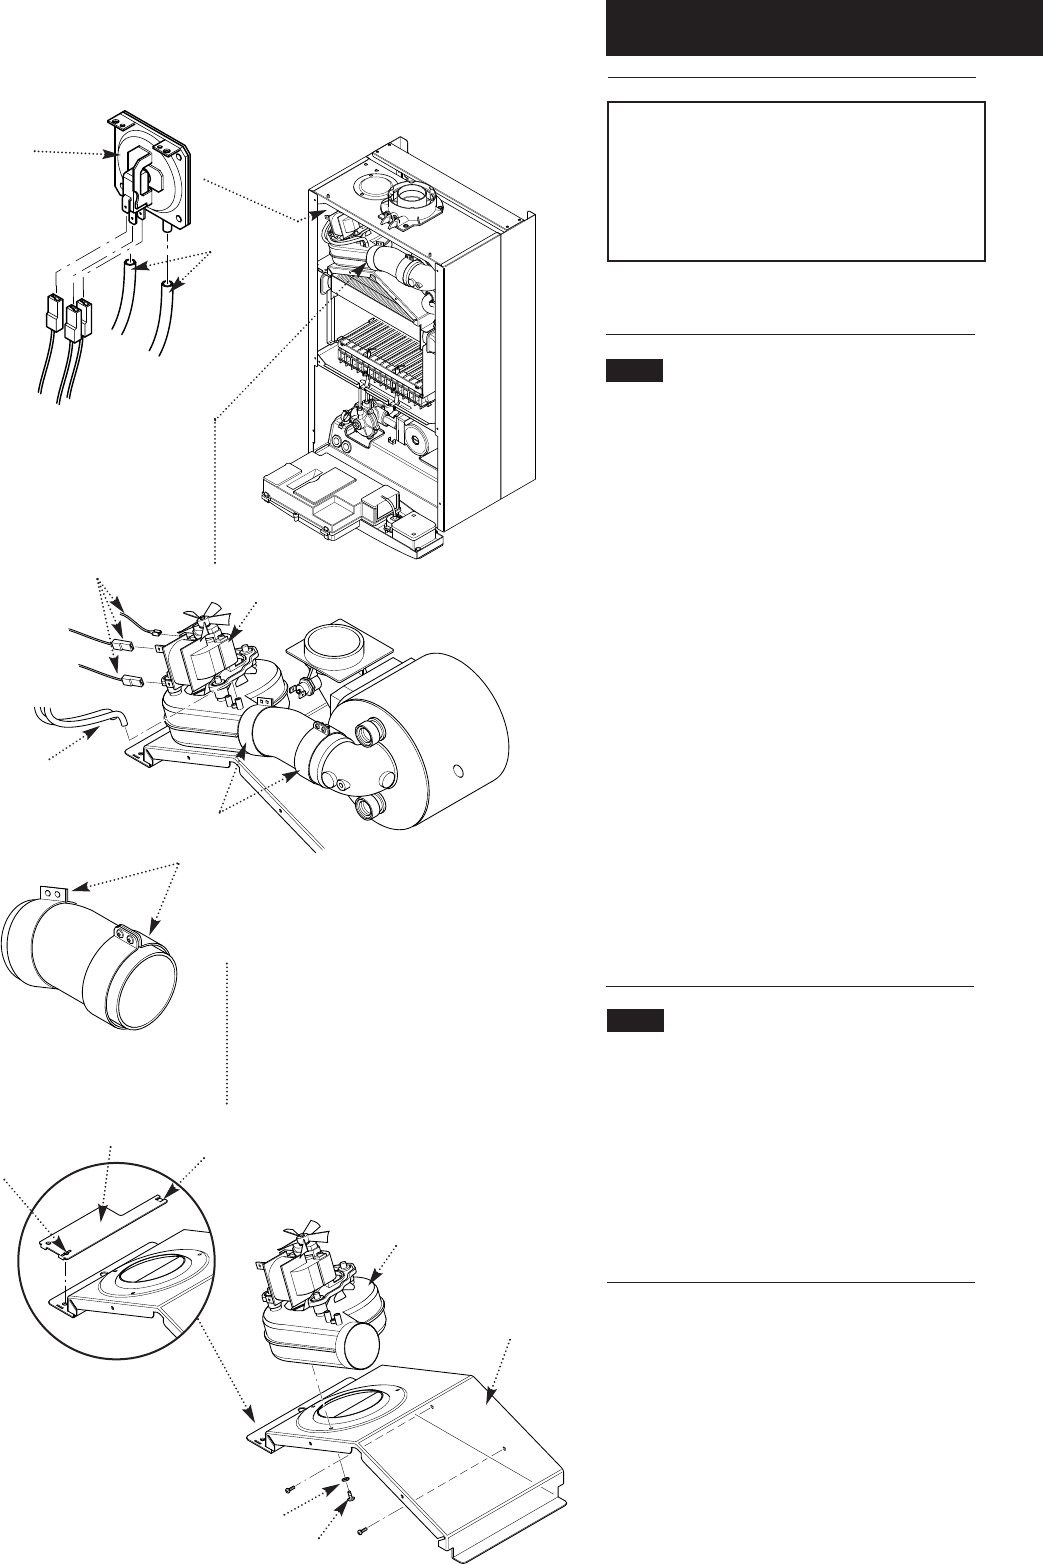
4. Remove the four screws securing the combustion box
door and remove the door.
5. Ease the front edge of the left hand baffle upwards,
disengaging the spring clip. Disengage the tab on the
baffle from the slot in the fan hood.
6. Undo the screws securing the fan hood to the
appliance back panel, and draw the fan and hood
assembly forwards.
7. Remove the screws and spring washers securing the
fan to the hood.
8. Fit the new fan to the hood using the screws and
spring washers previously removed.
9. Reassemble in reverse order of dismantling.
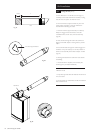
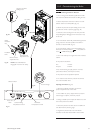
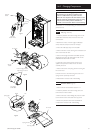
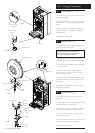
14.2 Pressure Switch (Fig. 61)
1. Remove the fan as described in section 14.1.
2. Note the positions of the two sensing tubes and
three wires and remove them.
3. Remove the two screws holding the pressure switch
to the bracket on the combustion box top panel.
4. Fit the new pressure switch and reassemble all
components in reverse order of dismantling.
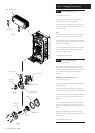
Fan Hood
Spring Washer
Securing Screw
Pressure
Switch
Sensing
Tubes
Pressure
Switch Wires
Fig. 61
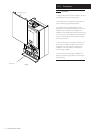
Fan Wires
Fan
Sensing
Tubes
Ease Fan Spigot Outlet
Pipe Clamps Inwards
Fig. 62
Fan Spigot
Outlet Pipe
Spring Clip
Baffle
Tab
Fan
Fig. 63