


14 Pelco Manual C557M (10/99)
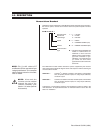
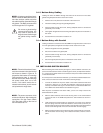
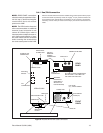
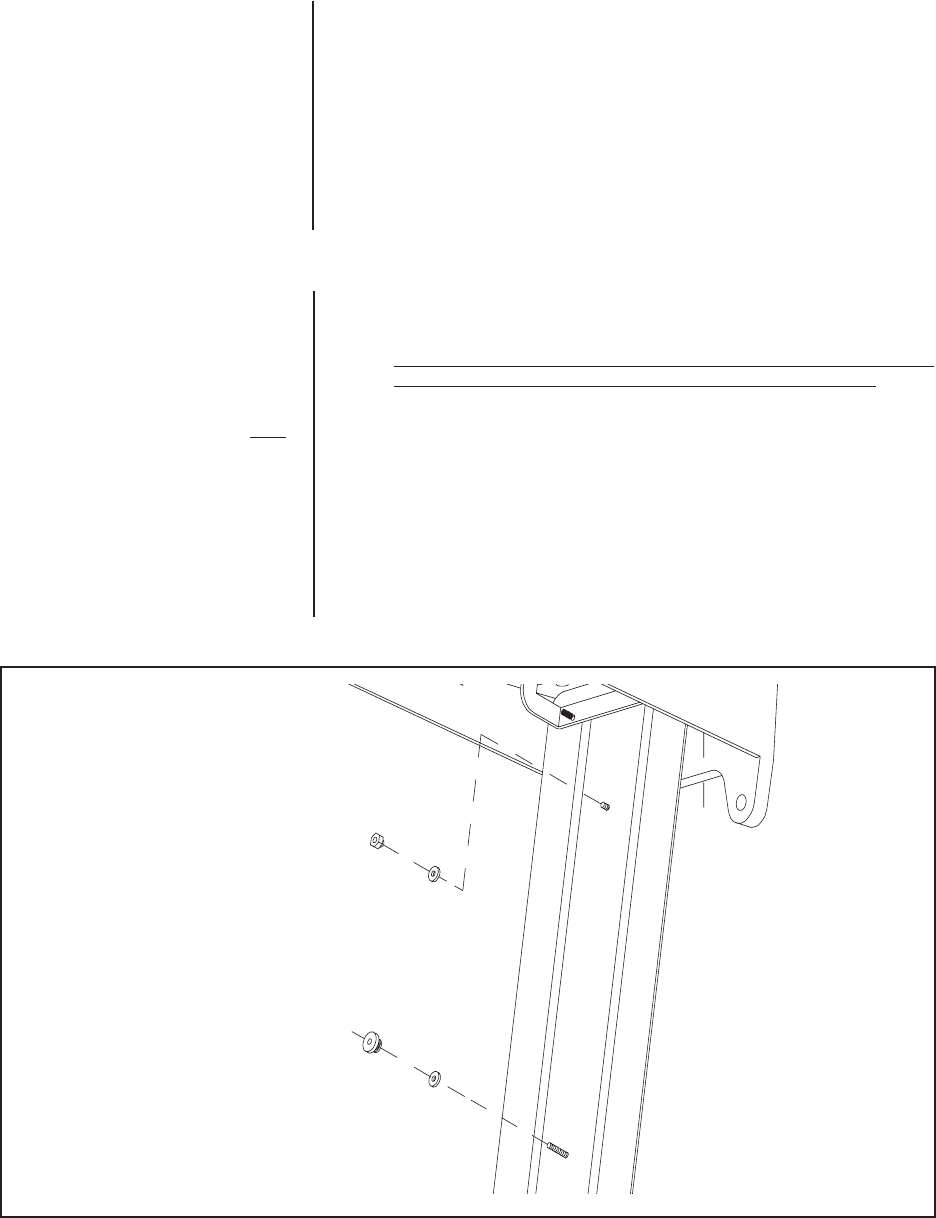
Figure 7. Receiver Box Mounting Hardware
KNURLED THUMBNUT
5/16 HEX ANCHOR
NYLON WASHER
STAINLESS STEEL WASHER
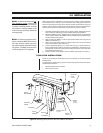
3.3 INSTALLING RECEIVER MOUNTING HARDWARE
The receiver box mounts to the inside of the mount arm access panel by setting
over an anchor stud and thumbnut. When installing the anchor, thumbnut and ap-
propriate washers to the studs on the access panel, make sure the hardware is
positioned correctly as shown in Figure 7.
1. Install the receiver mounting hardware as shown in Figure 7. Using a supplied
flat washer, tighten the 5/16 Hex anchor on the smaller stud located near the
inside center of the access panel.
2. Install the supplied nylon washer on the longer stud (located toward the front
of the access panel) and turn the supplied knurled thumbnut until the threads
of the stud are exposed. The receiver is now ready to be installed.
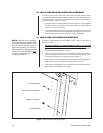
3.4 INSTALLING THE RECEIVER/DRIVER BOX
To install the receiver/driver box into the LWM41 Legacy
®
wall mount arm, perform
the following steps.
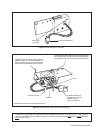
1.
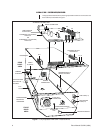
BEFORE MOUNTING THE RECEIVER/DRIVER BOX TO THE ACCESS
PANEL ON THE LWM, CONNECT ALL APPLICABLE CABLES
(Video,
Alarms, Aux) and the Switch Bracket power connector to the rear of the LRD41
receiver/driver box (see Figures 2, 6 and 7).
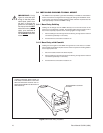
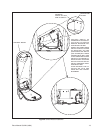
2. Mount the receiver/driver box to the access panel by simply aligning the two
(2) mounting holes on the bottom of the receiver/driver box with the anchor
and thumbnut hardware on the access panel (see Figure 7).
3. After aligning the mounting holes/studs, simply slide the receiver/driver box
down over the anchor and thumbnut and attach the box securely.
4. Tighten the locking thumbnut on the forward-most stud to secure the box into
place. Make sure the thumbnut is very tight.
NOTE:
Once the box is mounted,
you cannot see the rear RECEIVER/
DRIVER connectors; however, once
you are familiar with the connector
types and locations, you should be
able to attach the connectors located
on the rear of the RECEIVER, after
the box is mounted (steps 2, 3, and
4) rather than before.