


C3447M-B (8/09) 9
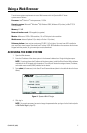
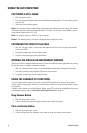
CHANGING THE VIDEO FORMAT
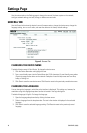
This feature allows you to switch between MJPEG and MPEG-4 video formats. If you are using Firefox, this
feature is not available and you will not see the Video Format drop-down box. You must use Internet
Explorer (version 5.5 or later) to use the MPEG-4 video format.
1. Open the Video Format drop-down box by clicking the down arrow.
2. Select a video format from the drop-down box.
NOTE: When setting the video format to MPEG-4 for the first time, you will need to install
ActiveX
®
Control. Follow the instructions displayed on your screen.
3. The video in the live video pane is updated. The selected image rate is now listed in the Image Rate
box, and either the Image Rate or the Quality drop-down box is displayed on the left.
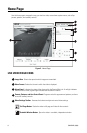
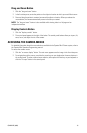
Drag Camera Button: Controls the pan and tilt functions by clicking in the video pane and
dragging the mouse.
Click and Center Button: Centers the camera by clicking the mouse in the video pane.
Drag and Zoom Button: Zooms in on a particular area by clicking and dragging the mouse.
Capture Button: Capture the image displayed in the video pane.
On-Screen Display Button: Displays the dome systems menu in the video pane.
Camera Configuration Menu Button: Displays the camera configuration menu.
Listen Button: Allows you to adjust the volume and listen to the audio that was sent to your
PC from a microphone attached to the dome.
Talk Button: Transmits audio from your PC microphone to speakers connected to the dome.
This button can be used in two modes: push-to-talk and hands-free (refer to Transmitting
Audio on page 15).
Display Controls Button: Displays the control panel.
Control Panel: Accesses the pan, tilt, zoom, focus, and brightness controls.
Camera Configuration Menu: Adjusts brightness, saturation, hue, and contrast.
Live Video Pane: Displays live video in the pane on the left side of the page.