


Heat & Glo • ESC-42ST • 2146-900 Rev. o • 5/12 47
14
14
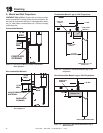
Appliance Setup
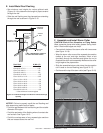
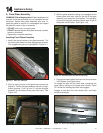
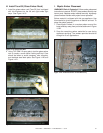
Figure 14.1 Glass Top Tab Detail.
A. Fixed Glass Assembly
WARNING! Risk of Asphyxiation! Glass installation and
removal should be performed only by a qualifi ed service
technician. Handle fi xed glass assembly with care. In-
spect the gasket to ensure it is undamaged and inspect
the glass for cracks, chips or scratches.
• DO NOT strike, slam or scratch glass.
• DO NOT operate fi replace with glass removed, cracked,
broken or scratched.
• Replace as a complete assembly.
Installing Fixed Glass Assembly
1. Identify the top and bottom of the glass assembly. The
top of the glass frame has three engagement grooves.
The engagement groove is highlighted in Figure 14.1.
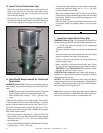
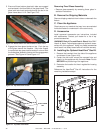
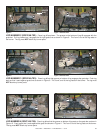
2. Start by tipping the top of the glass frame toward the
fi replace. Center the glass between the left and right
fi rebox supports. Push “up” and “in” and set the glass
assembly on the bottom three glass latch tabs. See
Figure 14.2 .
Figure 14. 2 Initial Positioning of Frame into Opening.
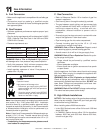
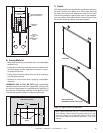
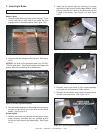
3. With the glass assembly resting (not engaged) on the
bottom glass latch tabs, allow for the top of the glass
assembly to tip away from the fi replace. Lift up slightly
and ensure the glass assembly bottom seal is tight to
the bottom of the fi rebox. See Figure 14.3.
Figure 14.3 Second Position of Frame into Opening.
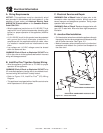
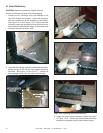
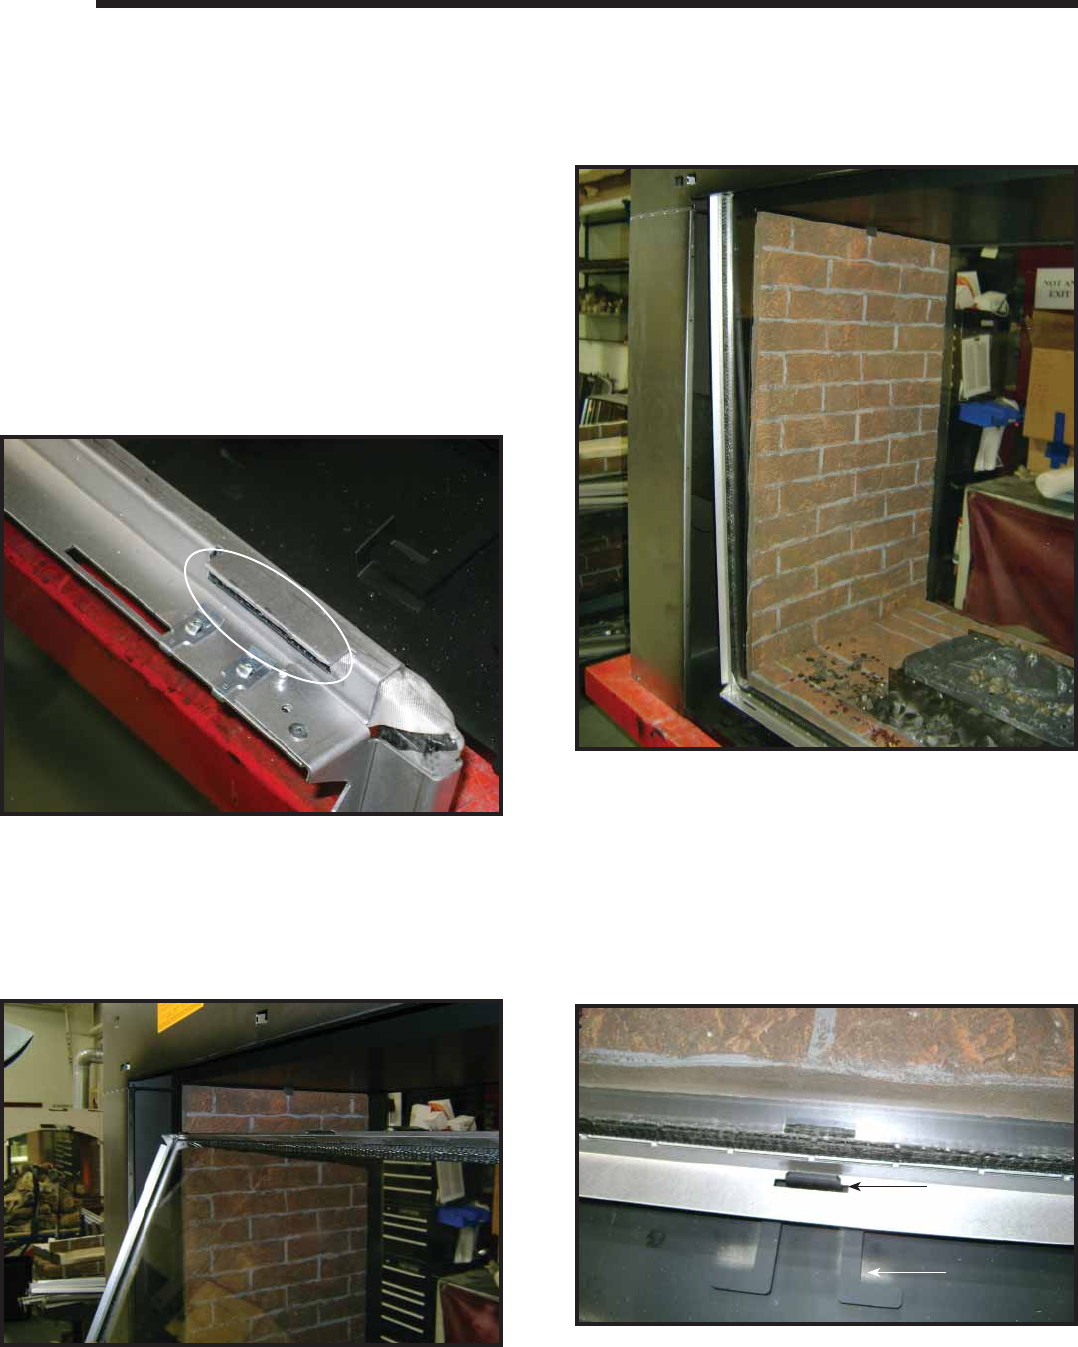
4. Engage the bottom glass latch tabs into the three slots
in the bottom of the glass frame.
To engage the tabs into the frame slots, manipulate the
glass clips by pulling out the glass latch handles. Figure
14.3 shows the middle glass latch tab engaged.
Engage an end latch fi rst, then middle latch, and fi nally
the last end latches.
Figure 14.4 Glass Latch Engaged into Frame Latch.
TAB
HANDLE