Activating and Deactivating Links
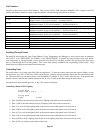
A special UPB command called “Link On” (activate) is used to command all of the devices that have the same Link to go to their
preset light levels at their preset fade rates.
For instance, in our “All On” and “All Off” example, when “Link 50 On” is transmitted by Omni IIe, each UPB Wall Switch with
Link 50 will go to 100% to achieve the “All On” effect. Other “Link On” (activate) commands may be transmitted that cause
Wall Switch ‘1’ to go to a desired level at a specified fade rate and Wall Switch ‘2’ to go to a different level at a different fade
rate. The ability to send more than one device to its preset level at a preset fade rate with a single command is known as
activating a Link. Likewise, pressing a pushbutton on a 6-Button or 8-Button Keypad can send the “Link On” (activate)
command.
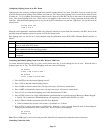
A special UPB command called “Link Off” (deactivate) is used to command all of the devices that have the same Link to go to
0% at their preset fade rate. For instance, in our “All On” and “All Off” example, when “Link 50 Off” is transmitted by Omni IIe,
each Wall Switch with Link 50 will go to 0% to achieve the “All Off” effect.
Setting a Link (Lighting Scenes)
Lighting scenes are created by pre-configuring light levels and fade rates in one or more UPB devices that get “activated” and
“deactivated” by a Link command or button press on a 6-Button or 8-Button Keypad.
Each UPB Wall Switch can hold up to sixteen different preset light levels (0% - 100%) that can be “linked” to the Omni IIe
controller or to a pushbutton on a 6-Button or 8-Button Keypad.
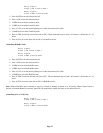
Omni IIe can “set” each of the 250 possible Links. The “Link Set” command is used to set up lighting scenes for a lighting group.
To set a “lighting scene” using Omni IIe, adjust all of the UPB Wall Switches with the pre-configured Link to the desired lighting
levels. The desired lighting levels may be set manually at the switch, or by a command issued from Omni IIe. After the desired
lighting levels are set, the “Link Set” command can be transmitted by Omni IIe to save the new “light levels” for each of the
devices pre-configured with the specified Link.
Executing Phantom Buttons
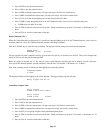
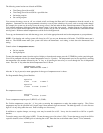
Omni IIe can turn on and turn off each of the 17 possible Phantom Buttons. Phantom Buttons must be pre-programmed into the
RS-232 interface or Chronos. Phantom Button 16 is always assigned to “All On” (if the Phantom button is turned on or off) and
Phantom Button 17 is always assigned to “All Off” (if the Phantom button is turned on or off).
To issue Phantom Button commands, from the top-level display or from the main menu, press the 4 (ALL) key on the console
keypad, and then press the 4 (PHANTOM) key. You are prompted to enter a Phantom Button (1-17).
ENTER BUTTON:
1-17
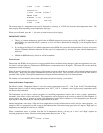
Enter the Phantom Button number (1-17) followed be the ' # ' key.
PHANTOM BUTTON 1
0=OFF 1=ON
When a Phantom Button is turned on, all of the devices that are pre-programmed with that Phantom Button will go to their preset
light levels. When a Phantom Button is turned off, all of the devices that are pre-programmed with that Phantom button will turn
off.
Executing CentraLite Scenes
Omni IIe can turn on and turn off each of the 255 possible CentraLite Scenes. To issue CentraLite Scenes commands, from the
top level display or from the main menu, press the 4 (ALL) key on the console keypad, and then press the 5 (CENLIT) key. You
are prompted to enter a Scene (1-255).
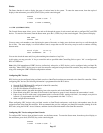
ENTER SCENE:
1-255
Page 28


