Configuring Lighting Scenes in an HLC Room
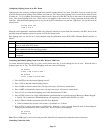
Lighting scenes are created by configuring light levels for HLC lighting devices in a room. Each HLC device in a room can store
up to four different preset lighting scenes (Scenes A-D) and one “On” Scene (preset lighting levels for each device when the room
is turned on). To set a lighting scene using the Omni console, adjust all of the HLC devices in the room to the desired lighting
levels. The desired lighting levels (0% - 100%) may be set manually at the switch, or by issuing commands from the Omni IIe
controller. After the desired lighting levels are set, use the 6 (SET) command to save the new “light levels” for each device in the
selected room.
Living Room SET
1=ON 2-5=A-D
When the scene command is transmitted (either using a Room Controller or by the Omni IIe controller), each HLC device in the
specified room will brighten or fade to its preset level for the selected scene.
Each lighting scene can also be set or easily changed using the pushbuttons on the HAI UPB™ 6-Button Room Controller, as
follows:
Step Operation
1 Press the desired pushbutton on the HAI UPB™ 6-Button Room Controller to activate the current scene (preset lighting
level) in each of the HLC devices.
2 Use the local Decora-style rocker switch on each UPB™ Wall Switch Dimmer(s) to set the desired lighting level(s) or
issue commands from the Omni IIe controller.
3 Press the pushbutton on the HAI UPB™ 6-Button Room Controller five (5) times quickly.
4 Each UPB™ Wall Switch Dimmer will flash its lighting load one time to indicate that the new level has been
configured.
Controlling Individual Lighting Loads in an HLC Room or UPB Units
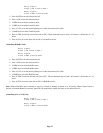
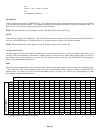
To control individual lighting loads in a room, use the down arrow key to scroll through the list of units. When the unit is
displayed, press the ' # ' key. For HLC/UPB lighting loads, the console will display:
LR Sconce
0=OFF 1=ON 2=DIM 3=BRT
↓
LR Sconce
4=LVL 6=LED 9=TIM #=STA
↑
¾ Press 0 (OFF) to turn the selected lighting load off .
¾ Press 1 (ON) to turn the selected lighting load on.
¾ Press 2 (DIM) to dim the selected unit (1-9 steps, each step is 10% from its current level).
¾ Press 3 (BRT) to brighten the selected unit (1-9 steps, each step is 10% from its current level).
¾ Press 4 (LVL) to set the desired lighting level of the selected unit (0%-100%).
¾ Press 6 (LED) to turn on or off the LED behind the specified button on a general purpose 8-Button or 6-Button Keypad.
• Specify 1-8 to control the LED behind buttons 1-8 respectively, and then select 0 (OFF) or 1 (ON).
¾ Press 9 (TIM) to time the selected unit (On, Off, Dim, Brighten).
• Timed commands may be from 1-99 seconds, 1-99 minutes or 1-18 hours.
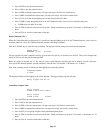
¾ Press # (STA) to see the exact status of a UPB device. When the ' # ' key is pressed, Omni IIe sends a “Status Request”
message to the selected device for its current state. The exact state is then displayed.
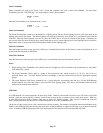
LR Sconce
STATUS 67%
Note: When a UPB signal is received over the powerline, Omni IIe will automatically update the status of the device.
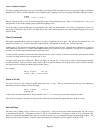
Controlling CentraLite Units
Page 21


