www.desatech.com
111245-01C26
D. Do not use this appliance if any part has been
under water. Immediately call a qualified
service technician to inspect the appliance and
to replace any part of the control system and
any gas control which has been under water.
NORMAL LIGHTING
INSTRUCTIONS
-
-
1. STOP! Read the safety information on
page 25.
2. Make sure equipment shutoff valve is
fully open.
3. Wait ve (5) minutes to clear out any gas.
Smell for gas around heater and near oor. If
you smell gas, STOP! Follow “B” on page 25.
If you don’t smell gas, go to the next step.
1. Set manual ignition bypass switch on the
control panel to the OFF position (auto-
matic ignition position).
2. Press ON/OFF button. Hold for 6 seconds.
Gas valve will open and electronic ignition
will begin sparking to light pilot. LED will
light. Note: You may be running this heater
for the rst time after connecting to gas sup-
ply or at the start of your heating season.
If so, the ON/OFF button may need to be
pressed again. This will allow air to bleed
from gas system. If several attempts to light
pilot fail, contact a qualied service person
or gas supplier for repairs. Until repairs
are made, light and operate manually (see
Manual Lighting Instructions for Electric
Power Outage, page 27).
OPERATING FIREPLACE
Continued
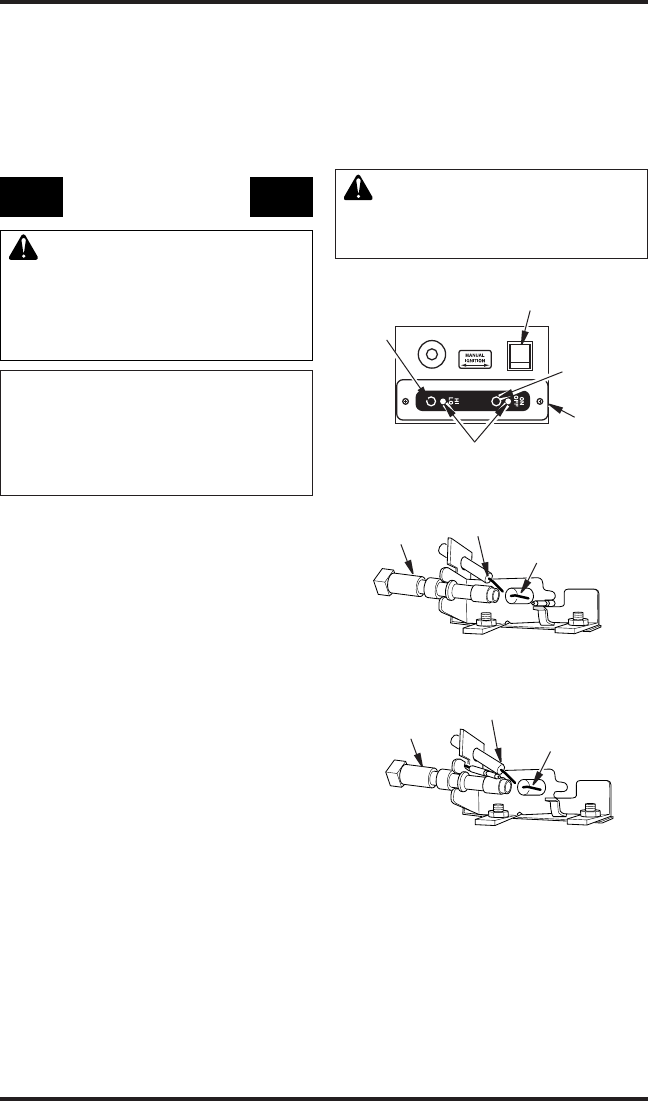
Figure 47 - Control Locations
Manual Ignition Bypass Switch
(Up is for Remote Control)
ON/OFF
Button
HI/LO
Button
Wall
Switch
Assembly
LED
Automatic
Ignitor
Electrode
Figure 48 - Pilot (Natural Gas)
Manual Ignitor
Electrode
Figure 49 - Pilot (Propane/LP Gas)
Automatic
Ignitor
Electrode
Pilot
Burner
Manual Ignitor
Electrode
Pilot
Burner
Control
1. Set manual ignition bypass switch on
control panel to OFF position (automatic
ignition position).
2. Wait ve (5) minutes to clear out any gas.
Smell for gas around heater and near oor.
If you smell gas, STOP! Follow “B” on page
25, column 2. If you don’t smell gas, go to
the next step.
3. When pilot ame is lit, the thermocouple is
heated by the ame. When thermocouple
becomes hot (5 to 15 seconds), main burner
will automatically light on high ame.
4. To lower ame, push HI/LO button on wall
switch once. Note: This replace does not
have a pilot-only mode.
CAUTION: Do not try to ad-


