


www.desatech.com
111245-01C 21
8. Route electrical cord(s) through access holes
in either side of replace with bushing. Plug
electrical cord(s) into electrical outlet.
9. Check all gas connections for leaks. See
Checking Gas Connections, page 19.
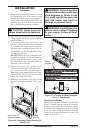
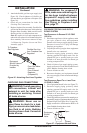
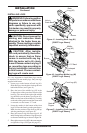
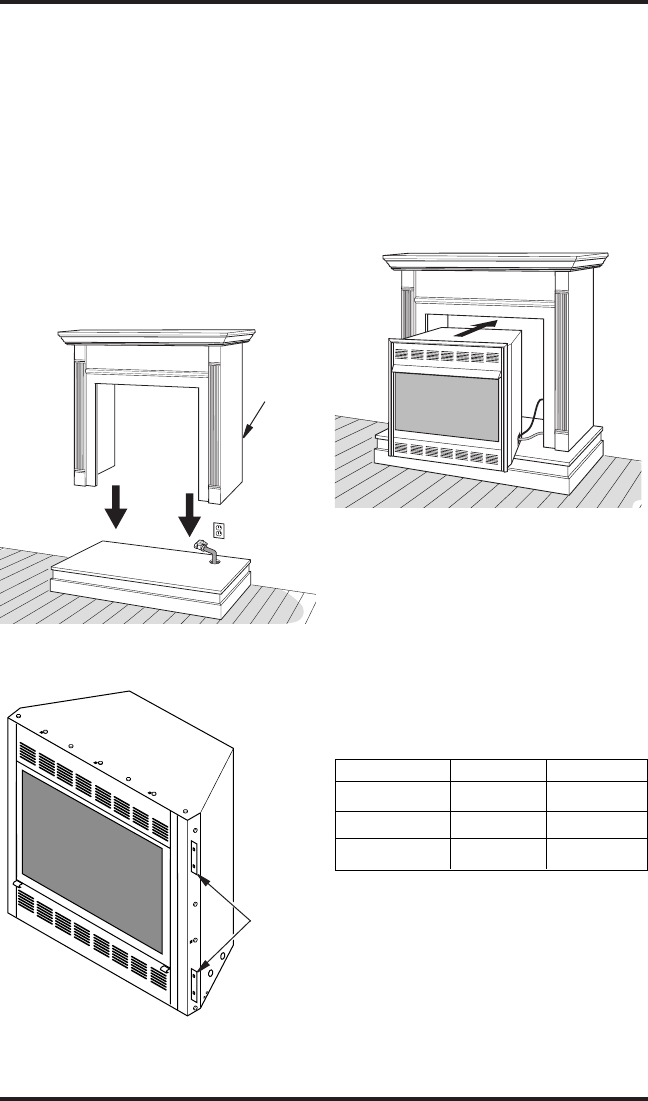
10. Break off nailing flanges (see Figure 32)
with hammer or pliers if applicable and place
replace inside mantel opening. See mantel
instruction sheet for specic installation in-
structions. Be careful not to scratch or damage
hearth base or cabinet mantel.
INSTALLATION
Continued
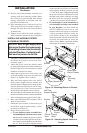
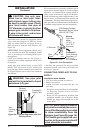
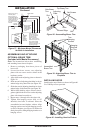
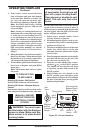
Figure 31 - Installing Cabinet Mantel
Cabinet
Mantel
Figure 32 - Location of Nailing Flanges
Nailing
Flanges
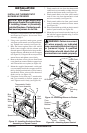
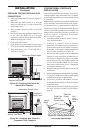
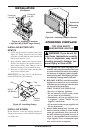
11. Place metal trim on shoulder screws located
on the side and top of the replace (see Assem-
bling Perimeter Trim). Firmly snap trim over
shoulder screws. Align replace in mantel
assembly so the trim overlaps mantel evenly
on all three sides.
12. Lower bottom louver door. Use 3" wood screws
provided with mantel accessory to attach re-
place to base (see mantel instruction sheet).
13. Check all gas connections for leaks. See
Checking Gas Connections, page 19.
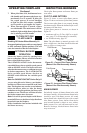
Figure 33 - Inserting Fireplace Into
Cabinet Mantel
INSTALLATION
Built-in installation of this fireplace involves
installing replace into a framed-in enclosure.
This makes the front of replace ush with wall.
If installing a mantel above the replace, you must
follow the clearances shown in Figure 37, page
23. Follow the instructions below to install the
replace in this manner.
Actual Framing
Height 32
3
/
8
" 33"
Front Width 34
5
/
16
" 35
1
/
2
"
Depth 16
11
/
16
" 17
3
/
4
"
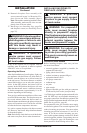
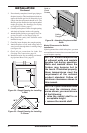
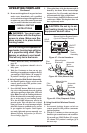
1. Frame in rough opening. Use dimensions
shown in Figure 34, page 22 for the rough
opening. If installing in a corner, use dimen-
sions shown in Figure 35, page 22 for the
rough opening. The height is 33" which is the
same as the wall opening above.
2. Install and properly ground GA3555, three-
prong 120 volt electrical outlet, in replace.
Follow instructions included in kit (see Ac-
cessories, page 40).