Version 1.0b
29
TROUBLESHOOTING INSTRUCTIONS (cont’d)
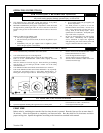
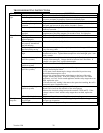
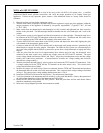
PROBLEM POSSIBLE CAUSE SOLUTION
Gas pressure to appliance is
low.
Refer to Item #2 in the Set-Up Guide.
Pilot not lit. Light pilot and wait for thermopile to heat up sufficiently to power the main
operator. If pilot fails to light, or hold, refer to above sections.
Control knob not in ON
position.
Rotate OFF/PILOT/ON control knob to the ON position.
Thermostat not in the ON
position.
Turn thermostat to ON, and adjust temperature control to call for heat.
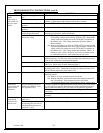
Thermopile output voltage not
within design parameters.
Refer to Item #7 in the Set-Up Guide. If unable to meet minimum
thermopile requirements, replace thermopile.
Defective thermostat or
thermostat wiring.
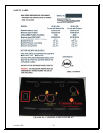
(A) With the pilot adjusted properly, (Refer to Item #7 in the Set-Up
Guide) place a jumper wire between TPTH and TH. Measure the
voltage (millivolt) reading across the TPTH and TP terminals on
the control valve. This voltage should not fall below 300mV.
Record reading.
(B) Remove the jumper wire from the TPTH and TH connections and
reconnect the thermostat wires to the same terminals. Measure the
voltage (millivolt) reading across the TPTH and TP terminals on
the control valve. This voltage should not fall below 150mV. If
reading is below 150mV the source of excessive resistance must
be located and removed. (bad connections or bad wires)
Defective wall switch. Repeat the troubleshooting items covered under “Defective thermostat or
thermostat wiring,” Use the exact same procedures but substitute the word
“wall switch” where the word thermostat appears.
Excessive wire resistance. Make certain that all mV connections are made using wire of the proper
AWG size. (Refer to the Trouble-Shooting Guide.)
No gas to main
burner.
Thermostat or
wall switch will
not cycle main
burner
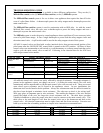
Valve wired wrong. Thermopile leads must be connected to the TPTH and the TP connection of
the main control valve. Thermostat wires must be connected to the TPTH
and the TH terminals of the main control valve.
Main operator coil defective. Verify the electrical resistance of the main control valve operator coil in the
following manner:
(A) Remove all wires from the control valve head.
(B) With an ohmmeter, measure the electrical resistance between TP
and TH terminals. If the resistance does not fall within
specifications shown in the Troubleshooting Guide, replace valve.
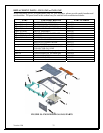
Check the appliances installation instructions provided by the manufacturer
to verify that the proper flue dimensions are within specification and that
proper combustion make-up air is provided for the particular appliance.
Verify that the appliance’s flue ins installed according to manufacturer’s
instructions.
Main burner
cycles on and off.
System not on
thermostat.
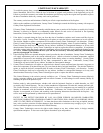
Flue gas spillage present in
combustion chamber. (Non-
DV appliances only)
Check the flue or the combustion air intake for blockage. Clean as
necessary.
Debris or damage to seat of
main valve.
Replace the control valve assembly. Main burner lights
in the PILOT
position of the
control valve.
Main seat blown out because
of exposing LPG gas valve to
unregulated line pressure in
excess of 15 psig.
Replace the control valve assembly.


