


10
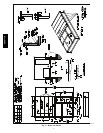
Economizer Hood and Two--Position Hood —
NOTE: If the power exhaust accessory is to be installed
on the unit, the hood shipped with the unit will not be
used and must be discarded. Save the aluminum filter for
use in the power exhaust hood assembly.
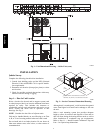
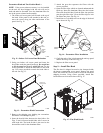
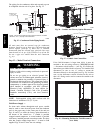
1. The indoor coil access panel will be used as the top of
the hood. If the panel is still attached to the unit, re-
move the screws along the sides and bottom of the
panel. See Fig. 12.
SIDE
PANEL
INDOOR
COIL
ACCESS
PANEL
INDOOR
COIL
ACCESS
PANEL
CAULK
HERE
TOP
PANEL
RAIN DEFLECTORS
C10007
Fig. 12 -- Indoor Coil Access Panel Relocation
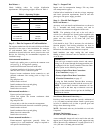
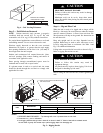
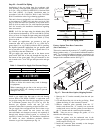
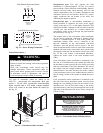
2. Swing out indoor coil access panel and insert the
hood sides under the panel (hood top). Be careful not
to lift the panel too far as it might fall out. Use the
screws provided to attach the hood sides to the hood
top. Use screws provided to attach the hood sides to
the unit. See Fig. 13.
TOP
PANEL
INDOOR COIL
ACCESS PANEL
SCREW
HOOD DIVIDER
LEFT
HOOD
SIDE
C10008
Fig. 13 -- Economizer Hood Construction
3. Remove the shipping tape holding the economizer
barometric relief damper in place.
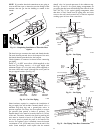
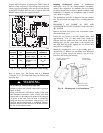
4. Insert the hood divider between the hood sides. See
Figs. 13 and 14. Secure hood divider with 3 screws on
each hood side. The hood divider is also used as the
bottom filter rack for the aluminum filter.
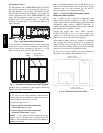
5. Attach the post that separates the filters with the
screws provided.
6. Open the filter clips which are located underneath the
hood top. Insert the aluminum filters into the bottom
filter rack (hood divider). Push the filter into position
past the open filter clips. Close the filter clips to lock
the filters into place. See Fig. 14.
7. Install the two rain deflectors on the edge of the hood
topasshowninFig.12.
DIVIDER
BAROMETRIC
RELIEF
CLEANABLE
ALUMINUM
FILTER
FILTER
HOOD
FILTER
CLIP
OUTSIDE
AIR
C10009
Fig. 14 -- Economizer Filter Installation
8. Caulk the ends of the joint between the unit top panel
and the hood top as shown in Fig. 12.
9. Replace the filter access panel.
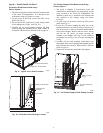
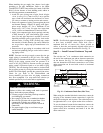
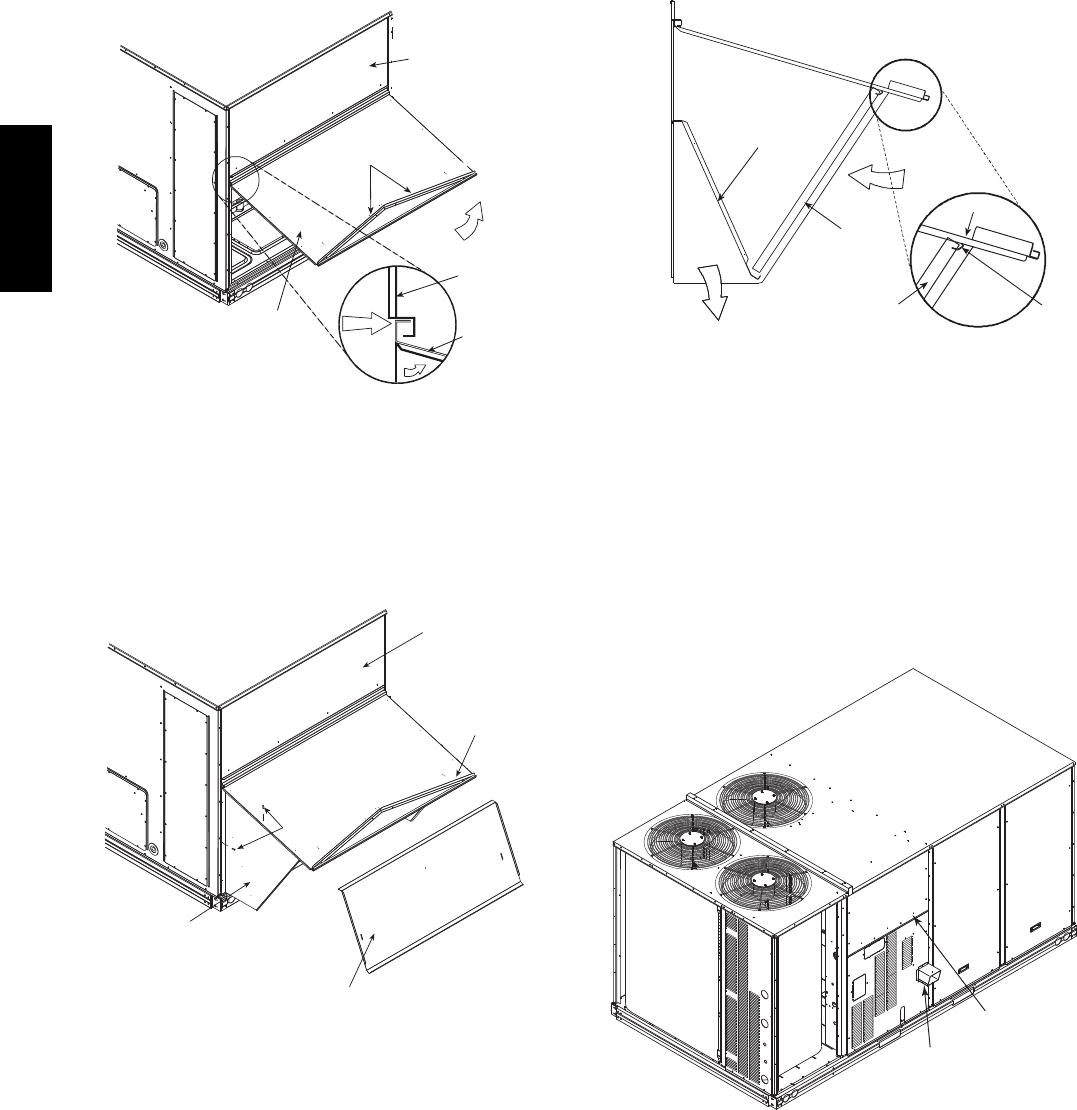
Step 9 — Install Flue Hood
The flue hood is shipped screwed to the basepan beside
the burner compartment access panel. Remove the panel
below the control box access panel to access the flue hood
shipping location. Using screws provided, install flue
hood and screen in location shown in Fig. 15.
FLUE
HOOD
CONTROL BOX
ACCESS PANEL
C10804
Fig. 15 -- Flue Hood Details
48TC**16