


—
27
—
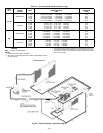
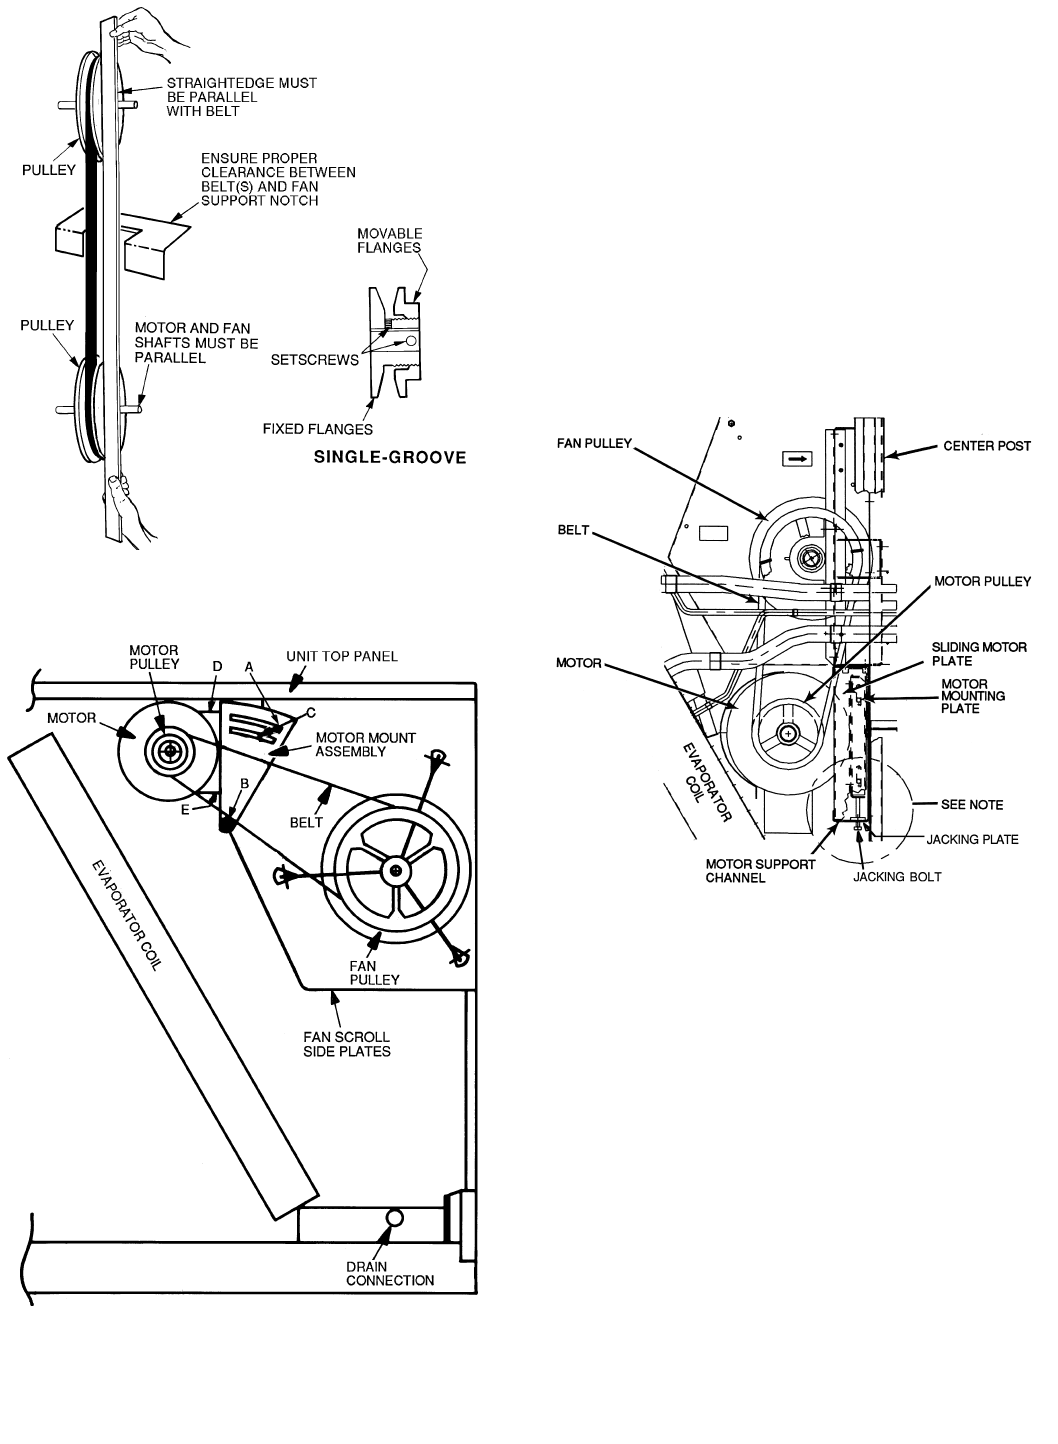
3. Loosen nuts on the two carriage bolts in the motor
mounting base.
4. Using jacking bolt under motor base, raise motor to
top of slide and remove belt. Secure motor in this
position by tightening the nuts on the carriage bolts.
5. Remove the belt drive.
6. Remove jacking bolt and tapped jacking bolt plate.
7. Remove the 2 screws that secure the motor mounting
plate to the motor support channel.
8. Remove the 3 screws from the end of the motor sup-
port channel that interfere with the motor slide path.
9. Slide out the motor and motor mounting plate.
10. Disconnect wiring connections and remove the 4
mounting bolts.
11. Remove the motor.
12. To install the new motor, reverse Steps 1-11.
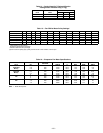
V. BELT TENSION ADJUSTMENT
To adjust belt tension:
1. Loosen fan motor bolts.
2. Adjust belt tension:
a. Size 155 Units: Move motor mounting plate up or
down for proper belt tension (
1
/
2
in. deflection
with one finger).
b. Size 180, 240 Units: Turn motor jacking bolt to
move motor mounting plate up or down for
proper belt tension (
3
/
8
in. deflection at midspan
with one finger [9 lb force]).
3. Tighten nuts.
4. Adjust bolts and nut on mounting plate to secure
motor in fixed position.
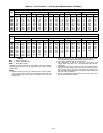
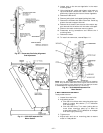
Fig. 30 — Evaporator-Fan Pulley Alignment
and Adjustment
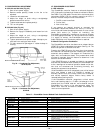
Fig. 31 — 551A155 Evaporator-Fan
Motor Section
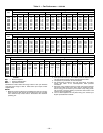
NOTE:
A 3
1
/
2
-in. bolt and threaded plate are included in the installer’s
packet. They should be added to the motor support channel below the
motor mounting plate to aid in raising the motor. The plate part number
is 50DP503842. The adjustment bolt is
3
/
8
- 16 x 2
1
/
2
LG.
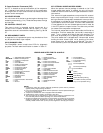
Fig. 32 — 551A180,240 Evaporator-Fan
Motor Section