


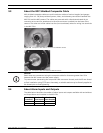
MIC612 Thermal Camera Installation Overview | en 15
Bosch Security Systems, Inc. Installation Manual F.01U.249.416 | 2.0 | 2012.09
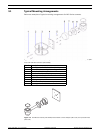
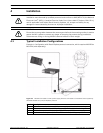
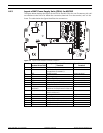
Figure 3.4 Typical corner mount (from left to right: Wall Mount Bracket (MIC-WMB), Shallow Conduit
Adapter (MIC-SCA), and Corner Mount Bracket (MIC-CMB))
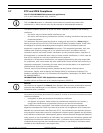
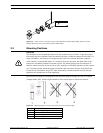
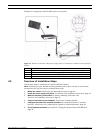
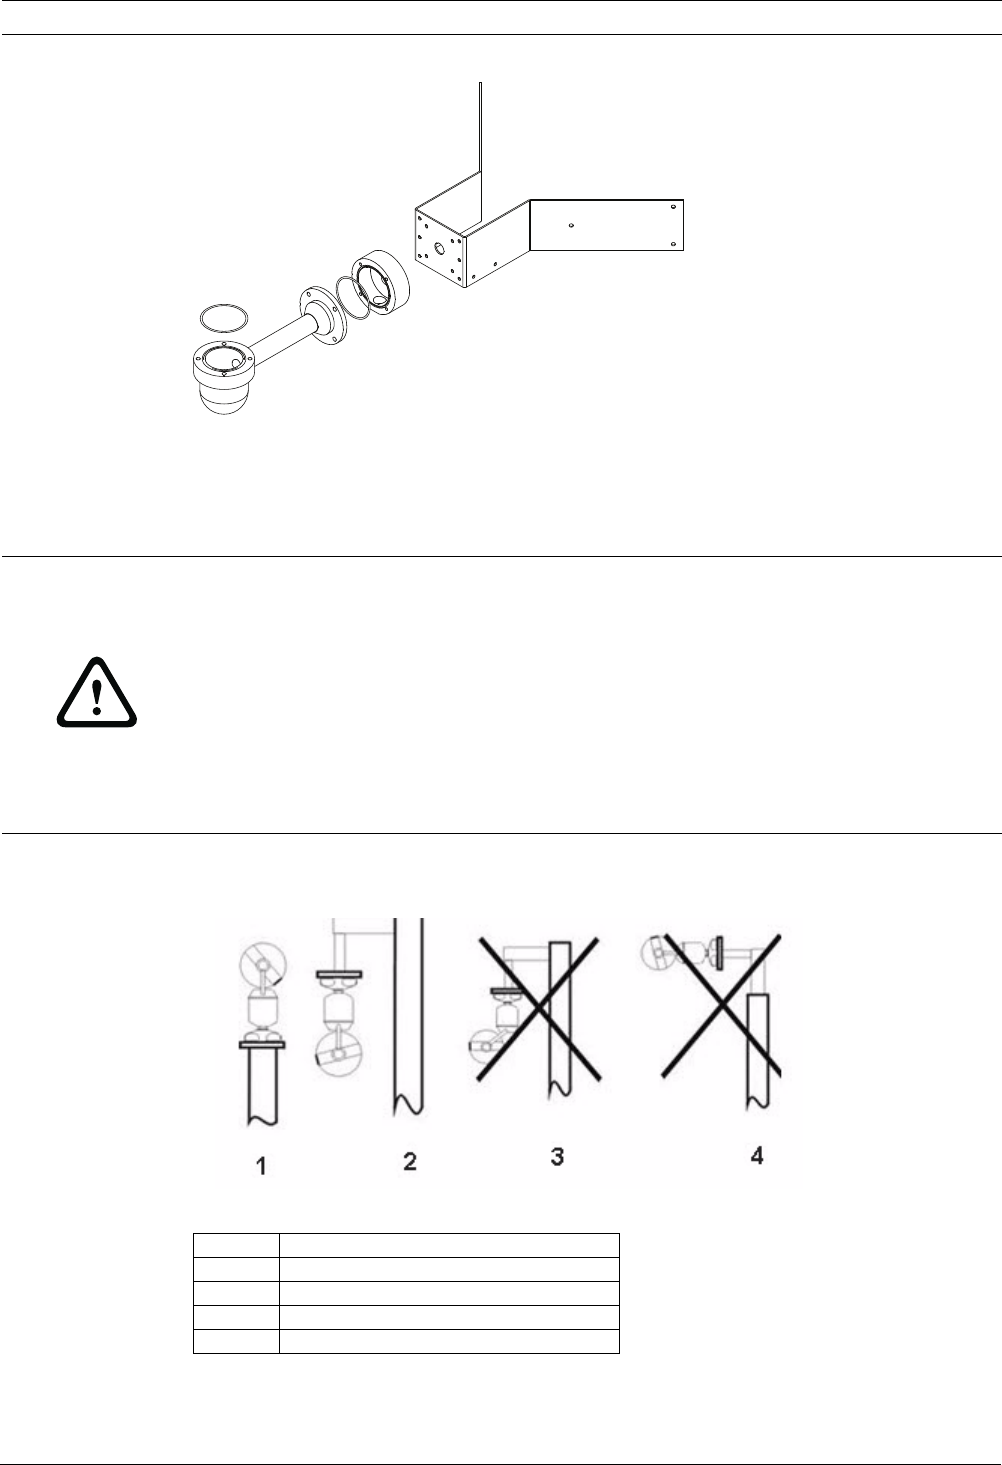
3.2 Mounting Positions
MIC Series 612 cameras are designed to be mounted upright (straight up, 90°) or inverted
(straight down, 90°). See the figure below for the correct ways to mount the camera.
Figure 3.5 Mounting diagram: Correct ways (left) and Incorrect ways (right)
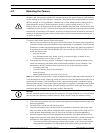
CAUTION!
The upright unit can be mounted either with the camera ball up or down. To get the picture
the correct way for installation with the camera ball down, rotate the camera tilt axis 180°. For
more information, see Section 5.6 Configuring the Camera for Inverted Operation, page 36.
If the camera is mounted ball down, it is essential that the connector and base area of the
camera are completely sealed from water ingress. Any water getting into the connector is
liable to cause corrosion to the connector pins, leading to unreliable operation of the camera
unit. To prevent water penetrating the composite cable connector threads, seal the 25 mm
thread at final installation using PTFE tape. Alternately, a suitable sealant may be liberally
applied to the thread prior to final tightening.
Number Description
1 Correct way, Upright
2 Correct way, Inverted
3 Incorrect way, Inverted and canted
4 Incorrect way, inverted on top of pole