


– 89 –
No.
R
Part name
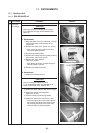
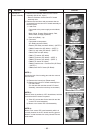
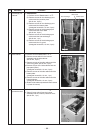
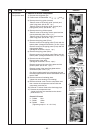
Discharge port
cabinet
Procedure
1. Detachment
1) Perform work of Detachment 1 of
Q
.
2) Remove screws for the discharge port
cabinet and the partition plate.
(M4, 8 mm, 3 pcs.)
3) Remove screws for the discharge port
cabinet and the bottom plate.
(Hexagonal screw M4, 10 mm, 2 pcs.)
4) Remove screws of the discharge port
cabinet and the motor base.
(M4, 8 mm, 2 pcs.)
5) Remove screws of the discharge port
cabinet and the heat exchanger.
(M4, 8 mm, 1 pc.)
6) Remove screws of the discharge port
cabinet and the fin guard.
(Hexagonal screw M4, 10 mm, 2 pcs.)
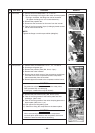
Remarks
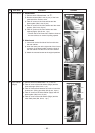
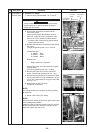
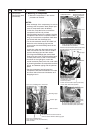
1) Perform work of Detachment 1 of
Q
.
2) Remove screws which fix the inverter
assembly and the side cabinet.
(M4, 8 mm, 2 pcs.)
3) Remove screws of the side cabinet and the
valve fixing plate. (M4, 8 mm, 2 pcs.)
4) Remove screws of the side cabinet and the
pipe panel (Rear).
(Hexagonal screw M4, 10 mm, 2 pcs.)
5) Remove screws of the side cabinet and the
bottom plate.
(Hexagonal screw M4, 10 mm, 1 pc.)
6) Remove screws of the side cabinet and the
heat exchanger.
(Hexagonal screw M4, 10 mm, 3 pcs.)
7) Slide the side cabinet upward and then remove
it. (Hook of inverter)
Side cabinet
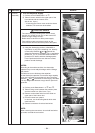
S
T
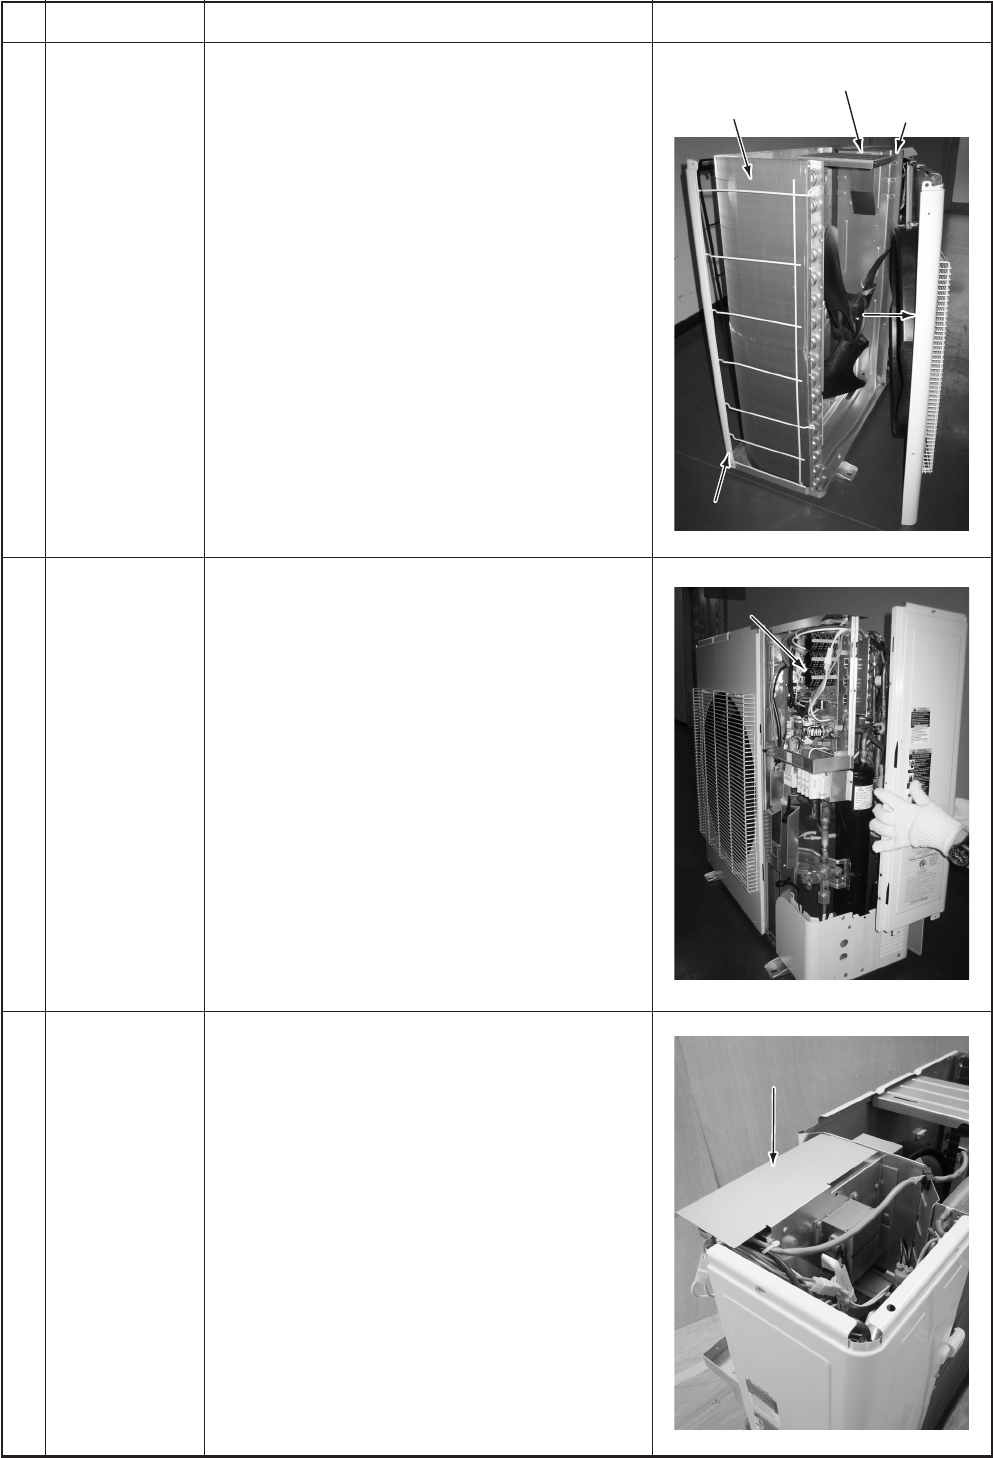
Inverter
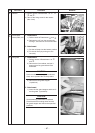
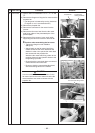
protective cover
1) Perform work of Detachment 1 of
Q
.
2) Take off screw which fixes the inverter
assembly and the inverter protective cover.
(M4, 8 mm, 1 pc.)
Motor base
Heat exchanger Partition plate
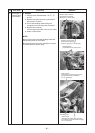
Inverter protective cover
Inverter protective cover
Inverter protective cover
Inverter assembly
Inverter assembly
Side
Side
cabinet
cabinet
Inverter assembly
Side
cabinet
Fin guard
Fin guard
Fin guard
Discharge port cabinet
Discharge port cabinet
Discharge port cabinet