


– 83 –
No.
Part name
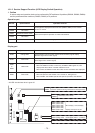
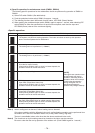
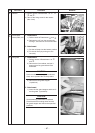
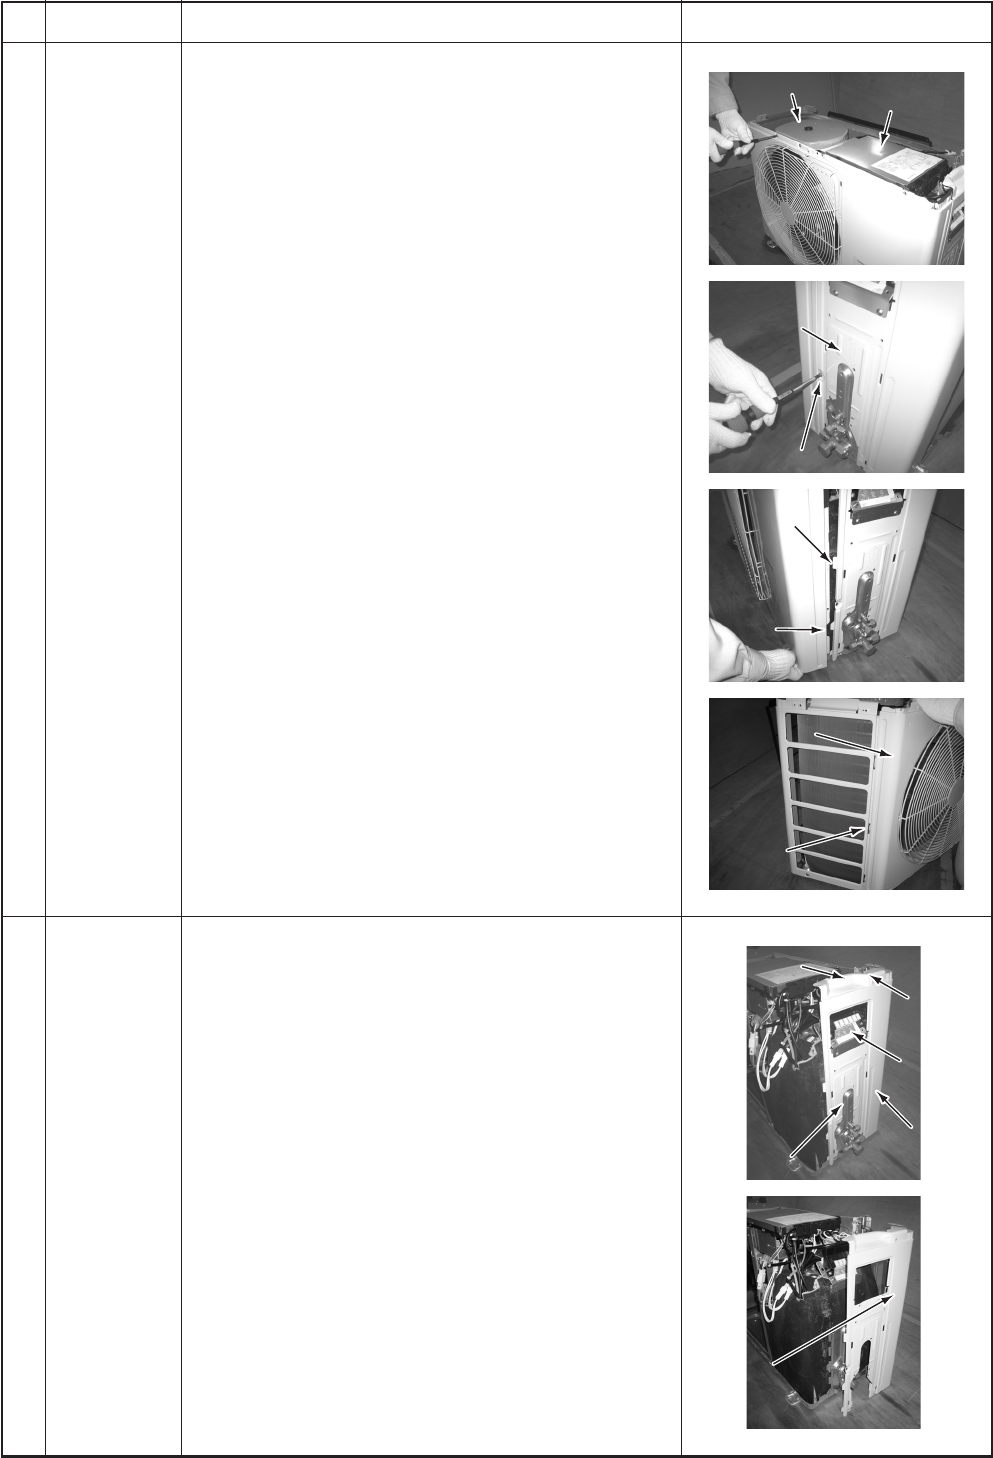
Front cabinet
Procedure
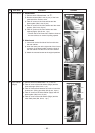
1. Detachment
1) Perform work of Detachment 1 of
.
2) Remove screws (M4, 8 mm, 2 pcs.) of the front
cabinet and the inverter cover.
3) Take off screws of the front cabinet and the
bottom plate. (M4, 8 mm, 3 pcs.)
4) Take off screws of the front cabinet and the motor
support. (M4, 8 mm, 2 pcs.)
5) Take off screws of the front cabinet and side
cabinet (Right). (M4, 8 mm, 1 pc.)
• The left side of the front side if made to insert to
the rear cabinet, so remove it pulling upward.
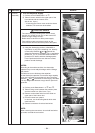
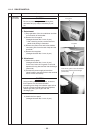
2. Attachment
1) Insert hook at the left side of the front side into
the rear cabinet.
2) Hook the lower part at the right side of the front to
concavity of the bottom plate. Insert the hook of
the rear cabinet into the slit of the front cabinet.
3) Attach the removed screws to the original positions.
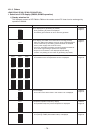
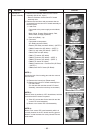
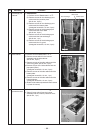
Remarks
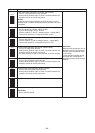
1) Perform works of Detachment 1 of
and
.
2) Take off screw of the side cabinet (Right) and the
heat exchanger. (M4, 8 mm, 1 pc.)
3) Take off fixed screws between the main unit and the
inverter box. (Wiring port side) (M4, 8 mm, 2 pcs.)
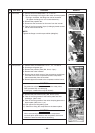
4) Take off screws of the side cabinet (Right) and the
bottom plate. (M4, 8 mm, 2 pcs.)
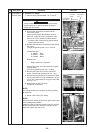
5) Take off screw of the side cabinet (Right) and the
valve fixed plate. (M4, 8 mm, 1 pc.)
Side cabinet
(Right)
Motor support
Motor support
Inverter cover
Inverter cover
Front
Front
cabinet
cabinet
Motor support
Inverter cover
Front
cabinet
Side cabinet
Side cabinet
(Right side)
(Right side)
Screw
Screw
Side cabinet
(Right side)
Screw
Slit
Slit
Slit
Slit
Claw
Claw
Slit
Claw
Front cabinet
Front cabinet
Slit
Front cabinet
Heat exchanger
Heat exchanger
Screw
Screw
Inverter box
Inverter box
Side cabinet
Side cabinet
(Right side)
(Right side)
Valve fixed plate
Valve fixed plate
Side cabinet
Side cabinet
(Right side)
(Right side)
Heat exchanger
Screw
Inverter box
Side cabinet
(Right side)
Valve fixed plate
Side cabinet
(Right side)