


C1492M-I (8/05) 13
SPECTRA SYSTEM SETTINGS AND CONNECTIONS
1. Check the wiring to the controller.
NOTE:
To wire the connector for the controller, refer to the manual supplied with the American
Dynamics controller.
2. Close the interconnect door.
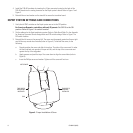
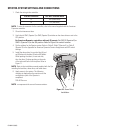
3. Verify that all SW1 (Spectra II) or SW3 (Spectra III) switches on the dome drive are set to the
OFF position.
For American Dynamics controllers with only 32 presets:
Set SW1-2 (Spectra II) or
SW3-1 (Spectra III) to the ON position. Refer to Figure 6 for switch location.
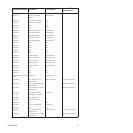
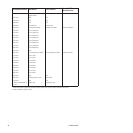
4. Set the address for the Spectra system. Refer to Table B, Table C (Spectra II), or Table D
(Spectra III) in the
Appendix
for American Dynamics Camera Assignments and DIP switch
settings.
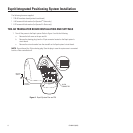
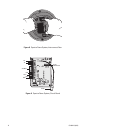
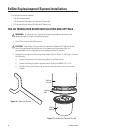
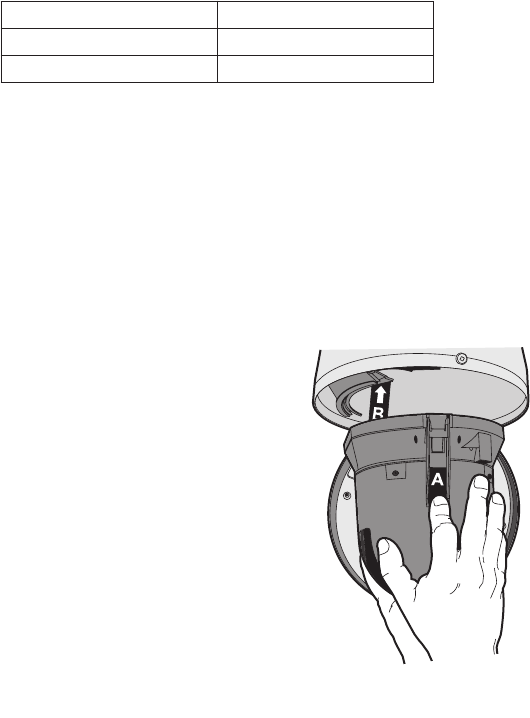
5. Install the dome drive. Line up the blue (A) and
red (B) tabs with the blue (A) and red (B) labels.
When pushing the tabs in, insert one side,
then the other. Continue pushing on the ends
of the tabs until both click into place. Refer to
Figure 11.
NOTE:
Refer to the installation manual supplied with the Spectra III dome for instructions on
installing the back box, dome drive, and lower dome.
6. Apply power to the system. The following
message is displayed on the monitor once the
configuration cycle of the Spectra is
completed:
TXB-AD Rev x.xx
NOTE:
x.xx represents the current firmware revision.
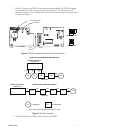
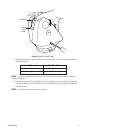
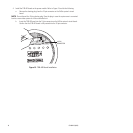
From AD Controller To 4-Wire Terminal Block
B RX+ (Green wire)
W RX- (Red wire)
Figure 10. Dome Drive
Installation