


C3608M (9/07) 13
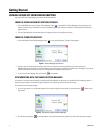
CREATING A MAP
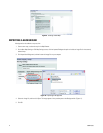
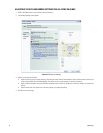
1. If you have not already done so, click the Edit Mode button in the toolbar to switch to the Edit Mode.
2. Click the Create Map button to display the New Map Settings screen.
3. Enter a name for the map.
4. If desired, import a background image for the map. Background maps can be AutoCAD DXF files, bit map files, or other types of graphics
files.
5. If desired, click the Icons tab, and then adjust the size of icons on the map. A default icon size is set automatically for all maps.
6. If desired, click the Parent Map tab, and then select the map to which the new map will be related. The new map will be listed under the
parent map in the Map Browser.
7. If desired, click the Scale tab, and then adjust the size of the map and its relation to the real world. Settings on this tab include
measurement (metric or standard), width and height of the map, scale, and physical location of the map (latitude and longitude).
8. Click OK to save the changes creating the map. Any setting can be edited later.
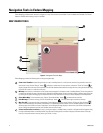
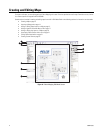
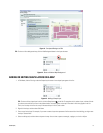
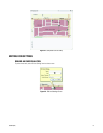
Title Bar: Shows the Endura Mapping name, the name of the user that is currently logged on, and the map that the user is viewing.
Toolbar: Click buttons on the toolbar to access the commands and other screens in the application. Only those buttons that are currently
available appear in the toolbar.
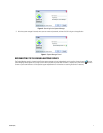
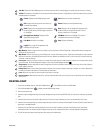
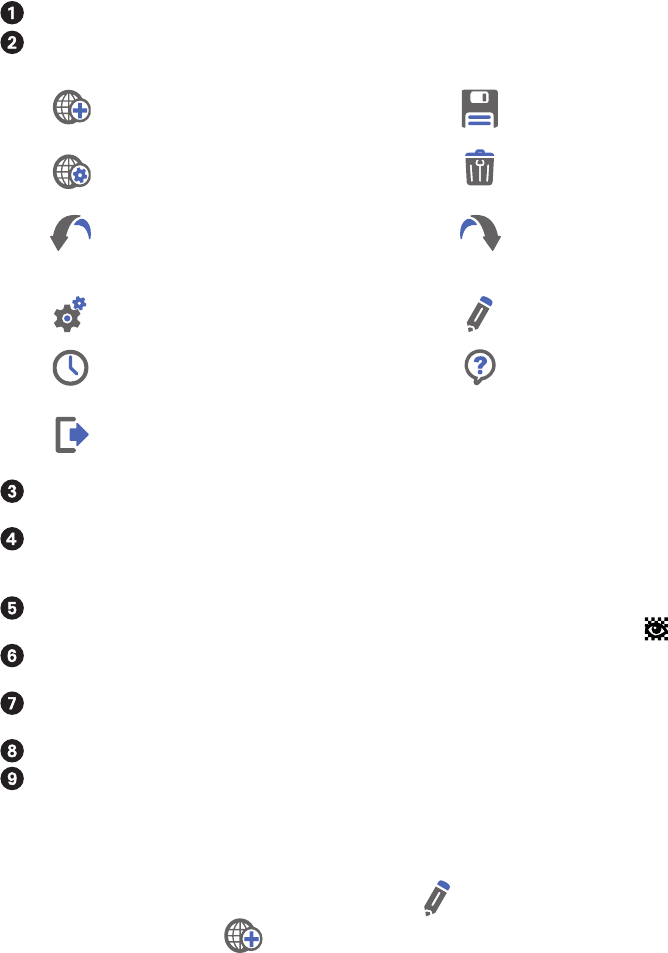
Create: Displays the New Map Settings screen. Save: Saves the currently selected map.
Edit: Displays the Edit map screen from which you
can modify map settings.
Delete: Deletes the currently selected map.
Undo: Displays a list of changes that can be reverted
to their original setting. The list displays a maximum
of 10 changes.
Redo: Displays a list of changes that were previously
undone so that you can quickly redo them. The list
displays a maximum of 10 changes.
Edit Application Settings: Displays the Edit
Application Settings screen.
Edit Mode: Switches to Edit Mode. This button is
unavailable when you are in Edit Mode.
Live Mode: Switches to Live Mode. Help: Displays online Help.
Log Off: Exits or logs off the application and
redisplays the Login screen.
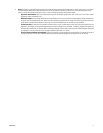
Map Browser: Select a map from the list to display it in the map viewer. Click the Expand All or Collapse All buttons to change the
display of the hierarchical list.
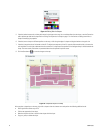
Map Viewer: Edit the map using any of the editing tools. You can add icon layers, icons, shape layers, and shapes to a map; associate
devices with the icons; and create different views of the map. Buttons are available to zoom in or out of the map, view the entire map,
and show or hide the minimap.
Icon Layers: Create an icon layer, or select an icon layer from the list to show or hide its icons on the map. You can add, remove, or edit
icons in the layer. To hide the background image of a map, click the Hide Background button .
Shape layers: Create a shape layer, or select a shape layer from the list to show or hide its shapes on the map. You can edit, delete, or
create shapes in the layer.
Editing Tools: Select a tool to draw shape layers on the map. You can draw a square or rectangle, a polygon, or a circle or ellipse. Use
the text tool to enter a description of the shape that you have drawn.
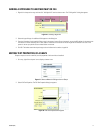
Icons: Select the icons that you want to place on icon layers on the map.
Device Browser: Select devices from the list, and then associate them with icons on the map. You can associate one or more devices
with any icon.