


49
Check for gas leaks
Before starting the boiler, and during initial
operation, smell near the floor and around
the boiler for gas odorant or any unusual
odor. Remove the front access panel and
smell the interior of the boiler enclosure. Do
not proceed with startup if there is any
indication of a gas leak. Use an approved
leak detection solution. Repair any leaks at
once.
ƽ WARNING
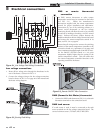
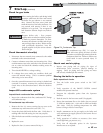
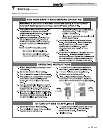
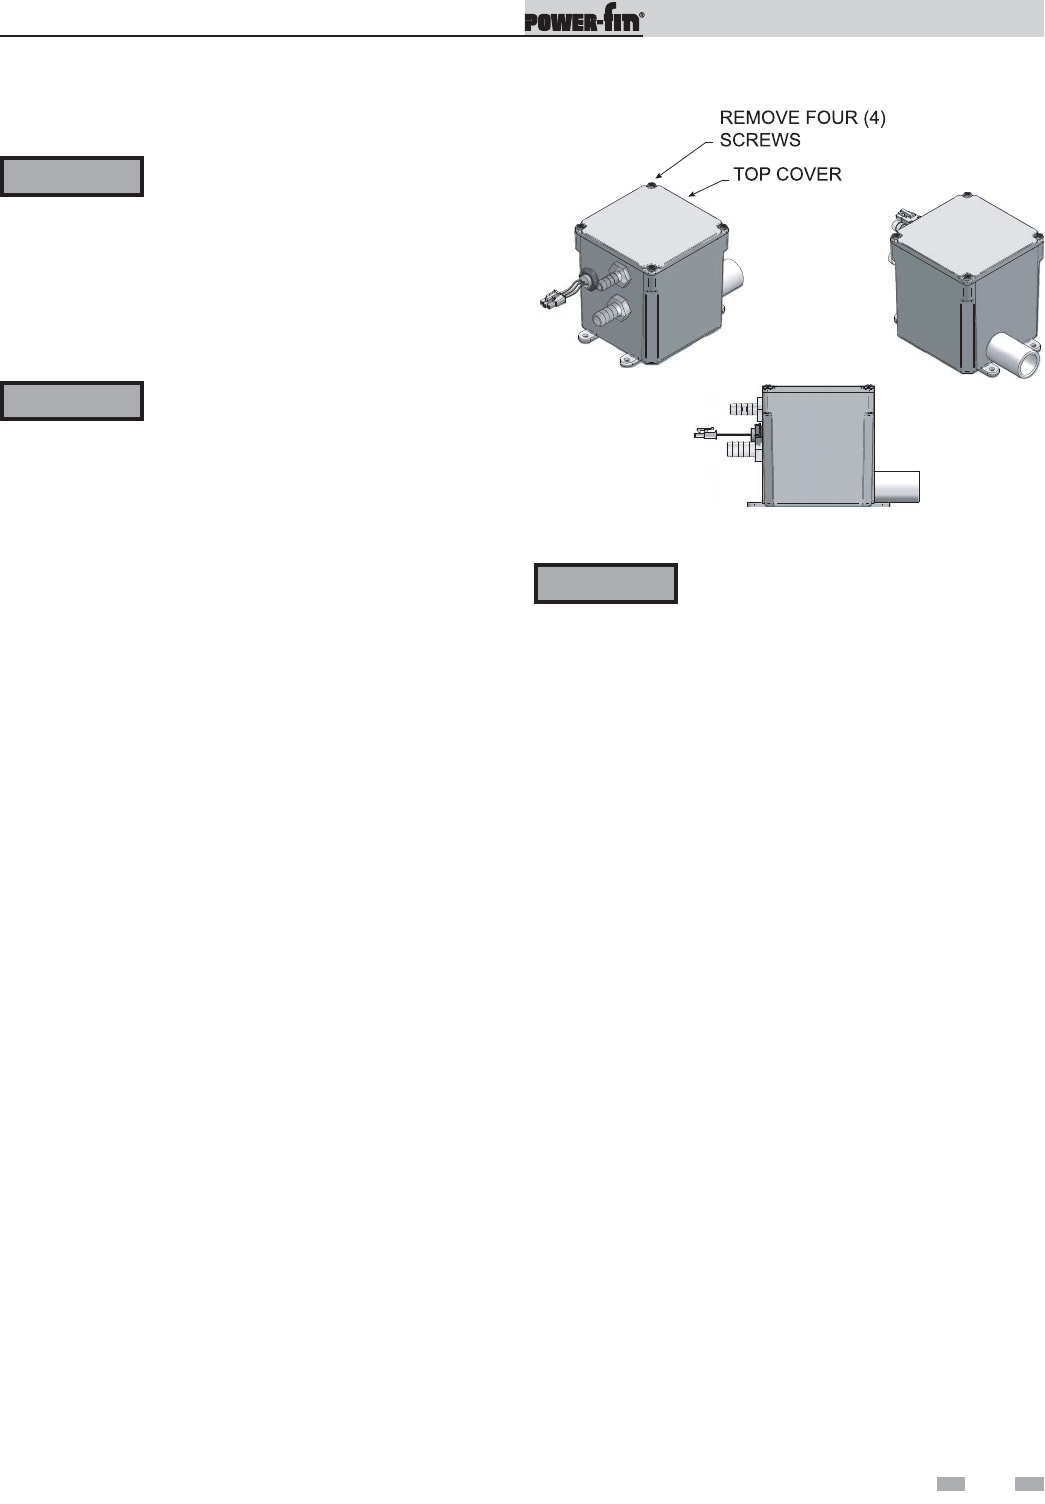
Figure 7-1_Condensate Trap
Propane boilers only – Your propane
supplier mixes an odorant with the propane
to make its presence detectable. In some
instances, the odorant can fade, and the gas
may no longer have an odor. Before startup
(and periodically thereafter), have the
propane supplier verify the correct odorant
level in the gas.
ƽ WARNING
Inspect/fill condensate system
Inspect/check condensate lines and fittings
1. Inspect the condensate drain line, condensate PVC fittings
and condensate trap.
Fill condensate trap with water
1. Remove the four (4) screws securing the top cover to the
condensate trap and remove the cover (FIG. 7-1).
2. Locate the plastic ball inside the float tube. Verify there is
nothing under the ball causing it to not seat properly.
3. Fill with fresh water until the water begins to pour out of the
drain.
4. Replace the cover.
5. Replace the four (4) screws removed in Step 1.
The condensate trap (FIG. 7-1) must be
filled with water during all times of boiler
operation to avoid flue gas emission from the
condensate drain line. Failure to fill the trap
could result in severe personal injury or
death.
ƽ WARNING
Check thermostat circuit(s)
1. Disconnect the two external wires connected to the enable
terminals on the connection board.
2. Connect a voltmeter across these two incoming wires. Close
each thermostat, zone valve, and relay in the external circuit
one at a time and check the voltmeter reading across the
incoming wires.
3. There should NEVER be a voltage reading.
4. If a voltage does occur under any condition, check and
correct the external wiring. (This is a common problem
when using 3-wire zone valves.)
5. Once the external thermostat circuit wiring is checked and
corrected if necessary, reconnect the external thermostat
circuit wires to the connection board. Allow the boiler to
cycle.
7 Start-up (continued)
Check vent and air piping
1. Inspect vent piping and air piping for signs of
deterioration from corrosion, physical damage or
sagging. Verify air piping and vent piping are intact
and correctly installed per this manual.
Placing the boiler in operation
Boiler operational checks
2. Turn the boiler main power switch to the “ON”
position.
3. Verify operation of the SMART SYSTEM control
module and Operator Interface.
4. Program the adjustable points from the Operator
Interface.
5. Push the reset for the low water cutoff (if equipped).
6. Ensure that maximum flow to the boiler does not exceed
75 GPM on Models 502 - 1302 and 90 GPM on Models
1501- 2001. Verify by checking temperature rise while
burner is firing at 100% of rated input.
7. Install a manometer on the gas supply to the boiler and
verify minimum gas supply pressure as the burner fires at
100% of rated input.
8. Verify operation of safeties as necessary (low water
cutoff, high limit, gas pressure, etc.,).
9. Verify that all adjustable points in the Operator
Interface are set as required.
Installation & Operation Manual