20
Install the Log Set
The four-piece log set is packaged in bubble wrap
inside the firebox.
Do not handle the log set with your bare
hands. Always wear gloves to prevent skin irrita-
tion from the ceramic fibers.
1. Remove the Grille and Top Plate from the stove.
Release the Glass Clips on top of the firebox. Lift
the Glass Panel straight up and out of the stove.
Remove the log set package.
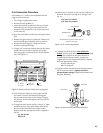
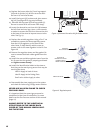
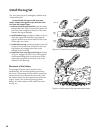
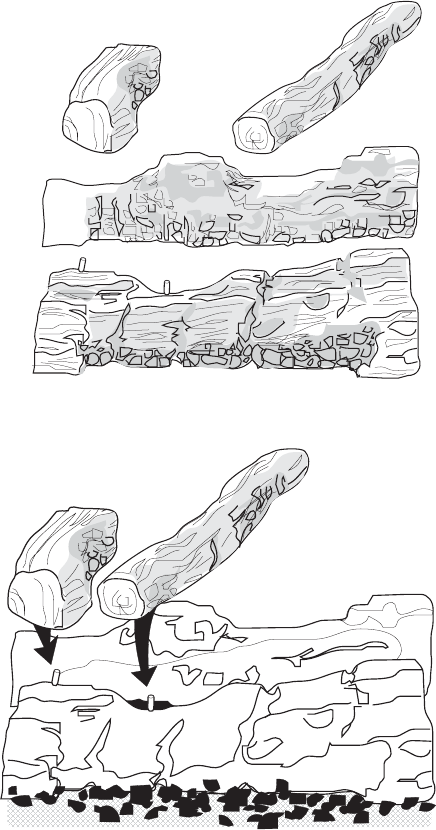
2. Install the Rear Log, oriented as shown in Fig. 20.
Place the log on the shelf (Rear Log Support)
against the back wall of the firebox. Push it over
to the right rear corner.
3. Install the Front Log on the Log Support over the
center of the burner tube. The pins in the Front
Log Support will engage with holes in the
bottom of the Front Log.
4. Install the Cross-over Log and Left Log as shown
in Fig. 21. Engage the pins in the Front Log with
the corresponding holes in the bottoms of the
upper logs and position the other ends in the
notches on the Rear Log.
Placement of the Embers
The package of Ember stones, located in the
hardware bag, will simulate glowing coals when
the burner is operating. For best results, spread the
stones evenly across the burner tube screen. “Pea”
size embers create the best appearance, while too
large a “chunk” can create long stringy yellow
flames. All of the embers do not have to be used.
See Fig. 21.
Figure 21. Positioning the top logs and ember stones.
Ember Stones
Pin
Pin
Figure 20. GF 600 DV Log set parts.
Left Log
Cross-over
Log
Rear
Log
Front
Log


