VISIONPRO
®
IAQ TOTAL HOME COMFORT SYSTEM
68-0287—04 12
INSTALLER SETUP
Auto Discover is available when the TH9421C thermostat is
connected to an EIM. The EIM communicates information to
the thermostat. Thermostat settings can be specified using the
up and down arrow keys on the screen or set to Auto Discover.
Using Auto Discover
Some Installer setups are defaulted to Auto Discover. If not
defaulted, the installer can change the option to Auto Discover,
however, it is always important that the installer verify that the
auto discovered values are correct for the system that is
present.
When using the thermostat with an equipment interface
module, Auto Discover will discover factory default settings
and will not receive communications as to proper system
settings. The equipment interface module is preprogrammed at
the factory as a one heat one cool product and the thermostat
will “auto discover” those settings. The equipment interface
module will be reprogrammed when the installer manually
changes the configuration in the installer set up. It is not
recommended to use Auto Discover with an equipment
interface module.
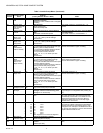
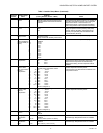
When using the VisionPRO® IAQ thermostat with a W8835
zone panel, configure the zone panel, using the DIP switches
on the panel, for the proper system settings. Enter the installer
setup on each thermostat and assign zone numbers, and
change the system settings (ISU 172–180) to Auto Discover
(E) then press the discover button on the zone panel. The zone
panel will then communicate those settings back to the
thermostats and the thermostats will automatically configure
the ISU settings in Auto Discover, again it is important to verify
that the auto discovered values are correct.
NOTE: When a VisionPRO® IAQ thermostat is being added
to an existing zoning system with T8635 Thermostats
the new VisionPRO® IAQ must be set up as the Zone
One Thermostat (master zone controller), and can
only be used with a W8835 zone panel.
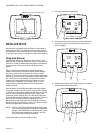
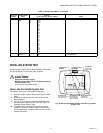
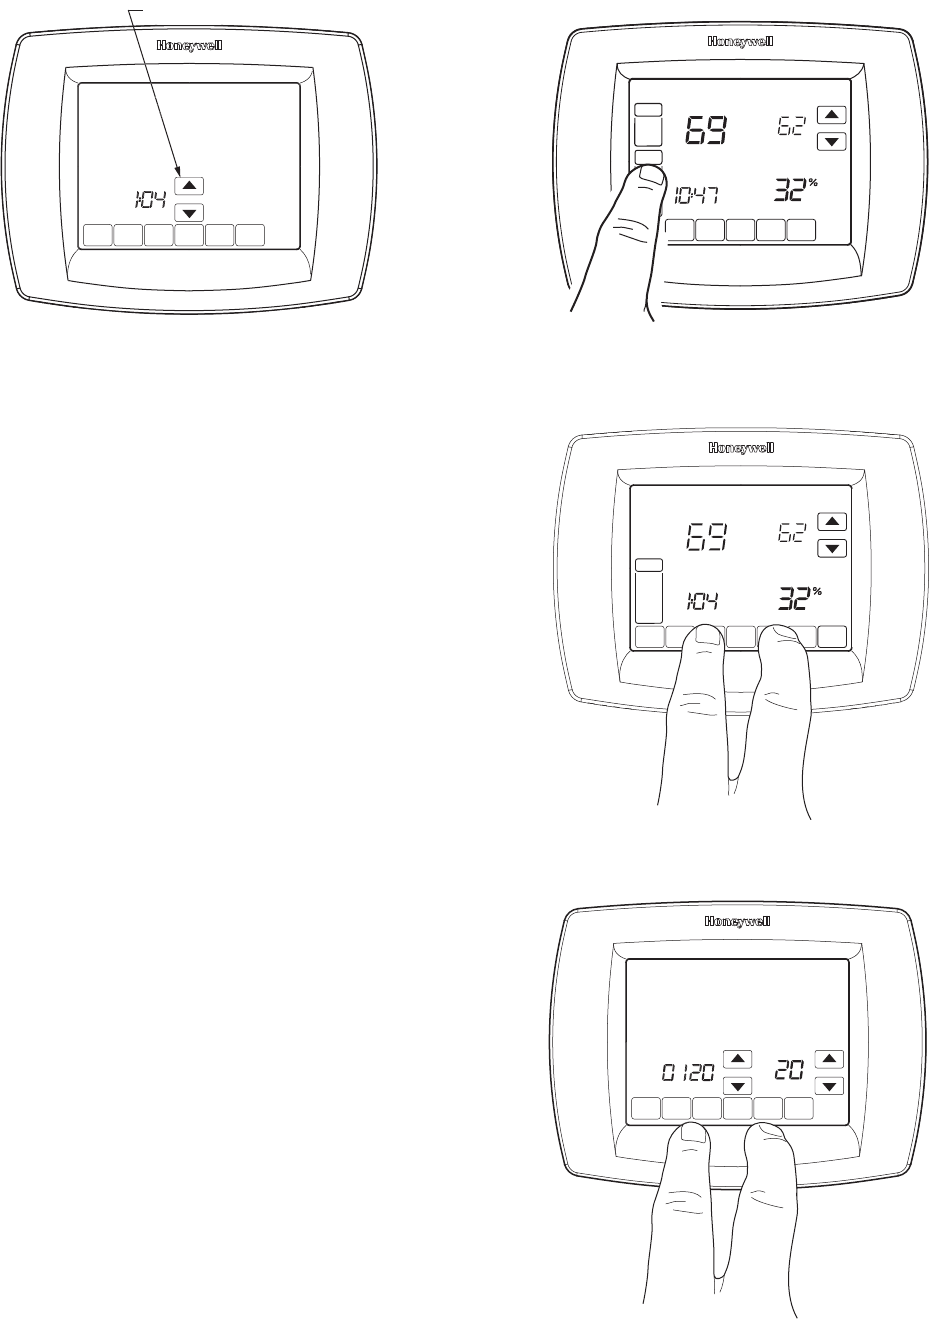
Follow these steps to enter the Installer Setup:
1. Press and release the System Key.
2. Press and hold the two blank keys on either side of the
center blank key for approximately five seconds until
screen changes.
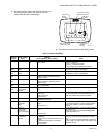
3. Release the two blank keys when the screen on the ther-
mostat matches the screen below.
D
O
N
E
MO
WE
TH
FR
SA
SU
USE ARROWS TO SET YEAR AND TIME
M22425
W
SCHED HOLD CLOCK
SCREEN
FAN
ON
AUTO
A
M
THU
SYSTEM
EM HEAT
OFF
COOL
Following
Schedule
Inside
M23498
Humidity
DONE
CANCEL
MO
MO
TU WE
WE
TH
TH
FR
FR
S
S
A
A
SU
SYSTE
M
EM
HEAT
OFF
CHANGE FILTER UV LAMP
Following
Schedule
Inside
Set
OK TO PICK MULTIPLE DAYS SCREEN LOCKED
M23499
Humidity
D
O
NE
M22442


