


23
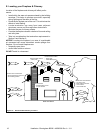
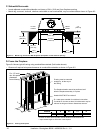
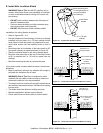
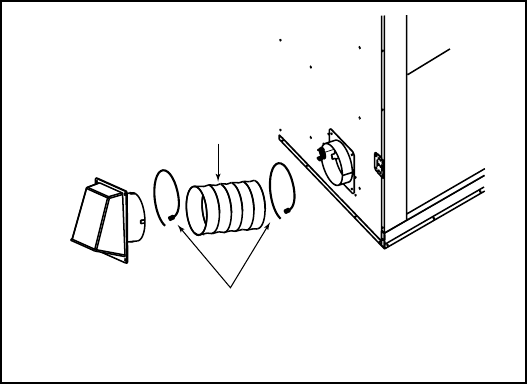
Outside Air
Hood
2 Wire Ties
Flexible Duct
(not supplied)
Figure 7.5 Outside Air Installation
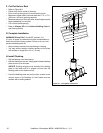
E. Install Outside Air Kit
• Keep duct runs short and straight to minimize
restriction.
• Theoutsideairkitsmustbeinstalledonbothsidesofthe
replace.
WARNING! Outside air kits must be installed on both
sides of the replace to prevent overheating and re.
• Locatetheoutsideairhoodsinacleararea.
• InstallasshowninFigures7.3,7.4and7.5.
• Theairductsmayberunvertically.
• Theoutsideairhoodsmustbeatleast3ft(.91m)below
thetopoftheuppermostchimneysection.
• Theoutsideairhoodscanbepaintedtomatch/accentthe
colorofthestructure.
CAUTION! Risk of Fire or Asphyxiation! Do not draw
outside combustion air from wall, oor or ceiling cavity,
or enclosed spaces such as an attic or garage.
place outside air hood close to exhaust
vents or chimneys. Fumes or odor could be drawn
into the room through the replace.
• Locate outside air hood to prevent blockage from
leaves, snow/ice, or other debris. Blockages could
cause the unit to overheat.
NOTICE: The fireplace provides some outside air for
combustion. Other methods may be necessary if more air
is required.
Heatilator•BirminghamBIR42•4059-308RevJ•1/11