


14
920-198-01
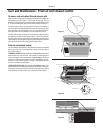
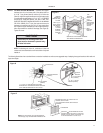
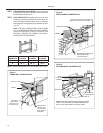
Figure J
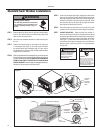
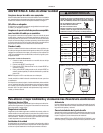
AIR FILTER
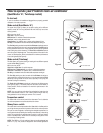
RETURNAIR
GRILLE LATCH
CORD
CLAMP
ADJACENT
SCREW HOLE
RETURNAIR
GRILLE LATCH
CORD CLAMP
CHASSIS
SEAL
GASKET
FAR
LEFT
SCREW
ADJACENT
SCREW
HOLE
WHEN INSTALLING CHASSIS SEAL GASKET,
BEGINAT EITHER BOTTOM CORNER AND
GO UP THE SIDE, ACROSS THE TOP,AND
DOWN THE OPPOSITE SIDE.
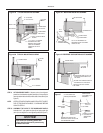
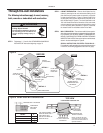
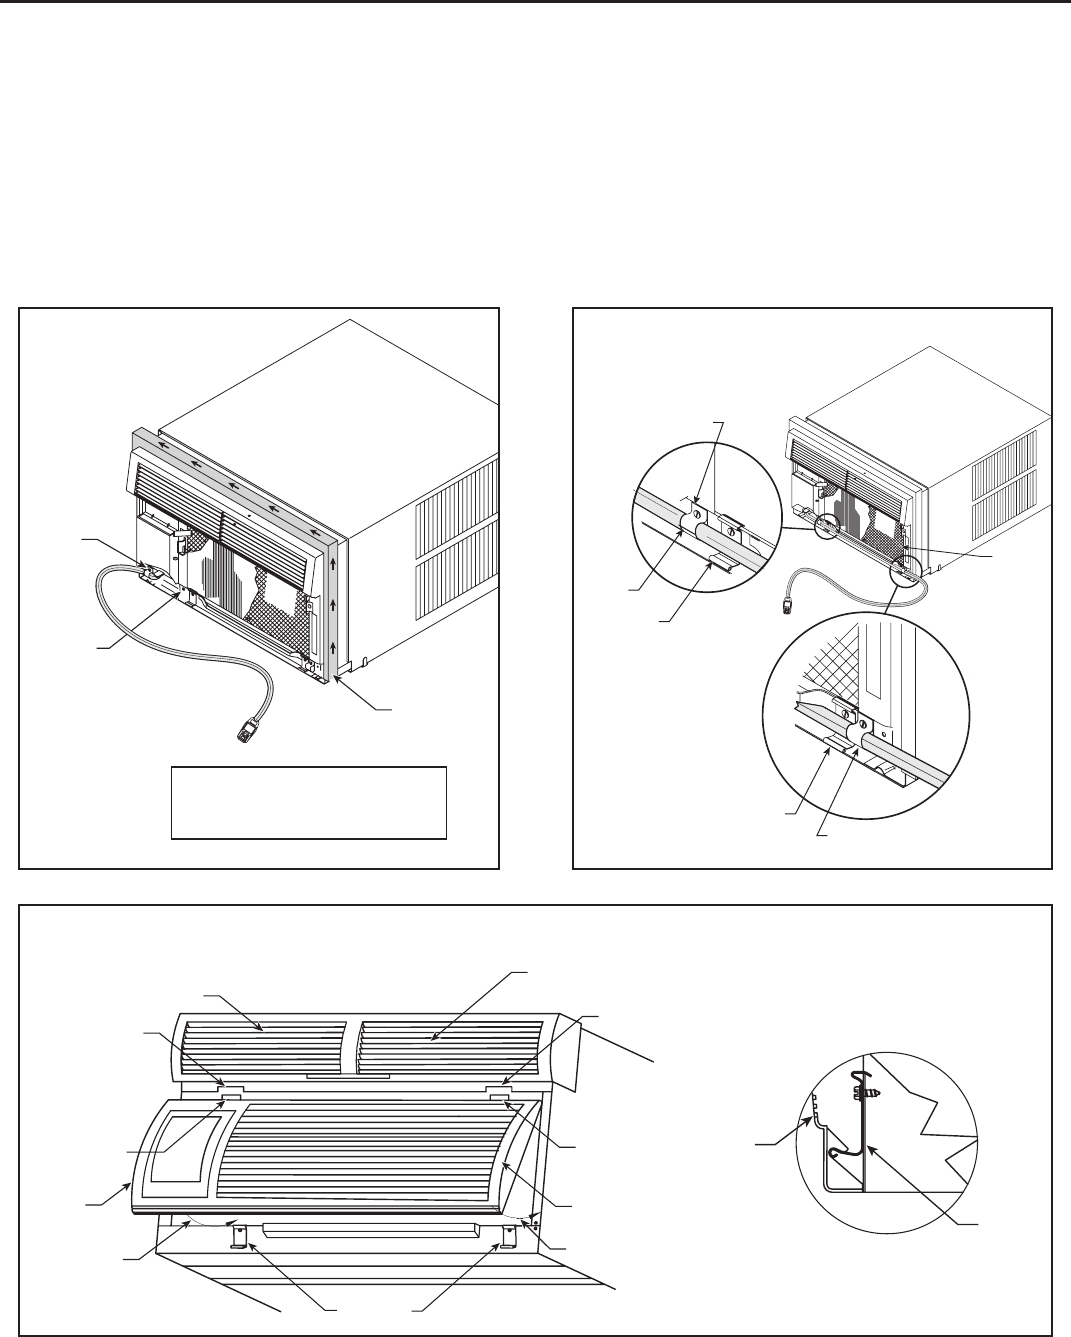
STEP 16 OPTIONAL: The factory assembles the supply cord so that
it exits the left side of the unit. At the consumer’s discretion,
the supply cord can be made to exit the right side of the unit.
To do this, remove the black rubber coated cord clamp from
under the far left screw (See Figure I). Replace this screw
back into the far left screw hole. Route the supply cord over
the top of the return air grille latches and reattach the clamp
to the adjacent screw hole (F
igures I & J). Detach the right
side cordclamp, routethe supplycord throughit andreattach.
Thesupplycordshouldbepulledtautsoasnottorestonthe
return air grille latches.
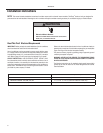
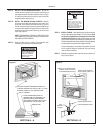
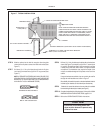
Figure K
DISCHARGE
AIR PLENUM
SLOT
TAB
SLOT
TAB
NOTE 2
RETURN
AIR GRILLE
(NOTE 1)
LATCHES
NOTE 3
NOTE 1
RETURN
AIR
GRILLE
NOTE 4
SIDE VIEW
LATCH
NOTE 3
STEP 17 Besurethe¿lterisinplacebeforeinstallingthereturnairgrille
(See Figure J), and that the electrical cord is properly routed
so not to interfere with the installation. (See Step 16.)
STEP 18 mottobehtraensedishtobmorftigni trop pusybellirgehtpukciP
(See Figure K, Note 1.) Lift return air grille and insert the grille's
tabs into the bottom slots of the discharge plenum (See Figure K,
Note2).Snapthegrilleintoplacebypushingthe
grilleup andonto
the unit's latches at the bottom (See Figure K, Notes 3 and 4).
STEP 19 Refer to the Operating Instructions beginning on page 3.
Figure I