


www.fmiproducts.com
116646-01J30
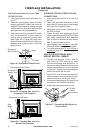
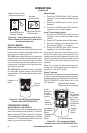
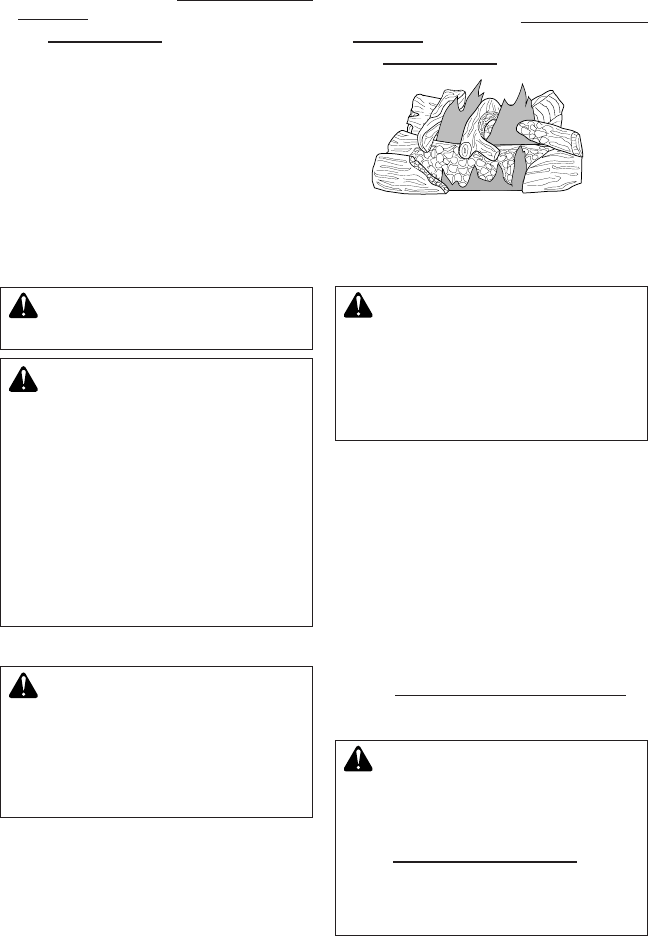
Figure 56 - Typical Flame Pattern
If you pilot assembly does not meet these
requirements:
• turn replace off (see To Turn Off Gas to
Appliance, page 27)
• see Troubleshooting, page 32
BURNER FLAME PATTERN
Burner ames will be steady, not lifting or oat-
ing. Flame patterns will be different from unit
to unit and will vary depending on installation
type and weather conditions.
If the vent conguration is installed incorrectly,
ames will lift or "ghost". This can be danger-
ous. Inspect ames after installation to ensure
proper installation and performance.
INSPECTING BURNERS
Continued
Figure 56 shows a typical ame pattern.
If burner ame pattern differs from that de-
scribed:
• turn replace off (see To Turn Off Gas to
Appliance, page 27)
• see Troubleshooting, page 32
CLEANING AND MAINTENANCE
WARNING: Turn off replace
and let cool before cleaning.
CAUTION: You must keep
control areas, burners and
circulating air passageways of
replace clean. Inspect these
areas of replace before each
use. Have replace inspected
yearly by a qualied service
person. Fireplace may need
more frequent cleaning due to
excessive lint from carpeting,
bedding material, pet hair, etc.
GLASS DOOR
WARNING: Handle glass
door panel with care. Do not
strike, slam or otherwise abuse
glass. Do not operate replace
with the glass door unlatched,
removed, cracked or broken.
WARNING: Do not use
abrasive cleaners as this may
damage glass. Use a nonabra-
sive household glass cleaner to
clean glass. Do not clean glass
when hot.
Glass must be cleaned periodically. Dur-
ing start up it is normal for condensation to
form on the inside of glass causing lint, dust
and other airborne particles to cling to glass
surface. During initial start up a slight lm
may form on glass due to paint curing. Glass
should be cleaned several times with a non-
ammonia, nonabrasive household cleaner
and warm water after the rst two weeks of
operation. Afterwards, clean glass two or three
times during each heating season, depend-
ing on the usage and circumstances present.
Refer to Removing/Replacing Glass Door on
page 24 of this manual when removing glass
door for cleaning.
WARNING: Only parts sup-
plied by the manufacturer should
be used when replacing broken
or damaged glass door panel
(see Replacement Parts, page
36). This glass door panel is
a complete unit. No substitute
materials may be used.