


MR810 Technical Manual Revision C REF 185042601
29
6
6.7 REPLACING THE PUSH BUTTONS AND THE LED LIGHT PIPE
6.7.1 REPLACING THE PUSH BUTTONS
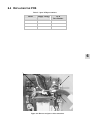
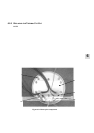
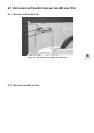
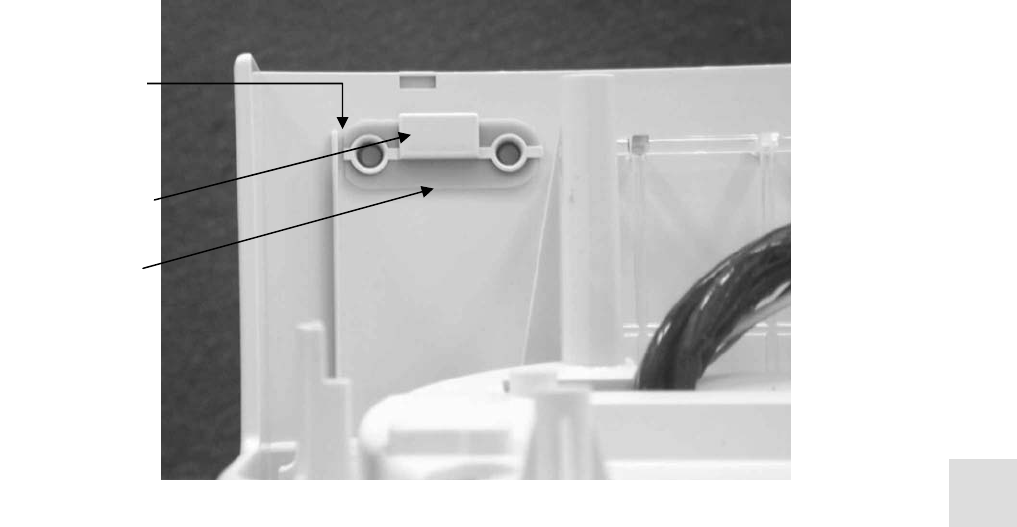
Figure 6.11: Orientation of button flange and button insert
1. Open the case and remove the PCB as outlined in § 6.2.
2. To replace the push buttons, remove the button retainer from inside the case. Now push the silicone
button from the front through the hole. Discard the button.
3. To install the new push button: orient the flat edge of the button flange with the rib on the case (the
buttons are designed to go in one way only). Now press the push button through the holes from inside
the case (Figure 6.11).
4. Orient the short side of the button retainer to the rib side of the case with the tab protruding towards the
base of the upper case. Insert the button retainer into the rear of the silicone buttons (Figure 6.11).
5. Now install the PCB, check the push button operation, and close the case as outlined in § 6.8
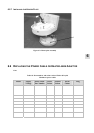
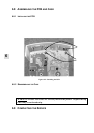
6.7.2 REPLACING THE LED LIGHT PIPE
1. Open the case and remove the PCB as outlined in § 6.2.
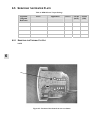
2. Pull the LED light pipe out of the holes in the front of the top case and lift away (Figure 6.12).
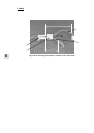
3. Insert the new LED light pipe into the four locations in the top of the case, and then slide th e four LED
light pipes into their holes in the front of the case. Check that the LED light pipe ends are flush with
the case front.
4. Now install the PCB and close the case as outlined in § 6.8
Button flange
Button insert
Flat edge of
button flange
orientated with
rib on case