


20
MR810 Technical Manual Rev C REF 185042601
6
6.3 REPLACING FUSES
WARNING:
Be sure to replace fuses with the correct type and rating, specified in Table 4.
Always replace fuse F3 with a 2 A fast blow type as serious injury could result from
the wrong fuse. Open the case and remove the PCB (refer to § 6.2)
Note: A limited number of MR810AEA units were manufactured with fuse F3 rated at 1.5 A. These units
can be identified by the fuse rating information laser-scribed on the in side of th e lower case. For these units
only, F3 must be replace d wi t h a 1.5 A fast b l ow f use.
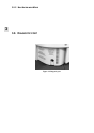
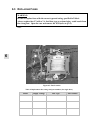
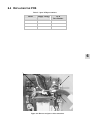
1. Slide the cable clamp up out of the transformer mount and lift it away from the fuses.
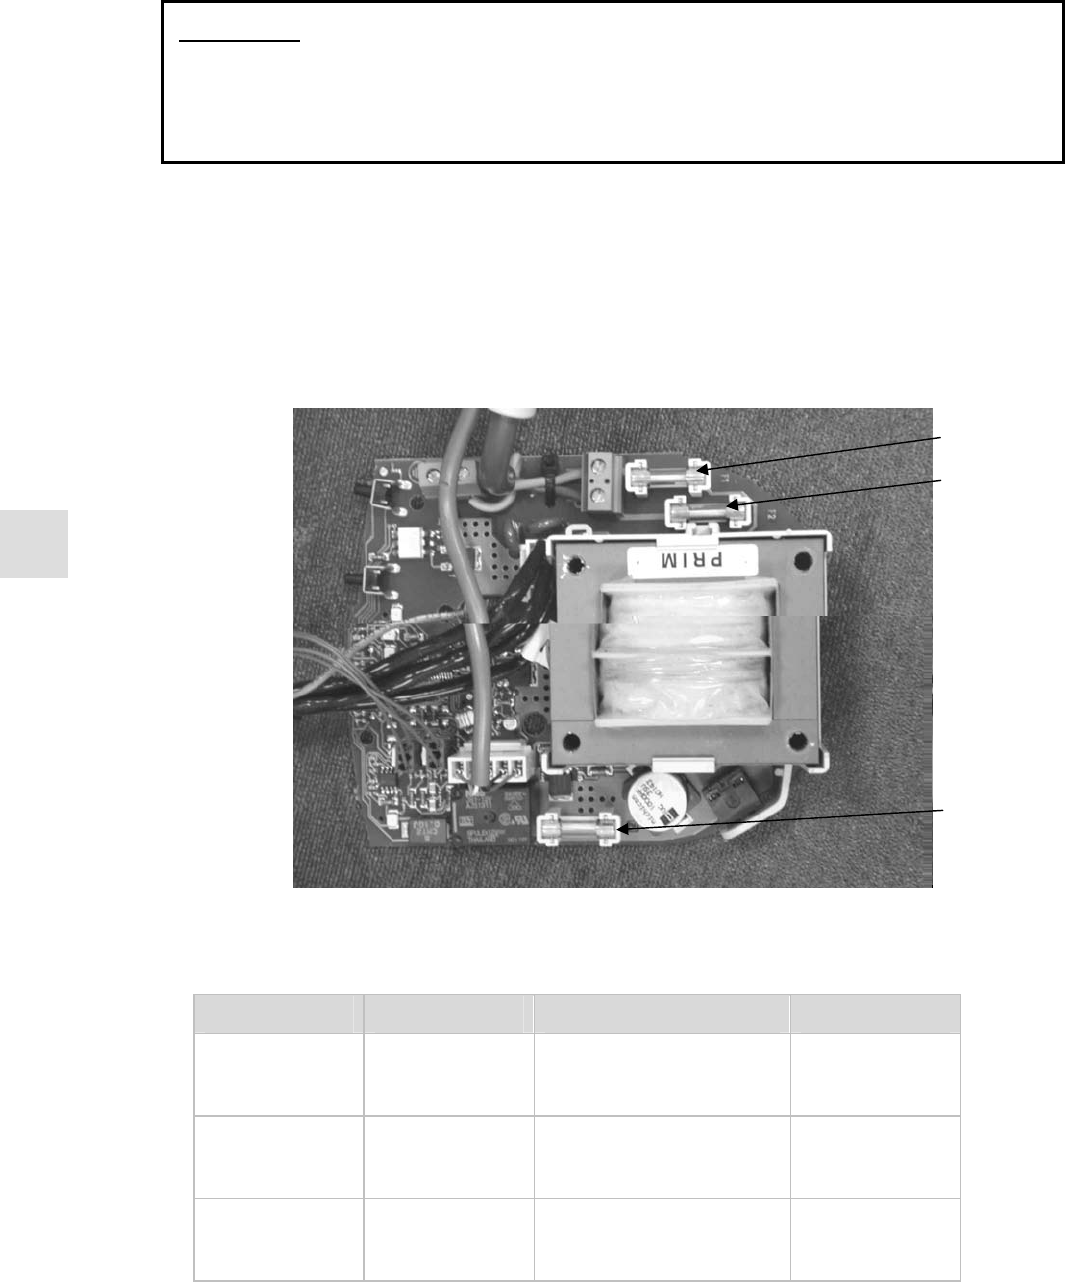
2. The fuses can now be accessed. Refer to Figure 6.3 for the location of the fuses and Table 4 for
replacement fuses.
3. Install the PCB and assemble the case (refer to § 6.8).
Figure 6.3: Fuse Location
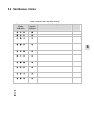
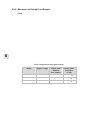
Table 4: Replacement fuse ratings and part numbers (for single fuses)
Model Supply Voltage Fuse Type Part Number
MR810A-- 230 V~ F1: 1.5 A 250 V~, Fast Bl o w
F2: 1.5 A 250 V~, Fast Bl o w
F3: 2.0 A 250 V~, Fast Bl o w
999 830 008
999 830 008
999 830 009
MR810J-- 115 V~ F1: 2.0 A 250 V~, Fast Bl o w
F2: 2.0 A 250 V~, Fast Bl o w
F3: 2.0 A 250 V~, Fast Bl o w
999 830 009
999 830 009
999 830 009
MR810G-- 100 V~ F1: 2.0 A 250 V~, Fast Bl o w
F2: 2.0 A 250 V~, Fast Bl o w
F3: 2.0 A 250 V~, Fast Bl o w
999 830 009
999 830 009
999 830 009
Fuse F2
Fuse F3
Fuse F1