CertainTeed Vinyl Siding Installation Guide
89
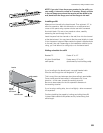
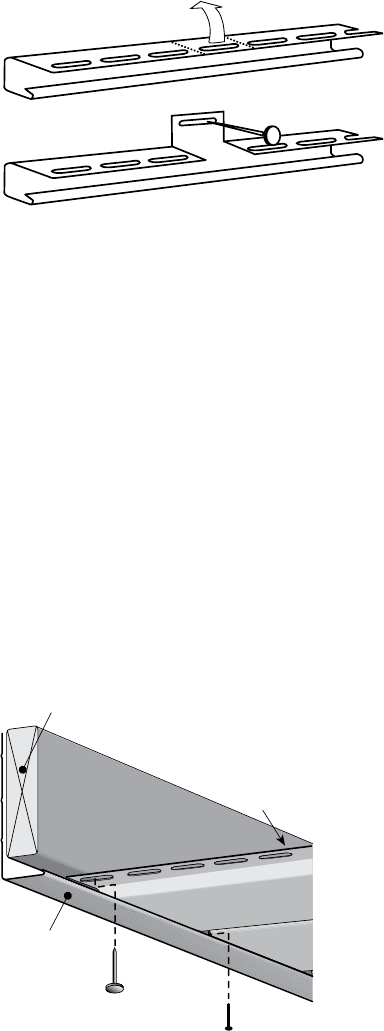
NOTE: If you don’t have the proper receiver for the soffit, you
can modify J-channel to create an F-receiver. Simply cut slots
in the nail flange area where the receiver will be nailed to the
wall, bend back the flange, and nail the flange to the wall.
Installing soffit
Measure from the wall to the fascia board. Then subtract 1/2" to
allow for expansion. Mark this dimension on a soffit panel and
cross cut the panel using a power circular saw with a reversed
fine-tooth blade. Cut one or two panels at a time, carefully
advancing the saw through the vinyl.
Insert the panel into the channel on the wall, then into the channel
at the fascia board. You may have to flex the panel slightly to insert
it into the second channel. Make certain the panel is perpendicular
to the wall, then nail. Depending on the installation method you’re
using, you’ll nail either to a nailing strip or to the fascia board.
Nailing schedule for soffit
Beaded T2 Fasten 8" to 12"
All other CertainTeed
soffit panels
Fasten every 16" to 24"
(as allowed by local building code)
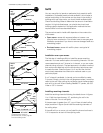
If you’re nailing to the fascia board, use small-headed nails.
Drive the nail through the nail flange and “V” groove.
This is one of the rare instances when face nailing is permissible.
Once a soffit panel is face-nailed, it will expand only in one
direction—in this case, toward the receiving channel.
Be sure to leave space for the full expansion allowance in
the receiving channel.
If you’re using a nailing strip, do not nail tightly—allow movement
for expansion.
Continue installing the panels by locking and nailing the soffit
in place. Make certain soffit panels are fully locked along their
entire length.
fascia
soffit panels
fascia
cap or
coil stock
nail into slot
nail into “v”


