CertainTeed Vinyl Siding Installation Guide
112
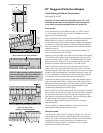
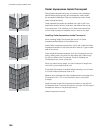
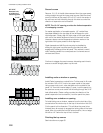
Second course
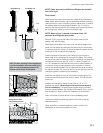
Remove 13-1/4" of the left side measured from the upper panel,
cutting straight through the lower panel course. (Note the small
mark on the face of the panel.) Drill a 3/16" hole in the center of
the nail hem and nail the siding through this hole to control the
direction of expansion and contraction.
NOTE: The 13-1/4" spacing provides the farthest separation
of overlapping courses.
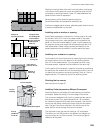
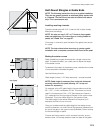
For easier application of complete panels, 1/4" vertical lines
have been added to the top edge of the nail flange for quick
initial alignment. Simply align the right edge of the upper panel
with one of the vertical alignment marks on the lower course.
However, always use the temperature indicator marks on the
right side of the upper panels for final alignment.
Cedar Impressions Half-Rounds may also be installed by
sliding the right panel up while ensuring the side lock tabs
engage with the flange of the left panel. This method is useful
when installing panels into cornerposts and J-channel around
windows and doors.
Continue to stagger the panel courses, alternating each time to
ensure a random shingle pattern up the wall.
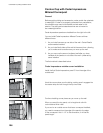
Installing under a window or opening
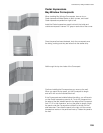
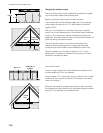
Install Cedar Impressions undersill trim. Cut the panel to fit under
the window. Drill a 3/16" hole in the upper center of the panel.
Using a snap lock punch, raise tab faces on the outside of the
panel 1/4" from the trimmed edge, 6" apart. Lock the panel into
the previous course, and center nail the siding through the 3/16"
hole drilled earlier. (Center nailing controls the direction of the
panel’s expansion and contraction.) Lock the panel into place.
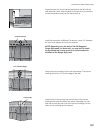
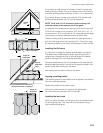
Installing over a window or opening
To install siding over a window, measure from the lock tab of the
course below the window top to the top of the window. Add 3/4".
Cut the panel to this dimension. This will allow the panel to be
lowered down far enough to engage the locking tabs of the lower
panel. After it is positioned into the locked position, the cut edge
will still be 1/4" below the top of the J-channel.
Finishing the top course
See instructions on page 65.
drill 3/16"
diameter hole
at midpoint of
remaining panel
13-1/4"
side locking tabs


