


21
WinterWarm Fireplace Insert or System
2000941
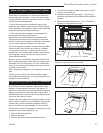
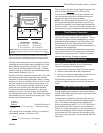
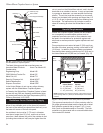
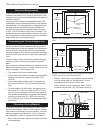
3. Reverse the Flue Collar (If Necessary)
The flue collar of the WinterWarm is reversible to allow
for installation into fireplaces with different lintel depths
and different damper orientations. It is shipped in the
rear-most position (the deep lintel position), which ac-
commodates lintel depths up to 6³⁄₄” (172 mm). The
fore-most flue collar position will accomodate lintels as
shallow as 4³⁄₄” (121 mm) in depth.
Taking into account the location of the damper frame,
choose the flue collar position that enables the chimney
connector to be installed using the most gradual bend
possible.
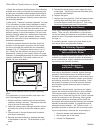
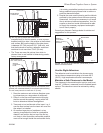
To reverse the flue collar, remove the flue collar in
-
sert panel located on top of the shroud by removing
the sheetmetal screws around the panel’s perimeter.
Remove the two fasteners that attach the flue collar to
the insert panel, then remove the panel. You then have
access to the top plate and to the flue collar.
Remove the four fasteners that attach the flue collar
to the top plate of the WinterWarm. Lift the flue col
-
lar away from the top plate. Position the flue collar in
the desired orientation, and reinstall the four fasteners.
Make sure the flue collar is seated firmly against the
gasket material.
Replace the flue collar insert panel. Fasten the flue
collar to the panel, and re-install the sheet metal screws
around the panel’s perimeter.
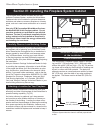
4. Install the Floor Protector
Make sure the floor protector satisfies the requirements
discussed on Pages 17 and 18.
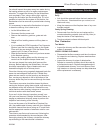
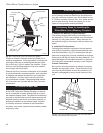
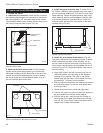
5. Assemble the Optional Surround Panel and Lean
it against the Front of the Fireplace
If your installation will include the optional surround
panels, assemble them according to the instructions
packed with the panels. Lean the finished assembly
against the chase front.
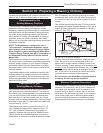
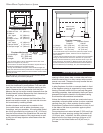
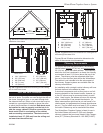
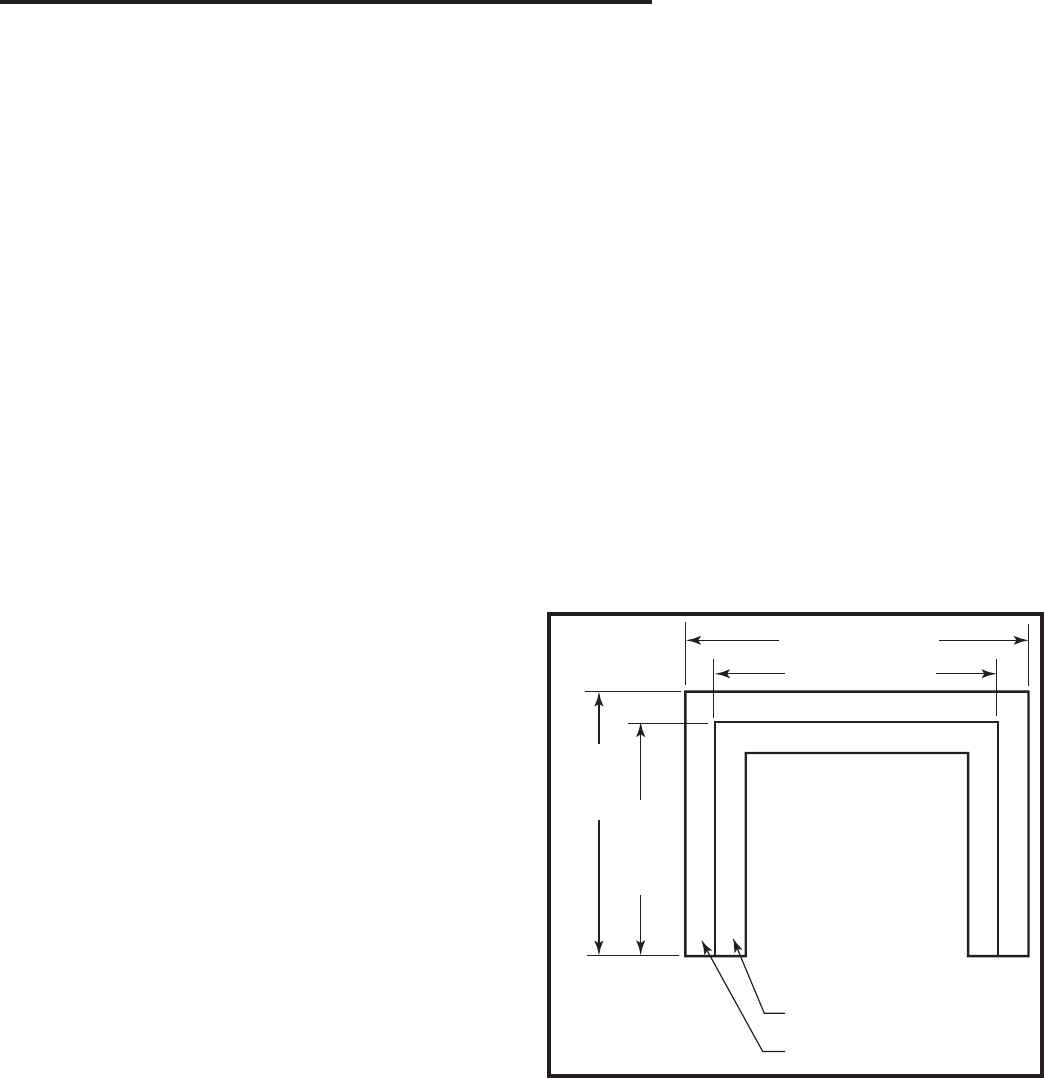
The CFM Specialist Home Products modular Surround
Panels cover gaps up to 4⁵⁄₈" (116 mm) using a single
panel, and up to 9¹⁄₄" (231 mm) using double panels.
Surround Panel kit #3014 has outside measurements of
31³⁄₄" tall by 43⁷⁄₈" wide (806mm tall x 1114 mm wide);
by combining Kit #3014 with extension kit #3015, the
resulting surround is 35⁹⁄₁₆" tall by 51¹⁄₂" wide (903 mm
tall by 1308 mm wide).
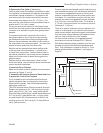
Custom-made surround panels may be made from any
noncombustible material, with the following restrictions:
The maximum suggested thickness of the surround
material is determined by both flue collar position and
lintel depth. For installations using the front flue collar
position, the maximum suggested surround thickness
is 4" (102 mm) minus the lintel depth. For example, a
3" (75 mm) lintel would result in a maximum surround
thickness of 1" (25 mm) .
There is no need to attach the surround panels to the
insert or to the fireplace. The modular surrounds are
sized to stand without additional support or attachment;
they are simply trapped between the fireplace insert's
cast-iron front, and the face of the fireplace.
For rear exit flue positions, the suggested position
would allow a surround thickness of 3¹⁄₂" (88 mm).
With these preliminary steps completed, you can now
proceed to install the WinterWarm firechamber and
front. That information is located in Section V, “Com-
pleting the WinterWarm Installation,” and begins on
Page 29.
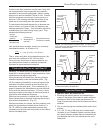
51¹⁄₂" (1308mm)
43⁷⁄₈" (1114mm)
35⁹⁄₁₆"
(903mm)
31³⁄₄"
(806mm)
FP1089
WinterWArm
trim sizes
3/28/01 djt
Kit #3014
Kit #3015
FP1089
Fig. 24 CFM Corporation #3014 and #3015 Optional Sur-
round Trim Kits.