


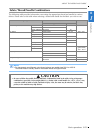

BEFORE EMBROIDERING
Getting Ready
Basic operations B-63
B
1
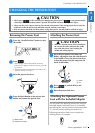
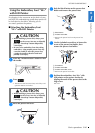
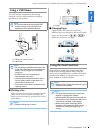
■ Adjusting the LED Pointer
Adjust the LED pointer if it indicates a point different
than the actual needle drop point.
Before adjusting the LED pointer, mark the actual
needle drop point on the fabric to be embroidered,
and then hoop the fabric and attach the embroidery
frame.
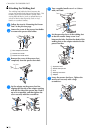
a
Press .
→ The settings screen appears.
b
Press .
→ The Embroidery settings screen appears.
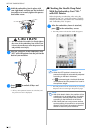
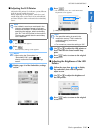
c
Display page 10 of the Embroidery settings
screen.
d
Press .
→ The Embroidery Foot “W+” with LED Pointer
Adjustment screen appears.
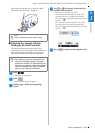
a LED pointer adjustment
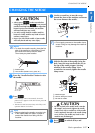
e
Use or to adjust the LED pointer so
that it indicates the actual needle drop
point.
f
Press twice to return to the original
screen.
■ Adjusting the Brightness of the LED
Pointer
a
Follow the steps from a to d to display
the embroidery foot with LED pointer
adjust screen.
b
Use or to adjust the brightness of
the LED pointer.
c
Press twice to return to the original
screen.
Note
• As a default, some keys mentioned in the
following procedures appear in light gray
and are not available. To enable the keys for
specifying the settings, attach embroidery
foot “W+” with LED pointer to the machine.
The keys are enabled after the embroidery
foot is detected.
Memo
• When using the “Embroidery” or
“Embroidery Edit”, touch to
directly access the Embroidery settings
screen.
Note
• The specified setting is saved in the
machine’s memory. This is useful for
positioning during continuous
embroidering.
• For normal use, return the setting to “00”.
a